Custom Fields
This setting enables the creation of custom fields to store additional customer information.
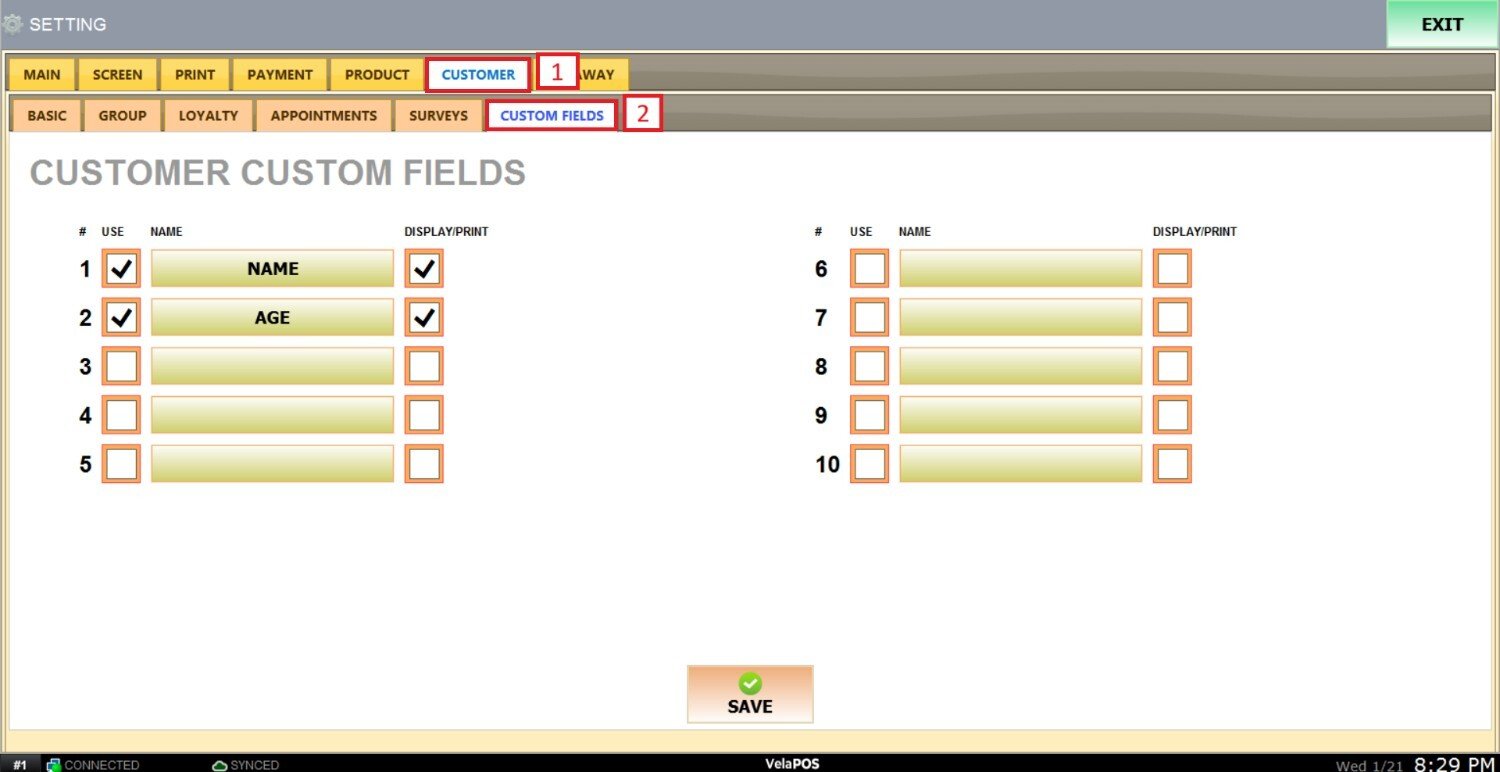
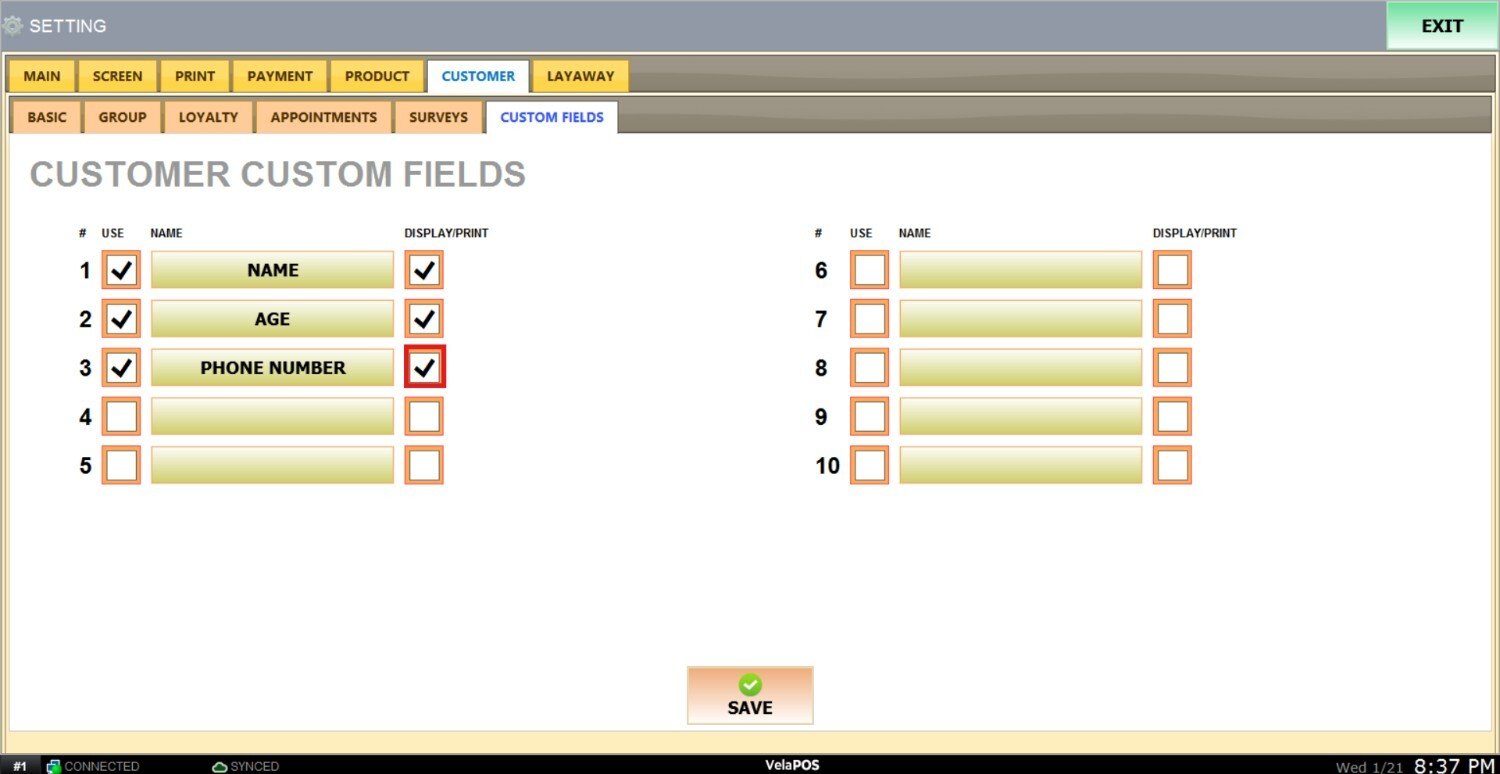
Main screen>MENU>SETTINGS>CUSTOMER>CUSTOM FIELDS
On the main screen, go to MENU and press on SETTINGS.

Under CUSTOMER, go to the CUSTOM FIELDS tab.
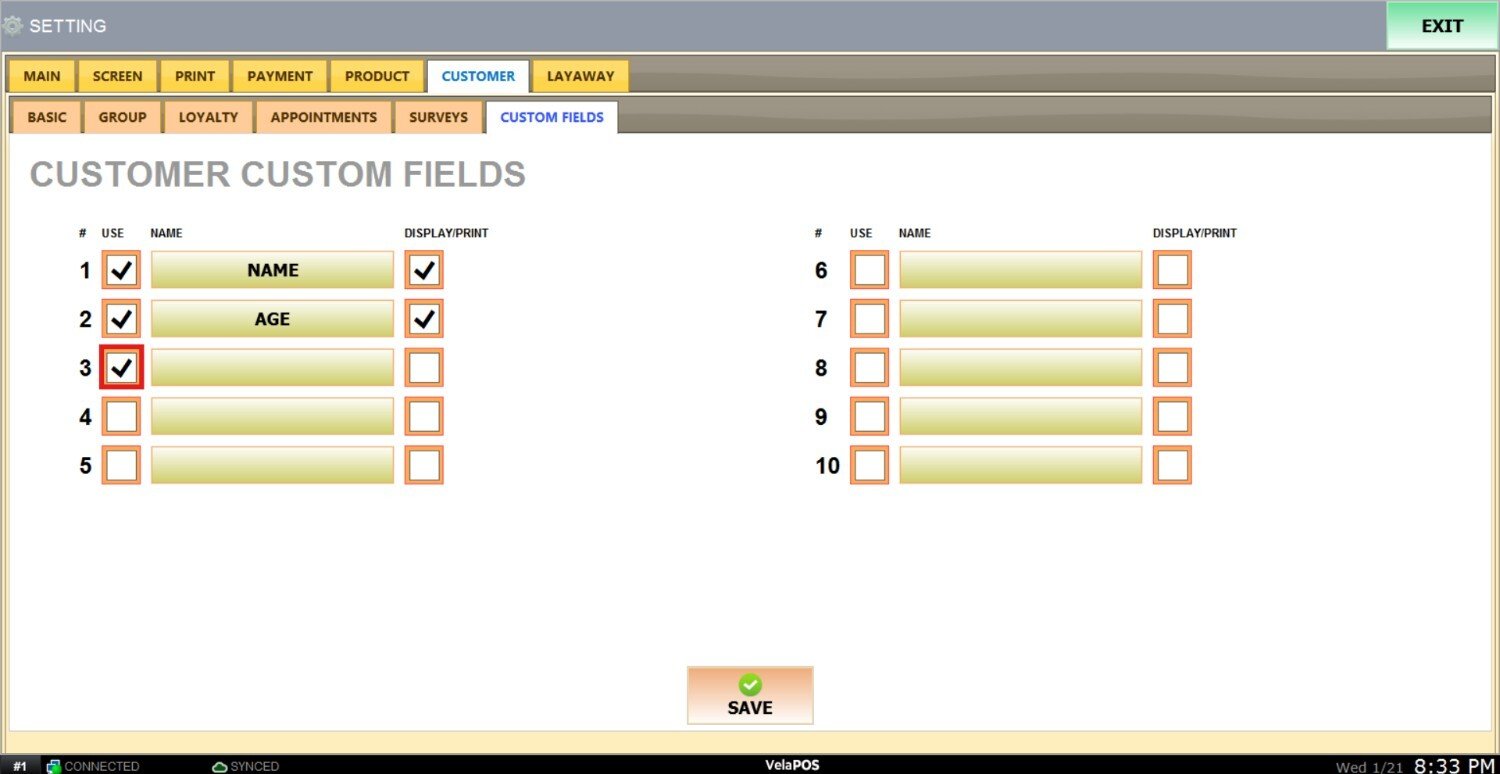
To add a new field, check the box to the left of an empty field.
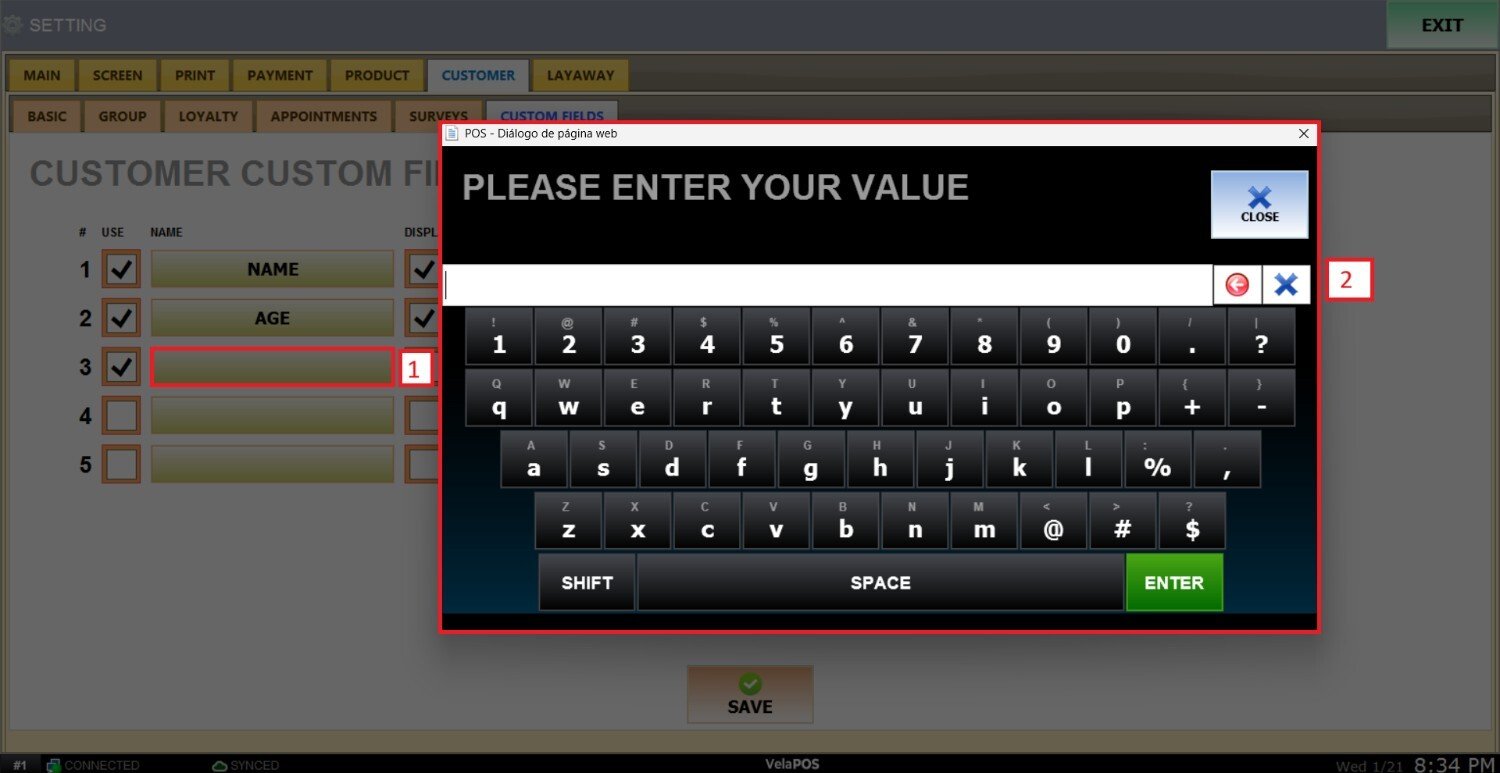
Press on the field and input the desired information.
Note: If you check the DISPLAY/PRINT box next to a field, that customer information will appear on the ticket.
After making any modifications, press SAVE to store them, and RESTART THE PROGRAM to ensure the updates are applied correctly.

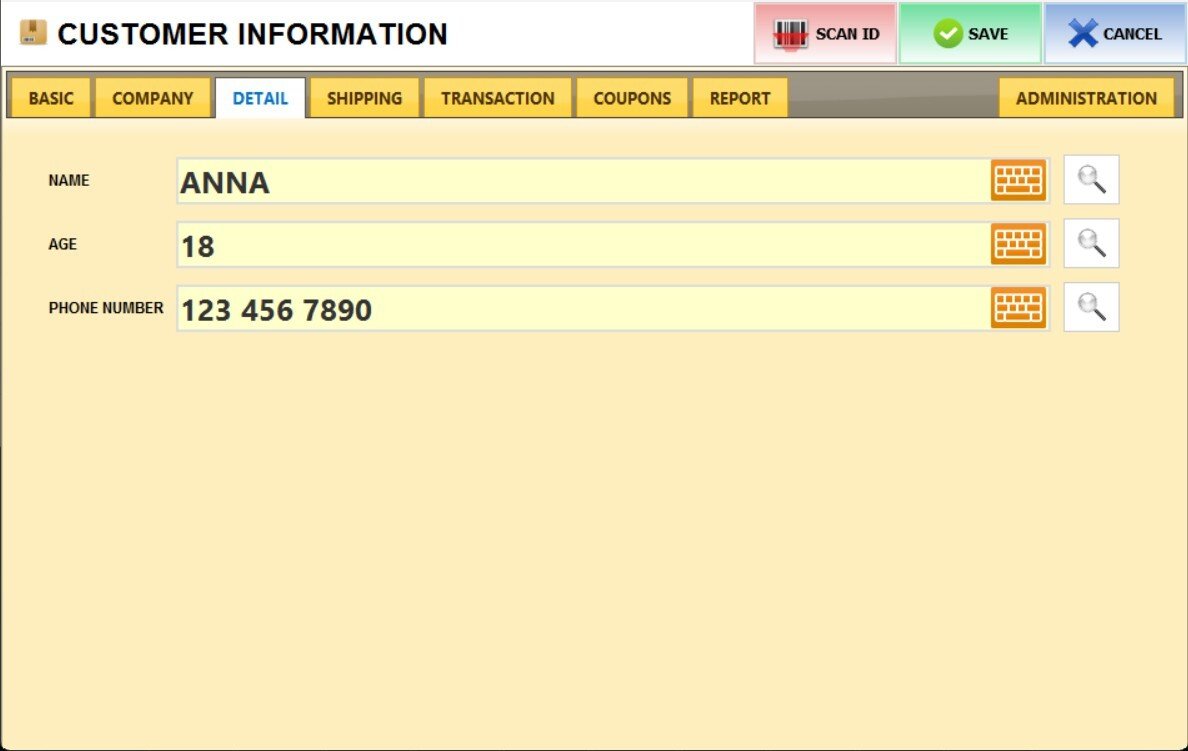
Results:
This is how the fields appear on the customer's details.