Kitchen
These settings allow you to control how and when orders are printed in the kitchen. These options ensure that tickets are printed in a way that matches your workflow, whether you want immediate printing, delayed printing, or manual control. You can also customize what content appears on the ticket and how it is formatted for better readability in a fast-paced kitchen environment.
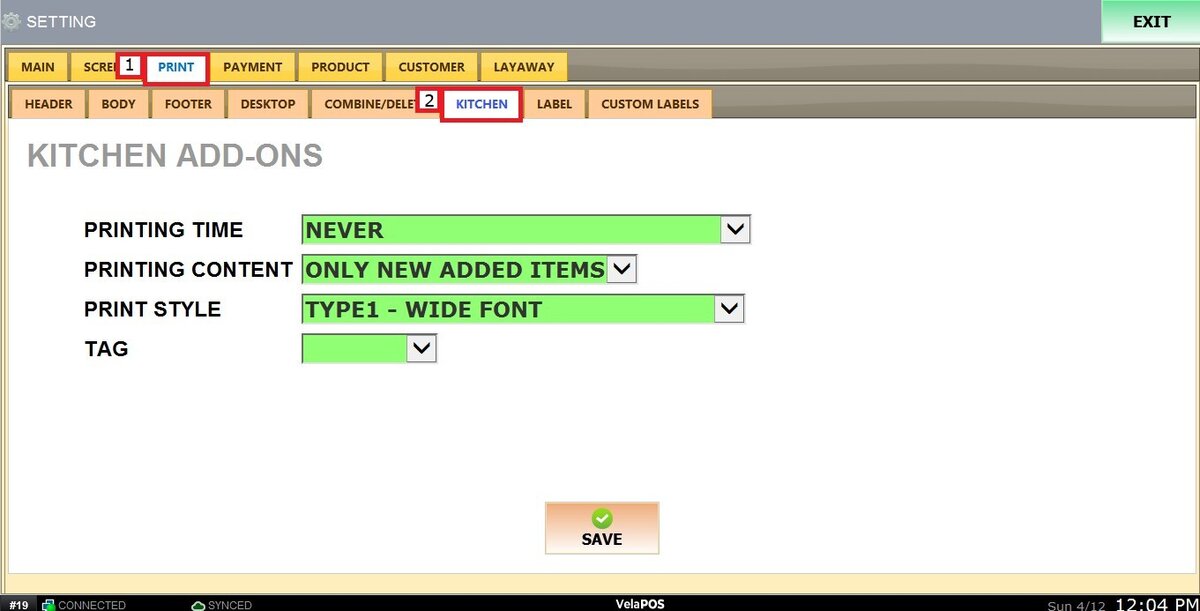
Main Screen > MENU> SETTINGS> PRINT> KITCHEN
Go to MENU, then select SETTINGS.

Under the PRINT settings, click on KITCHEN.
PRINTING TIME
Choose when orders are sent to the kitchen printer:

1. NEVER : Doesn't print to kitchen
2. ON A PAYMENT : Prints when payment is made.
3. AT COMPLETION OF TRANSACTION : Prints when the transaction is completed.
4. BY SEND BUTTON ONLY : Prints only when the SEND button is pressed.
PRINTING CONTENT
Defines what part of the order is printed:

1. ONLY NEW ADDED ITEMS : Prints only newly added items.
2. ALWAYS ENTIRE TICKET : Prints the entire order every time.
PRINT STYLE
Customize the appearance of the printed ticket:
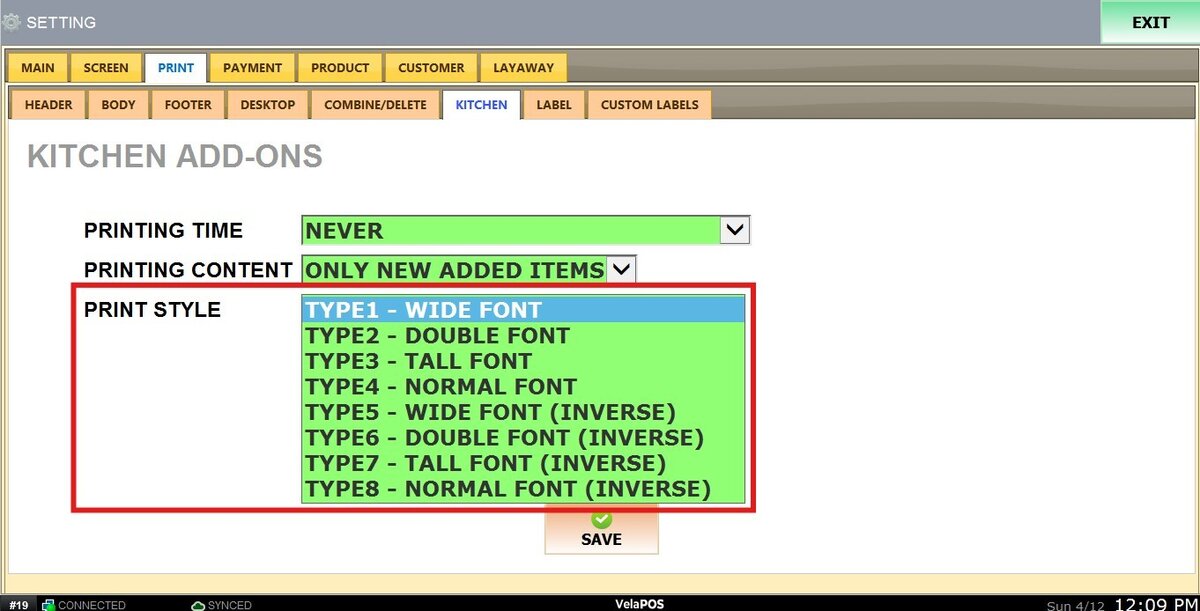
1. TYPE1 - WIDE FONT: Wider text
2. TYPE2 - DOUBLE FONT: Double-sized text
3. TYPE3 - TALL FONT: Taller text
4. TYPE4 - NORMAL FONT: Standard text
5. TYPE5–8 (INVERSE): Inverted text styles.
TAG
Control where tags appear on ticket:
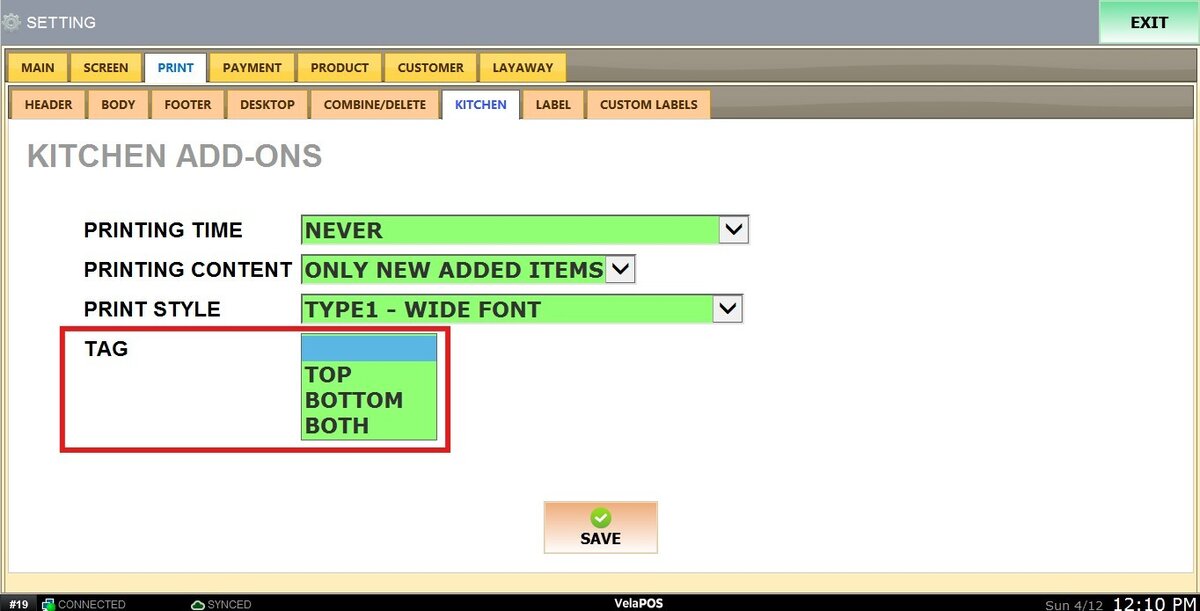
1. TOP: Display at the top
2. BOTTOM: Display at the bottom
3. BOTH: Display at both top and bottom
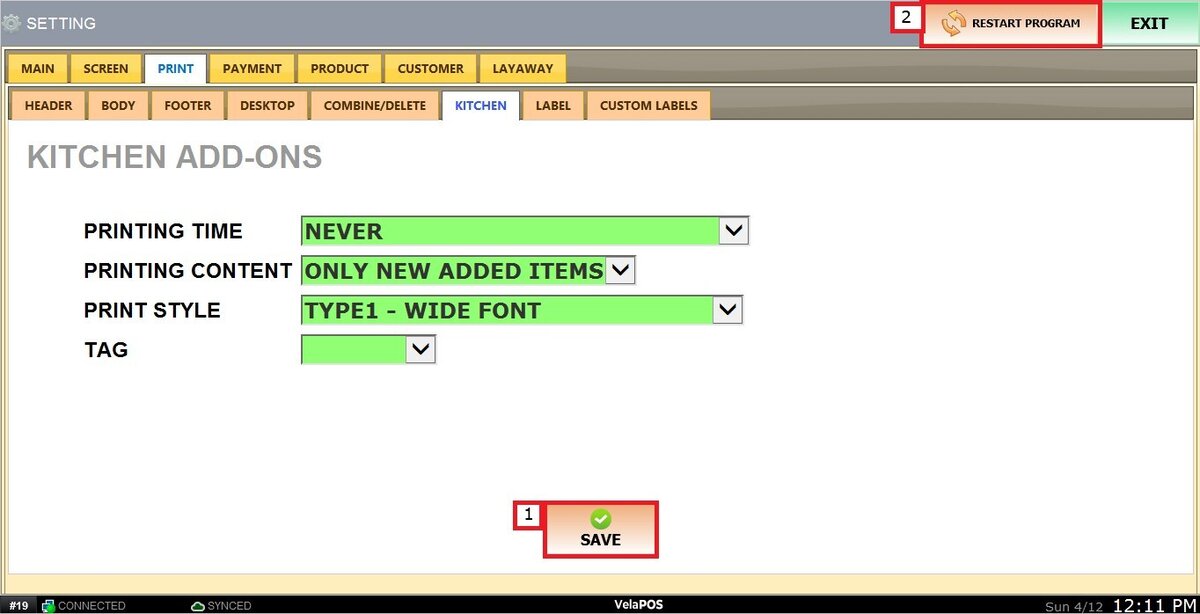
To apply all the changes, click on SAVE and RESTART THE PROGRAM.
To learn how to add a Kitchen Printer to a product, refer to Product Additional Print guide