Initiate Transfer
The feature enables the transfer of product stock between store locations.
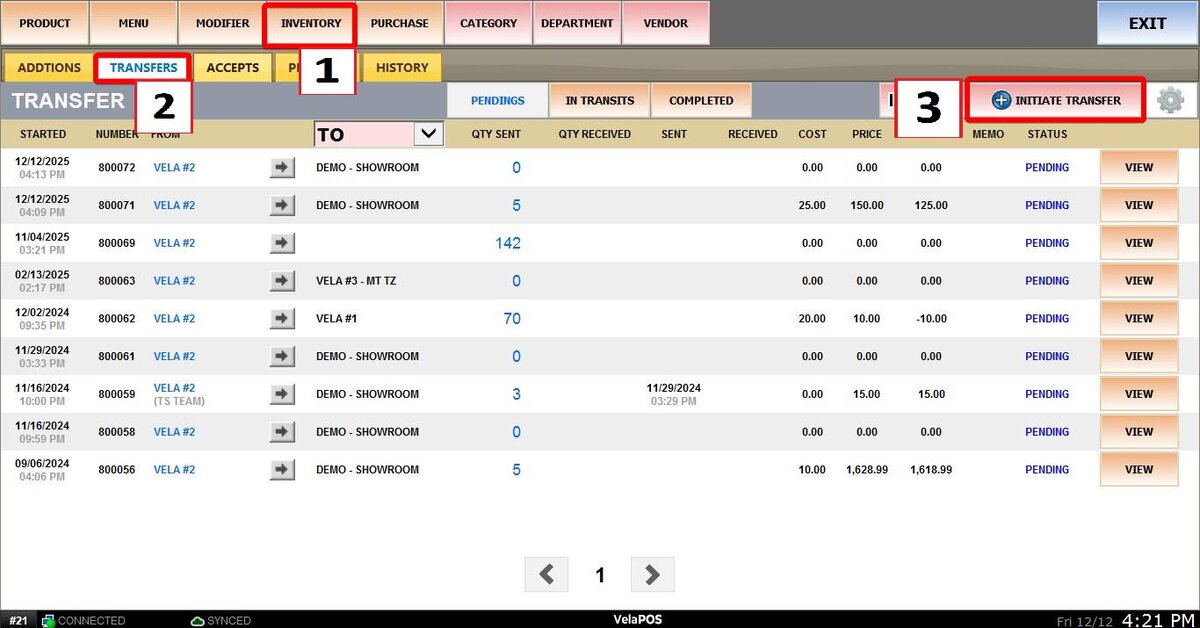
Main Screen> MENU > PRODUCTS > INVENTORY > TRANSFERS >INITIATE TRANSFER.
On the Main Screen, go to MENU and press on PRODUCTS.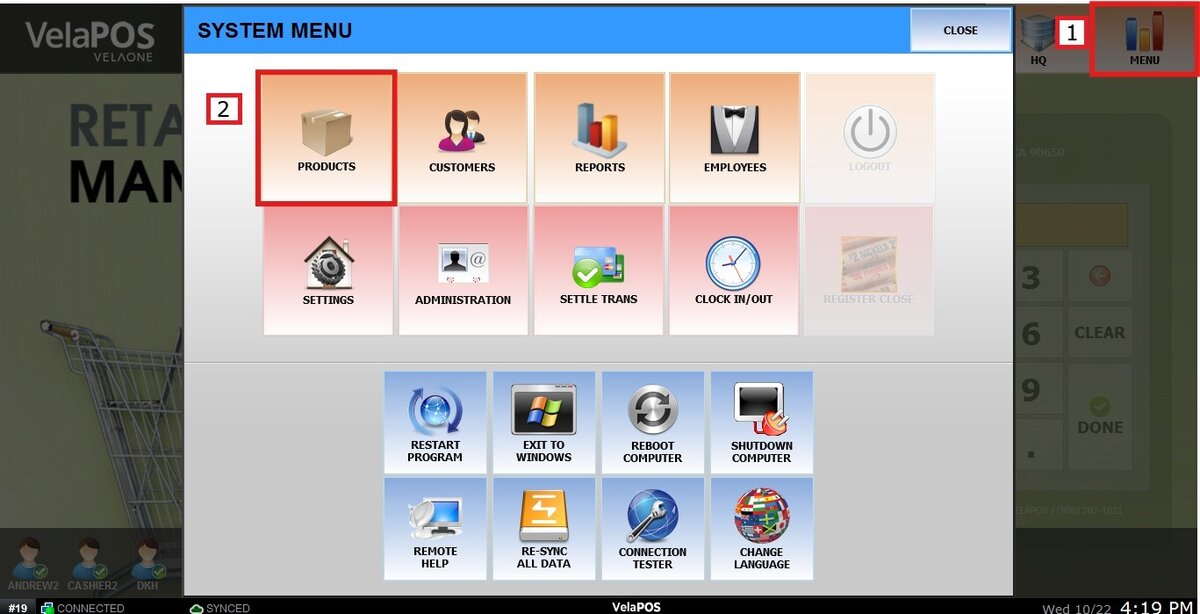
Under the INVENTORY tab, go to TRANSFERS and click on INITIATE TRANSFER
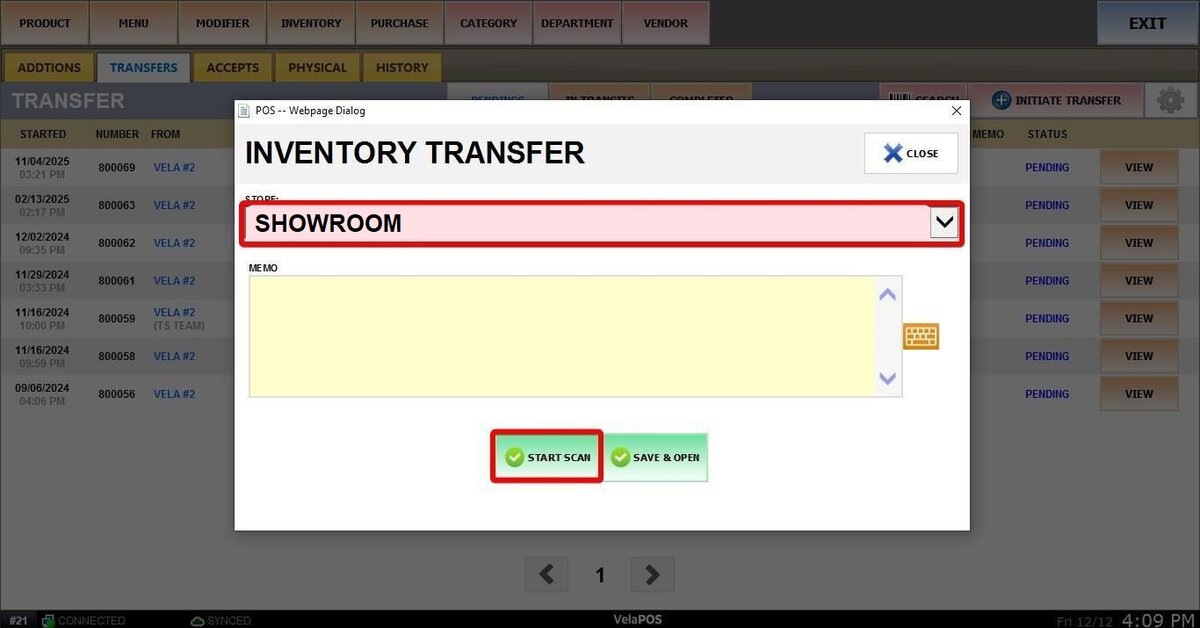
Select the destination store from the dropdown menu where the items will be sent.
Click START SCAN.
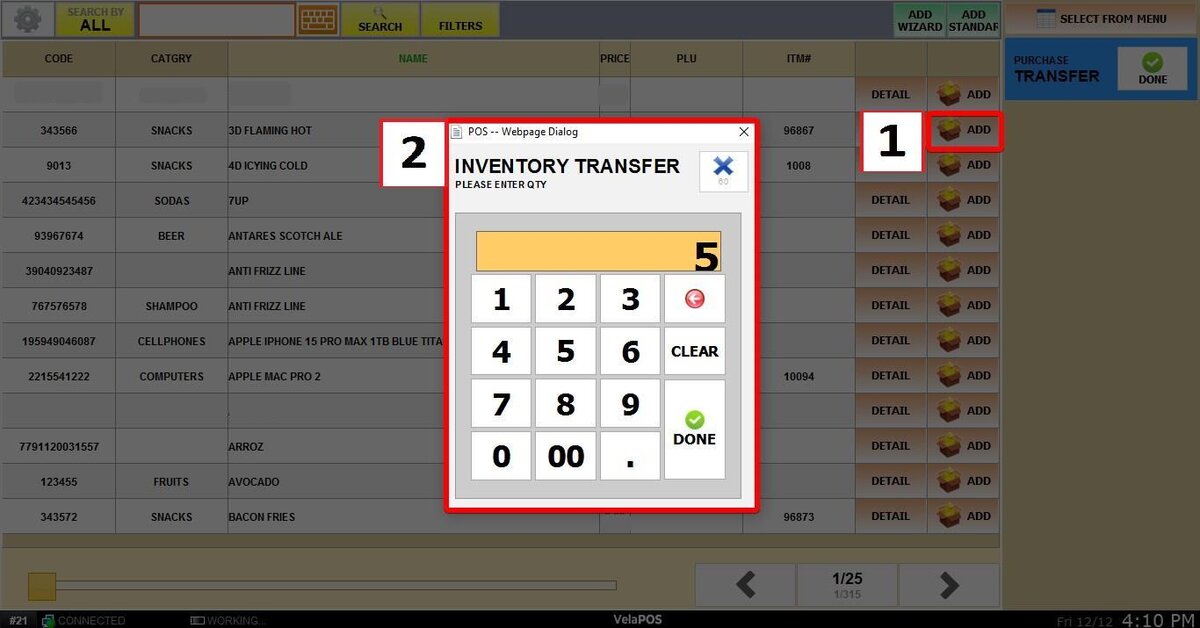
Next, search for the products you are going to transfer. Click ADD.
Input the specific QTY (Quantity), and press DONE.
Hint: You can use the SELECT FROM MENU button to find items using your standard sales screen layout, or use the ADD WIZARD to create and add a new item from scratch during the transfer process.
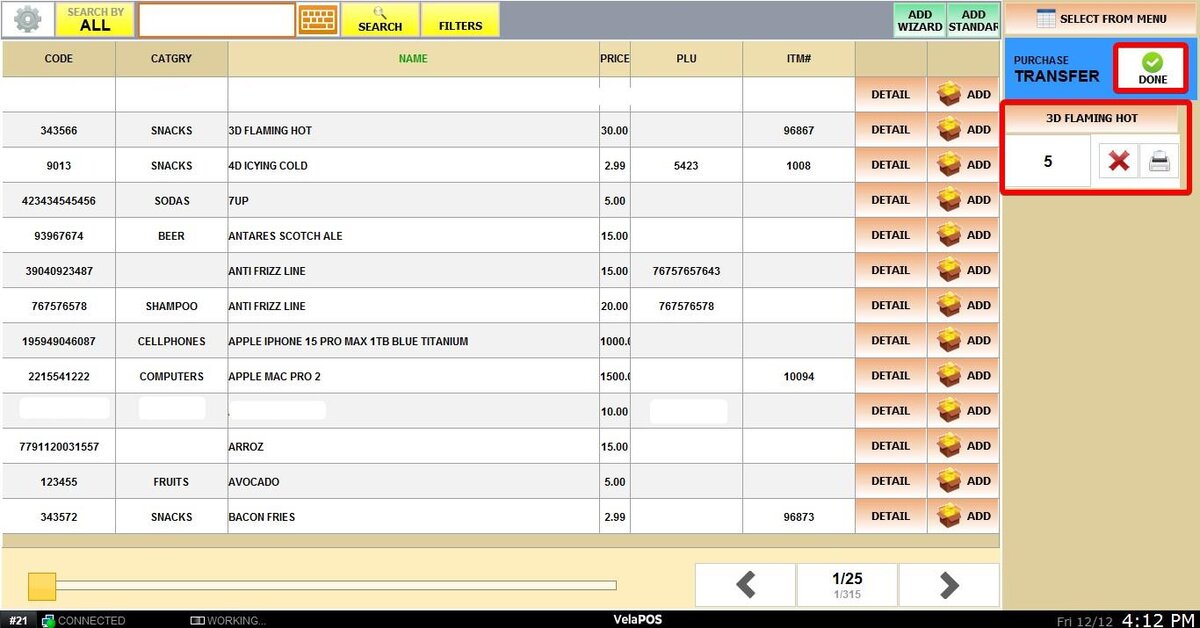
As you add items, they will appear on the right side of the screen. In this view, you can adjust the QTY for each item and click the item name to check its specific details.
Next, click DONE.
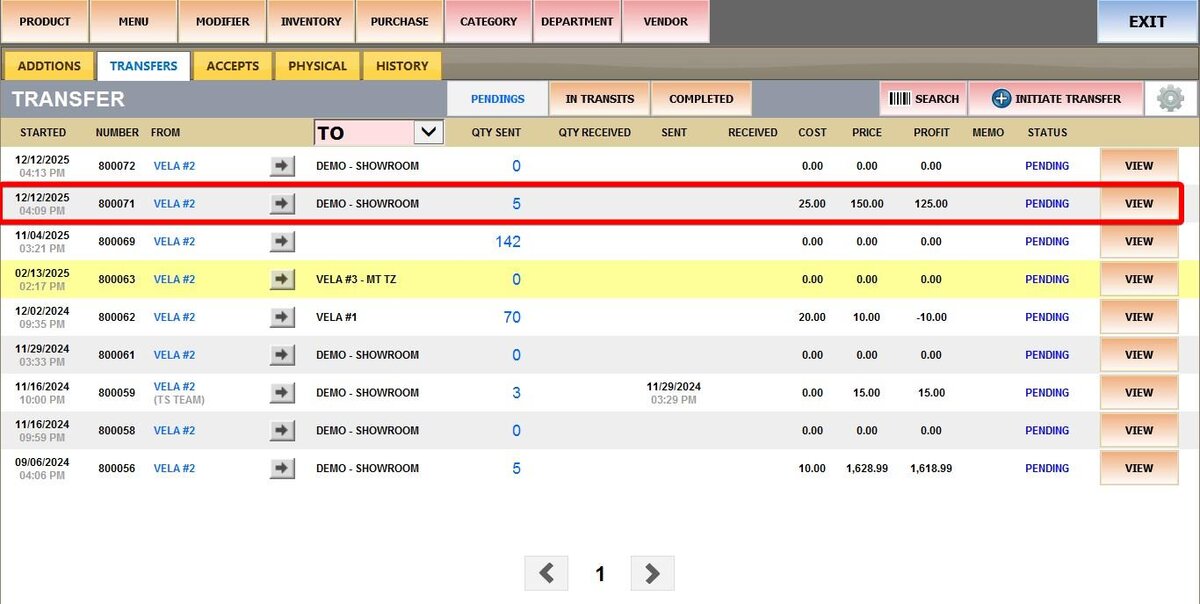
Click VIEW to see a full summary of the transfer.
If the summary is correct, press SEND.
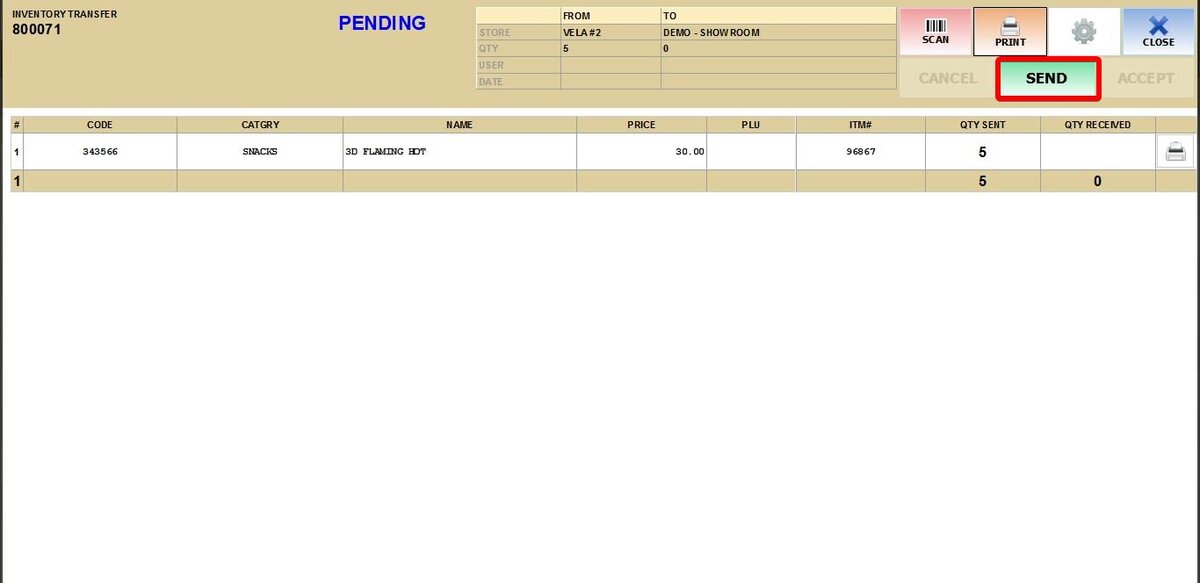
Hint: click SCAN if you need to go back and add or remove more items.
Result:
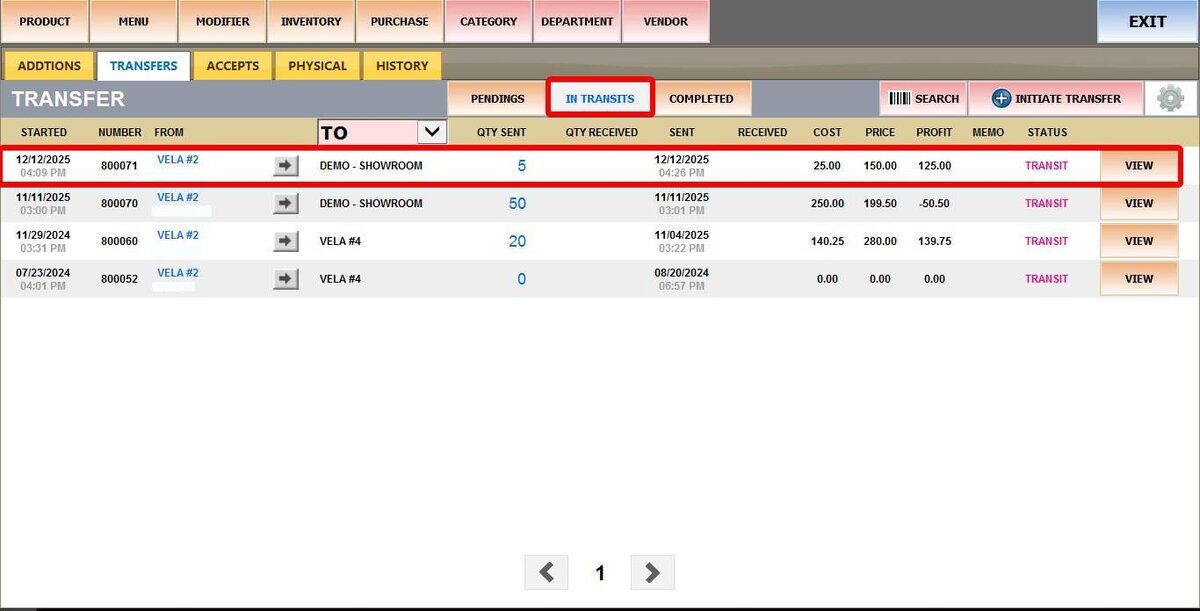
The transfer status will now change to In Transit. The inventory has left your location but will not be added to the destination's stock until they officially accept it. Refer to Accept Transfer Guide