Gratuity
You can control how tips are processed and presented to customers on the PIN Pad during checkout, as well as how they are handled in the POS after the transaction. The system allows for either a simplified setup or a fully customized configuration.
Main Screen > MENU > SETTINGS > PAYMENT > GRATUITY
Go to MENU then SETTINGS.
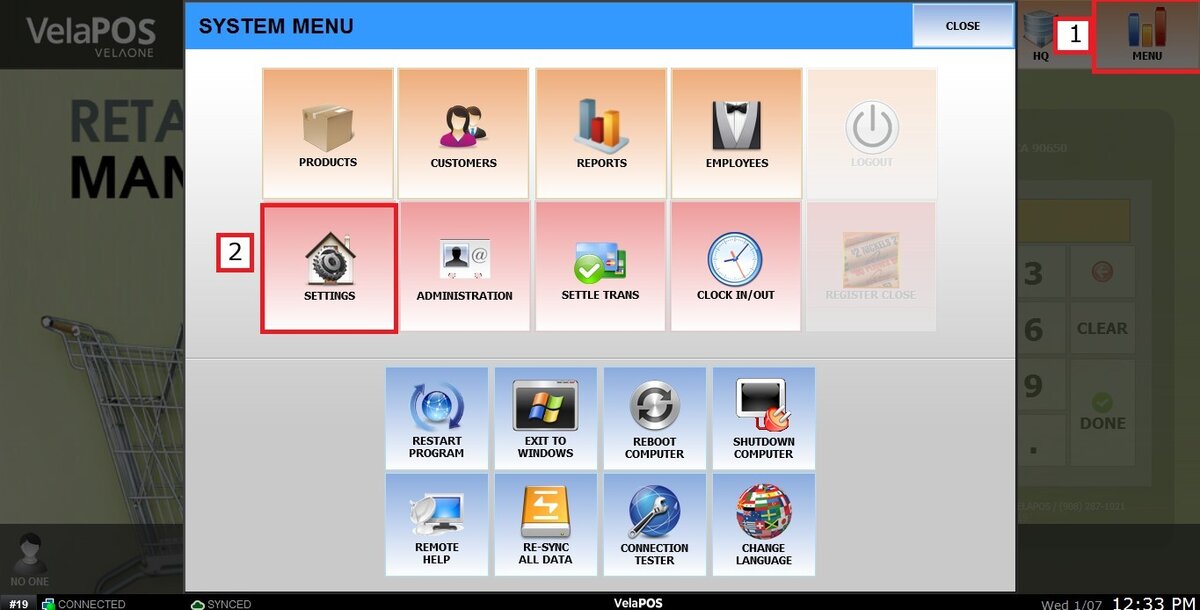
Under PAYMENT, select GRATUITY.
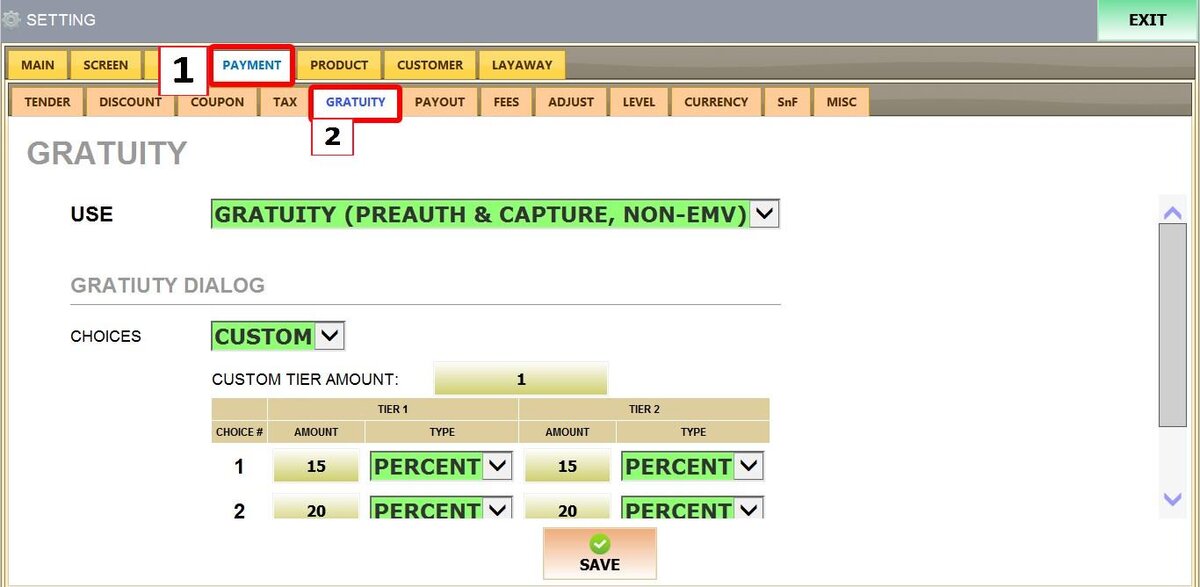
USE
select from three distinct tip processing modes

1. NO GRATUITY: Disables tipping entirely.
2. GRATUITY (Sale and Adjust): Processes the base transaction first, then allows the tip to be added later.
3. GRATUITY (Pre-Auth and Capture): Pre-authorizes the card for a certain amount, then captures the final total after the tip is entered.
CHOICES
Defines how tipping options appear on the customer-facing PIN Pad.
1. AUTO: Displays a standard set of tip buttons (e.g., common percentages plus a Custom option). Hides the manual configuration table.
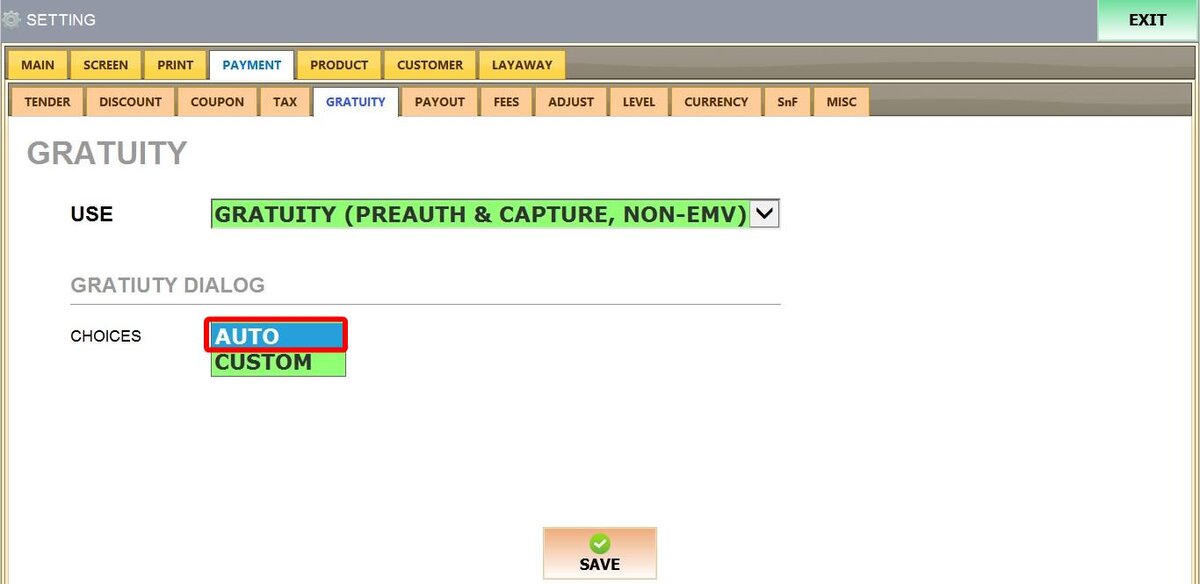
2. CUSTOM: Allows you to manually configure tip buttons. Enables the custom configuration table.
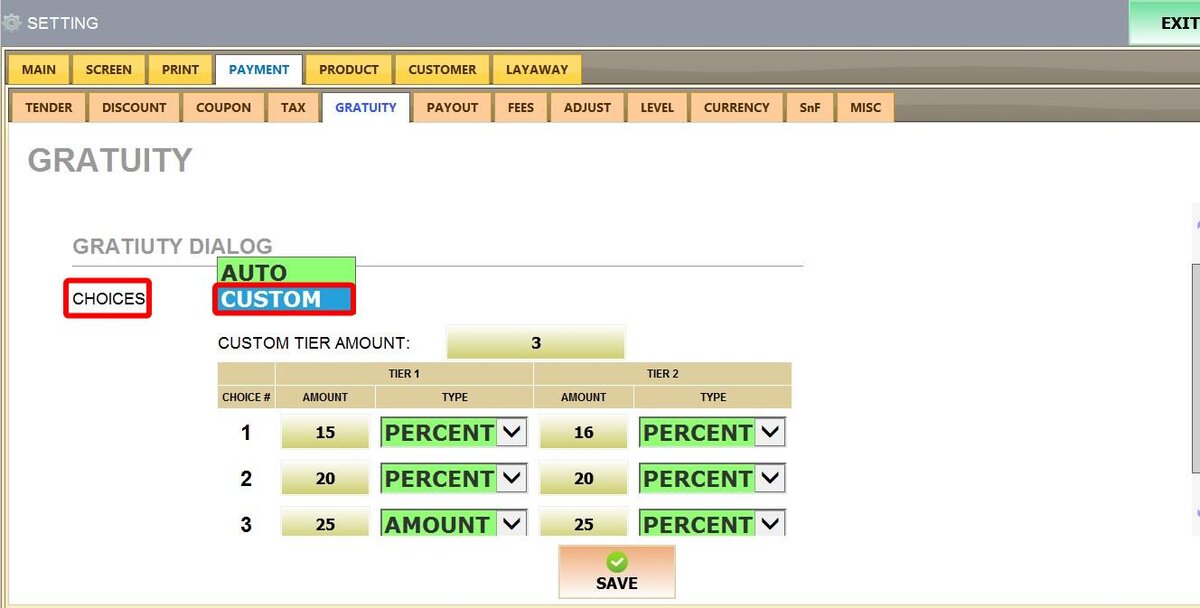
CUSTOM TIER AMOUNT: Defines the transaction amount threshold that switches the PIN Pad from Tier 1 to Tier 2 tip options.
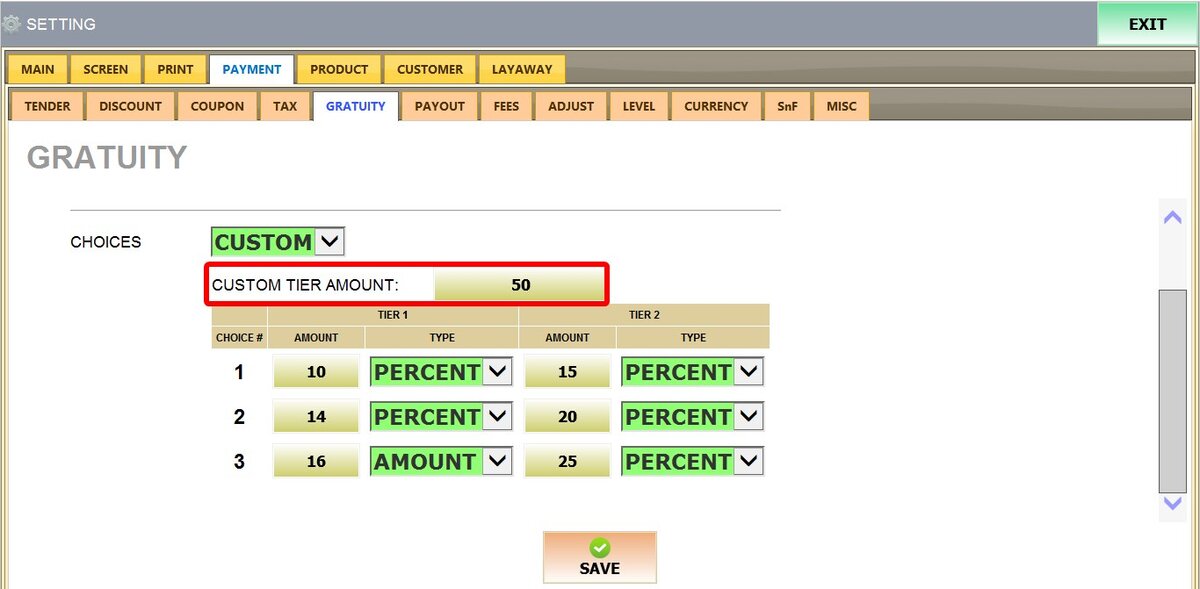
CUSTOM CONFIGURATION TABLE
Use this table to define your own tip buttons:
CHOICE #: Determines the position of the button on the PIN Pad (1, 2, or 3).
AMOUNT: The value assigned to the tip option.

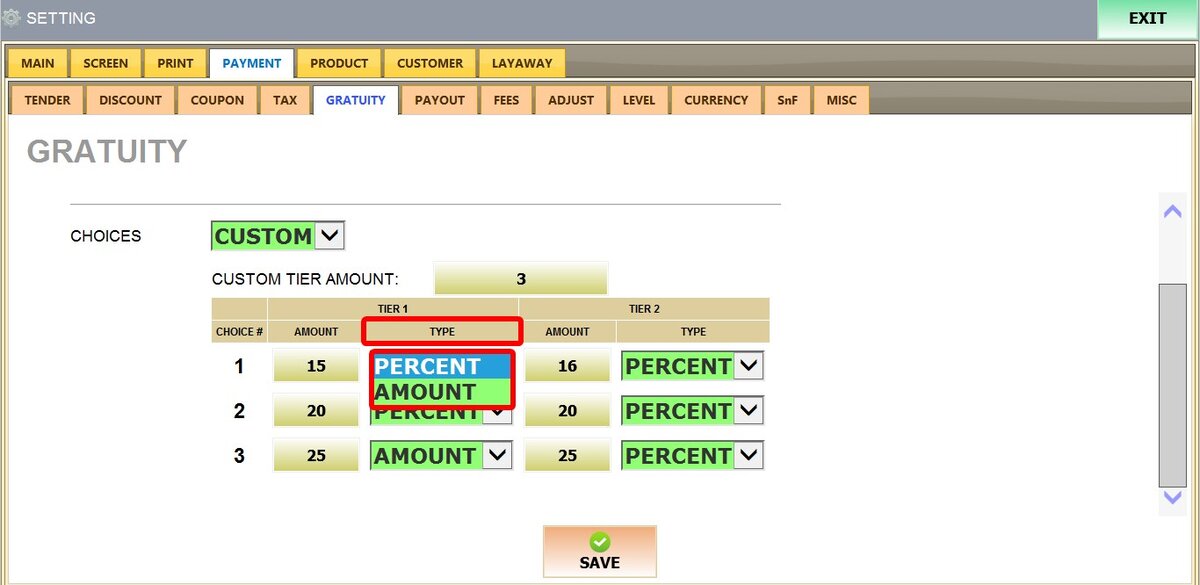
TYPE: Defines how the tip is calculated
1. PERCENT: Calculates the tip as a percentage of the sale total.
2. AMOUNT: Adds a fixed value to the total, regardless of the sale amount.
After configuring gratuity settings SAVE and RESTART THE PROGRAM to apply the changes.

To learn how to use the gratuity feature, refer to the Gratuity section in the Transaction List guide.