Header
The Receipt Header Setting allows you to control what information appears at the top of printed receipts, either automatically or through manual customization.
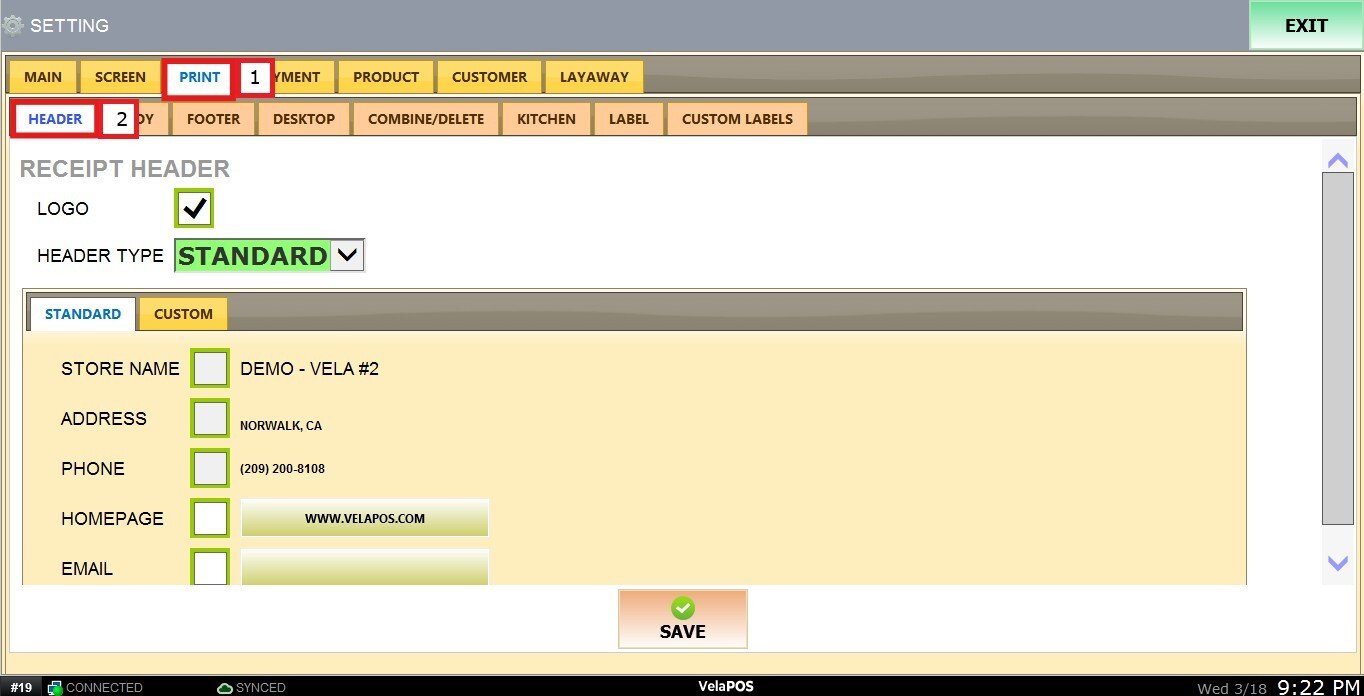
Main Screen > MENU > SETTING > PRINT > HEADER.
Go to MENU, then SETTINGS.

Under the PRINT tab, select HEADER.
There you will find two sections:
LOGO
By enabling or disabling this setting, you can choose whether the logo previously provided to the company is printed on the receipt.

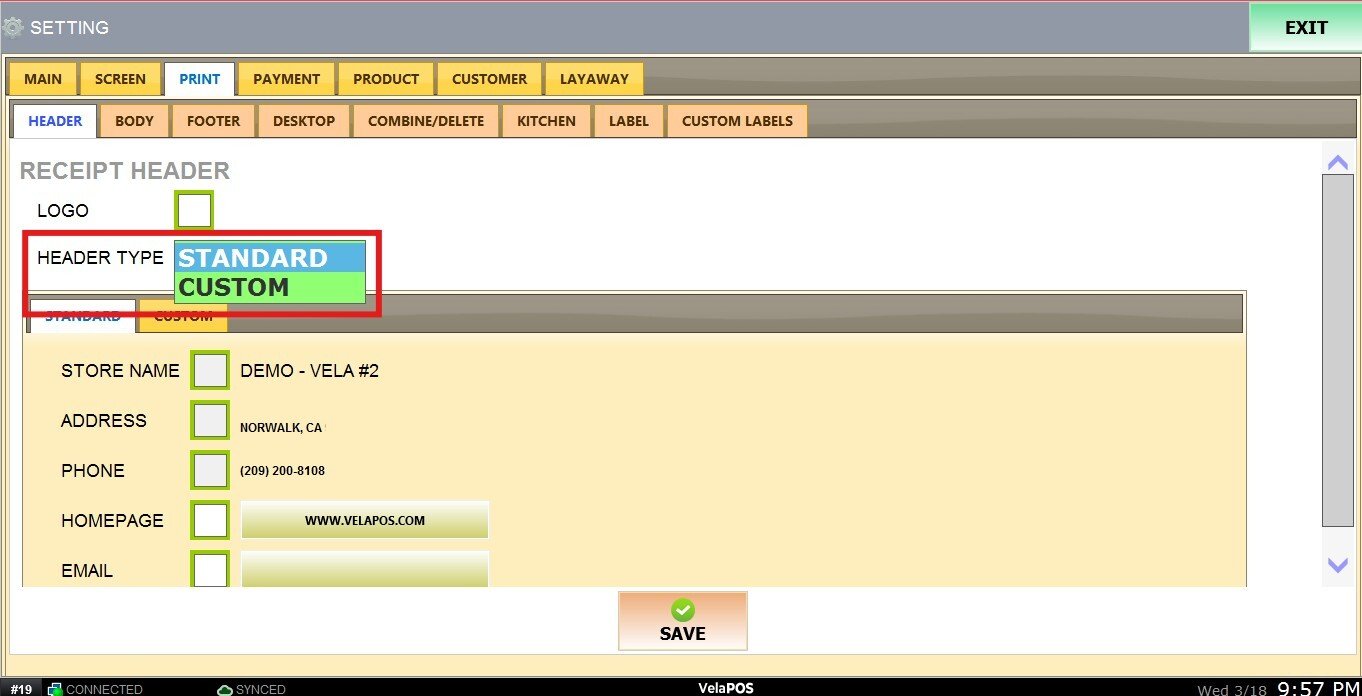
HEADER TYPE
This section allows you to select which information will be displayed on the receipt.
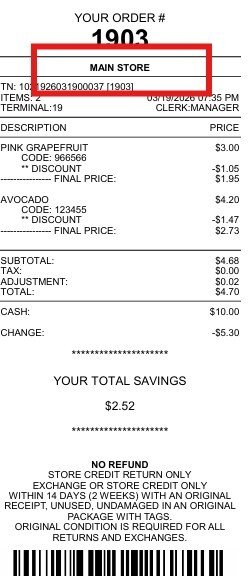
STANDARD: The system automatically prints store information that is already registered in the POS.
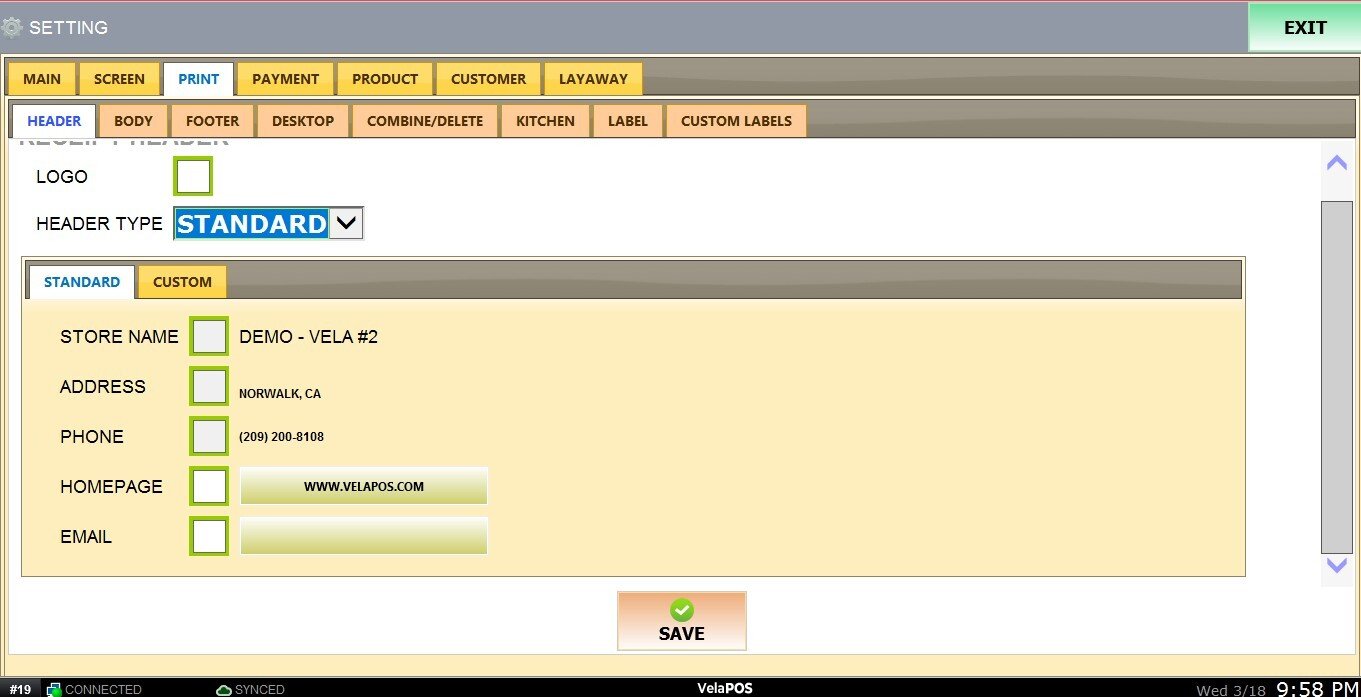
The following information is automatically filled and cannot be edited manually: Store Name, Store Address, and Phone Number.
Hint: To modify this information, please contact Tech Support.
The following fields can be edited manually by entering the desired information: Homepage and Email.
Result:

CUSTOM: Allows you to fully design the receipt header instead of using the default store information.
To start adding information, click on + ADD A LINE button.
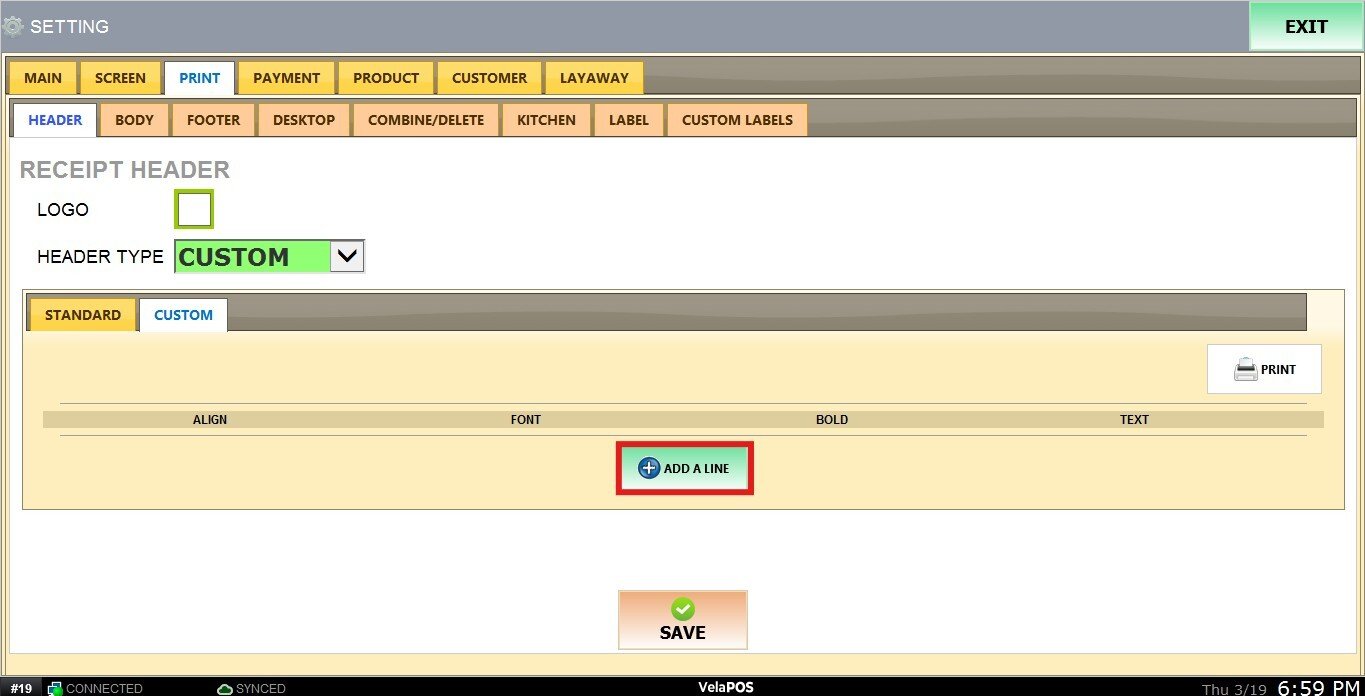
A section will appear allowing you to begin customizing the header content.
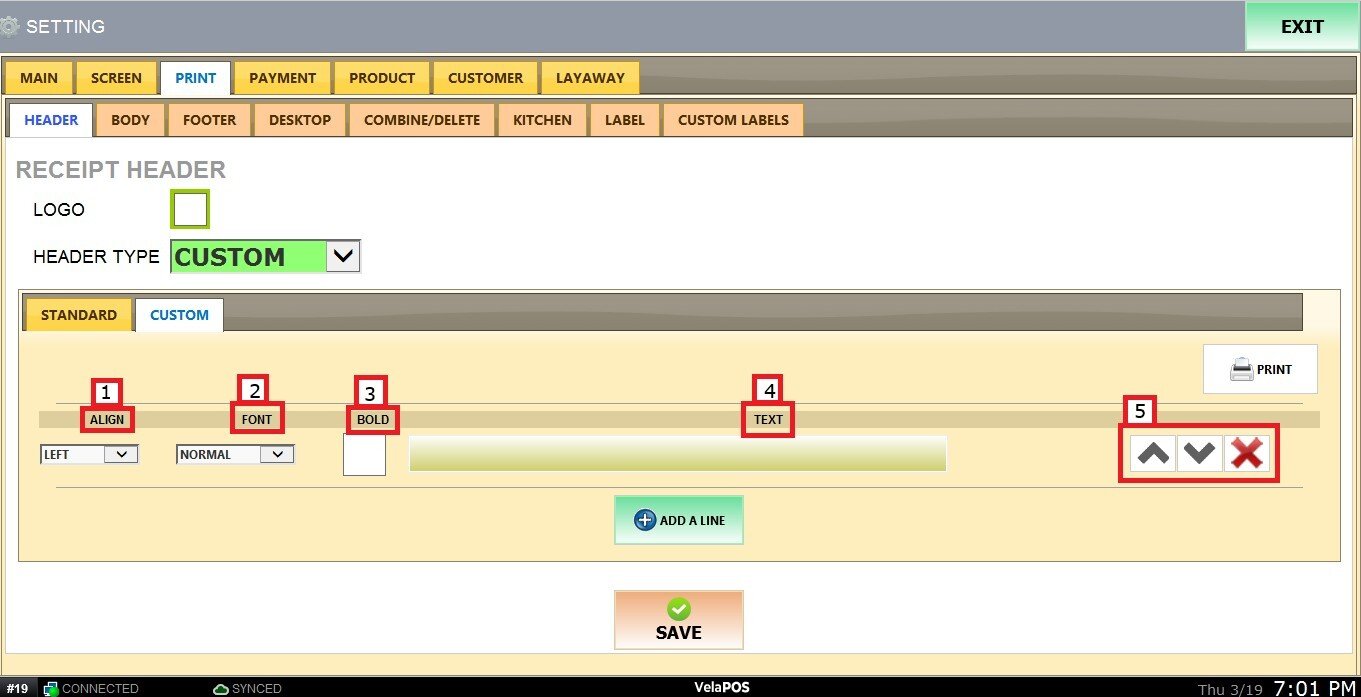
1. ALIGN: Select the alignment of the text: left, center, or right.
2. FONT: Choose the font size for the text.
3. BOLD: Enable this option to display the text in bold.
4. TEXT: Enter the content you want to display.
5. BUTTONS: Use the arrow buttons to reorder lines, or click X to delete a line.
Once all information has been entered and the header is configured, click on SAVE and RESTART PROGRAM
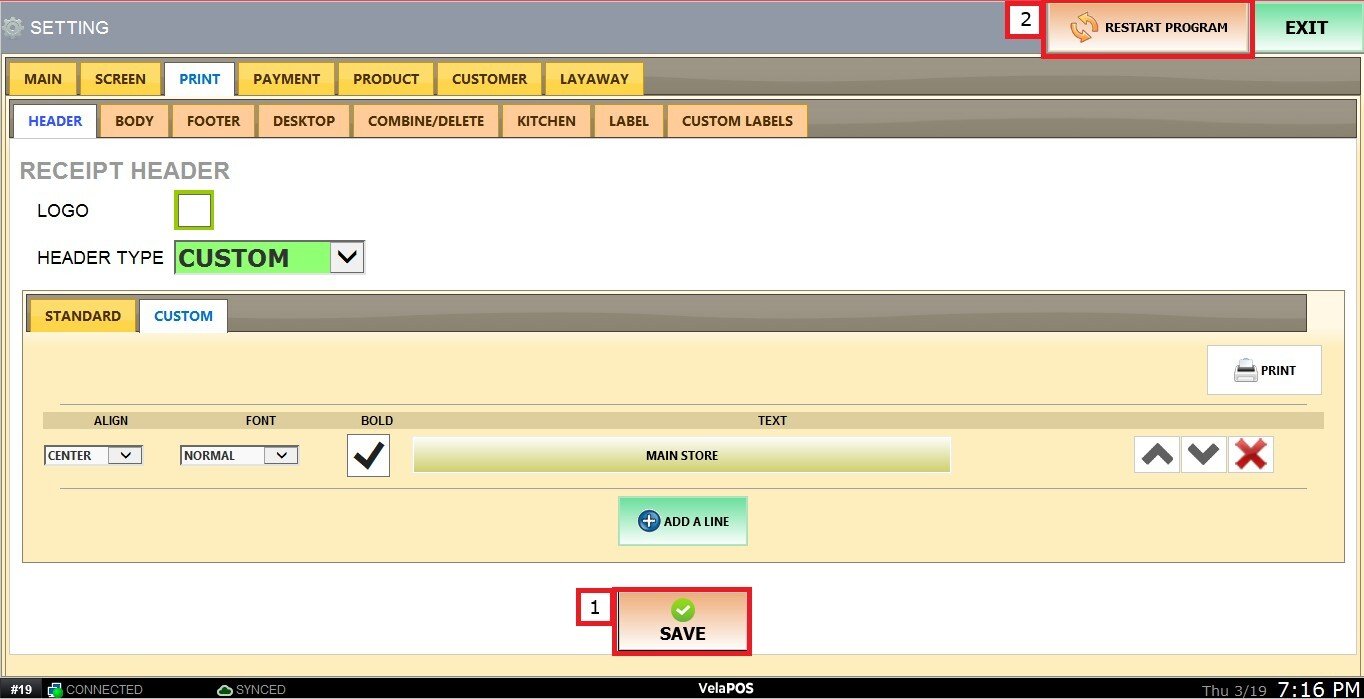
Result: