Apparel Sizes
This setting allows you to customize the sizes available in the store’s apparel section.
Main screen > MENU > SETTINGS > PRODUCT > APPAREL SIZES
On the main screen, go to MENU and press on SETTINGS.
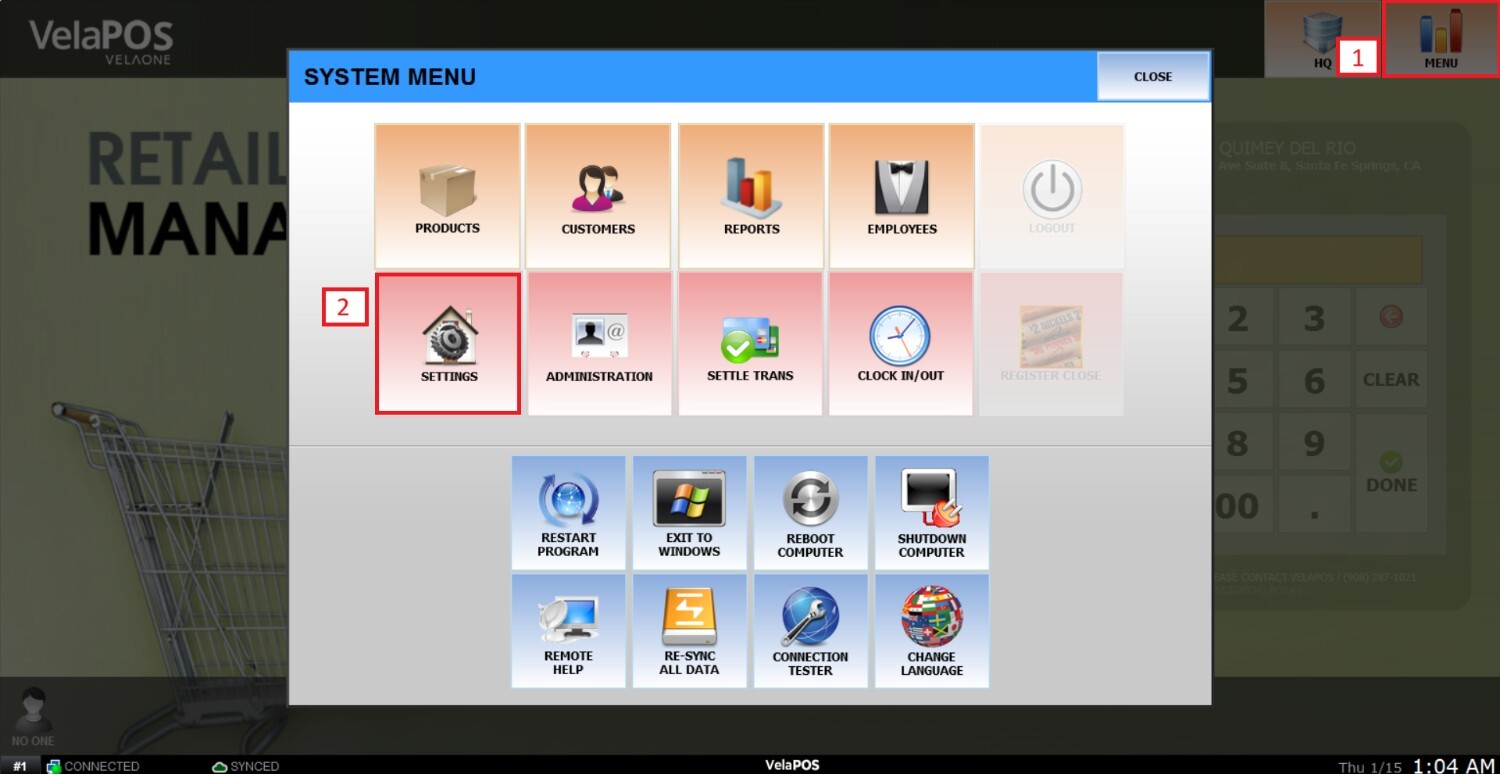
Under PRODUCT, go to the APPAREL SIZES tab.
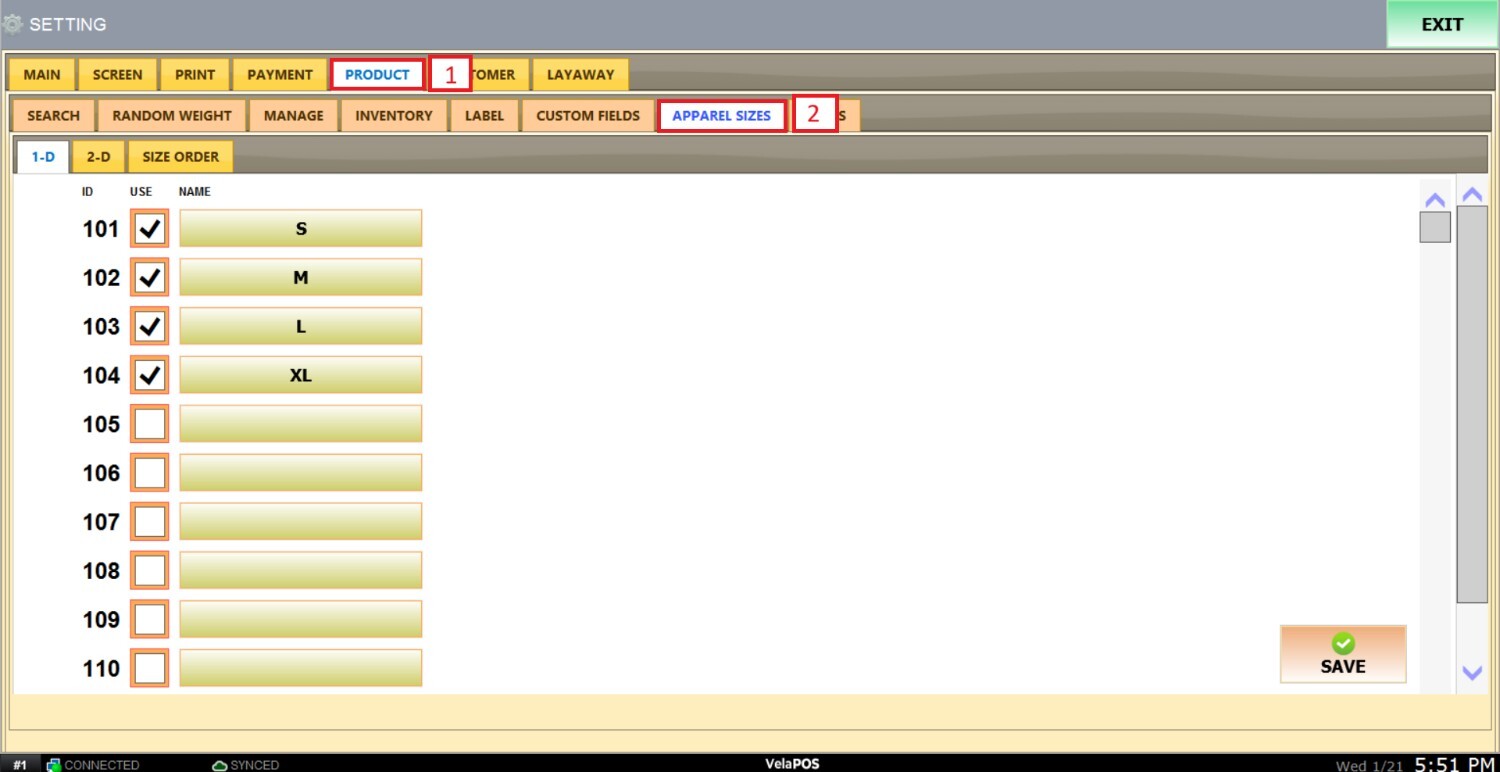
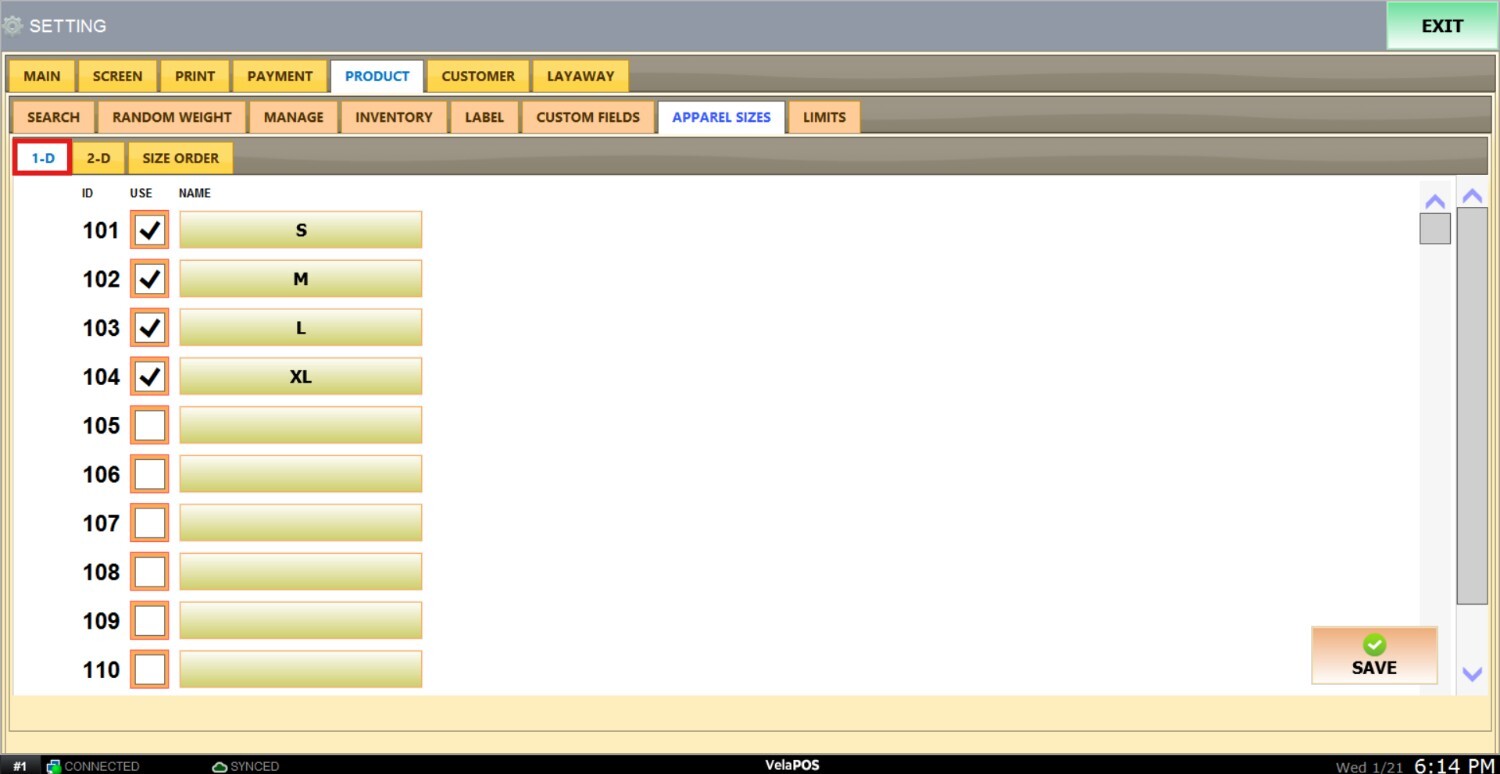
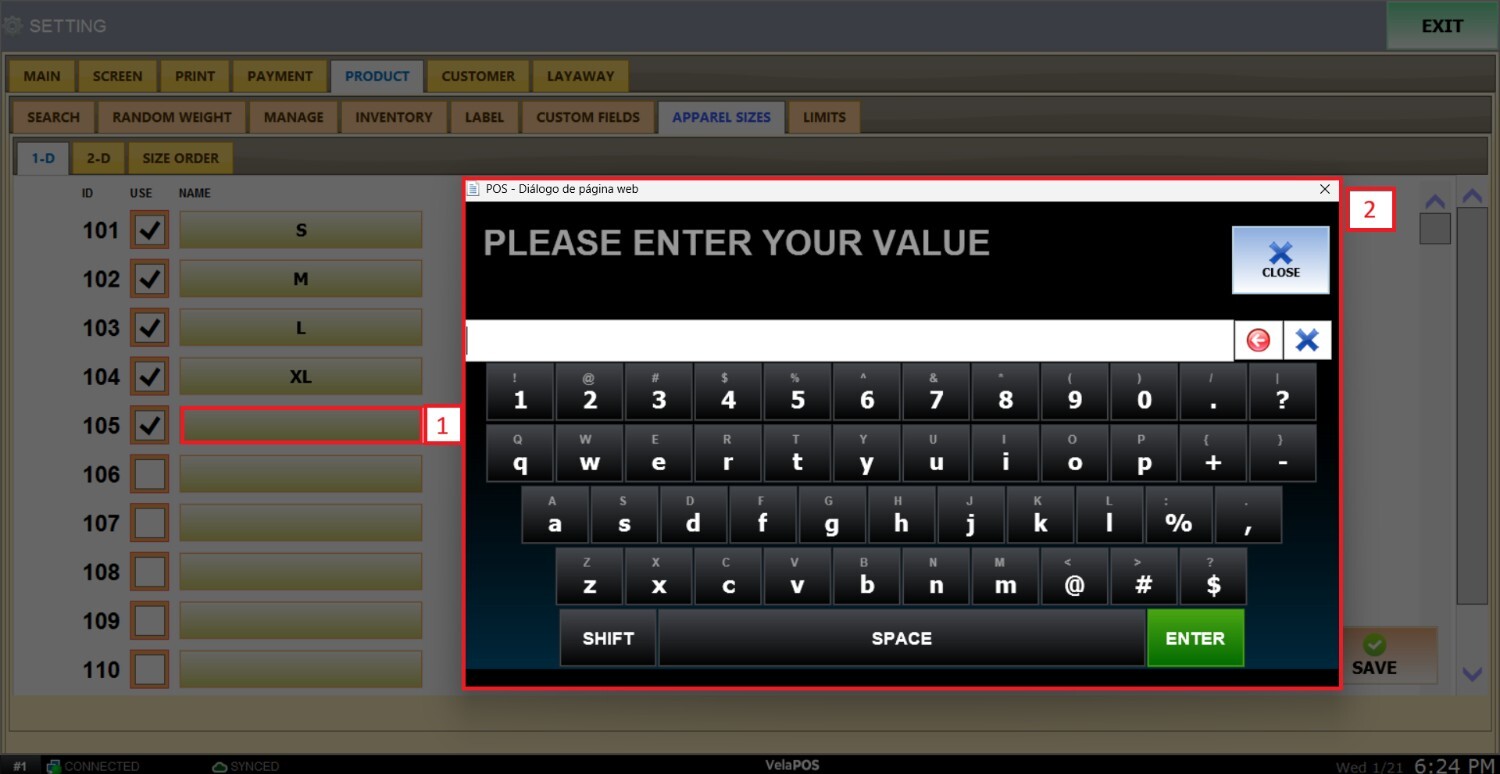
1-D
With this option you can set the sizes you want to use on your apparel section.
To add the sizes, check the box next to the empty field.
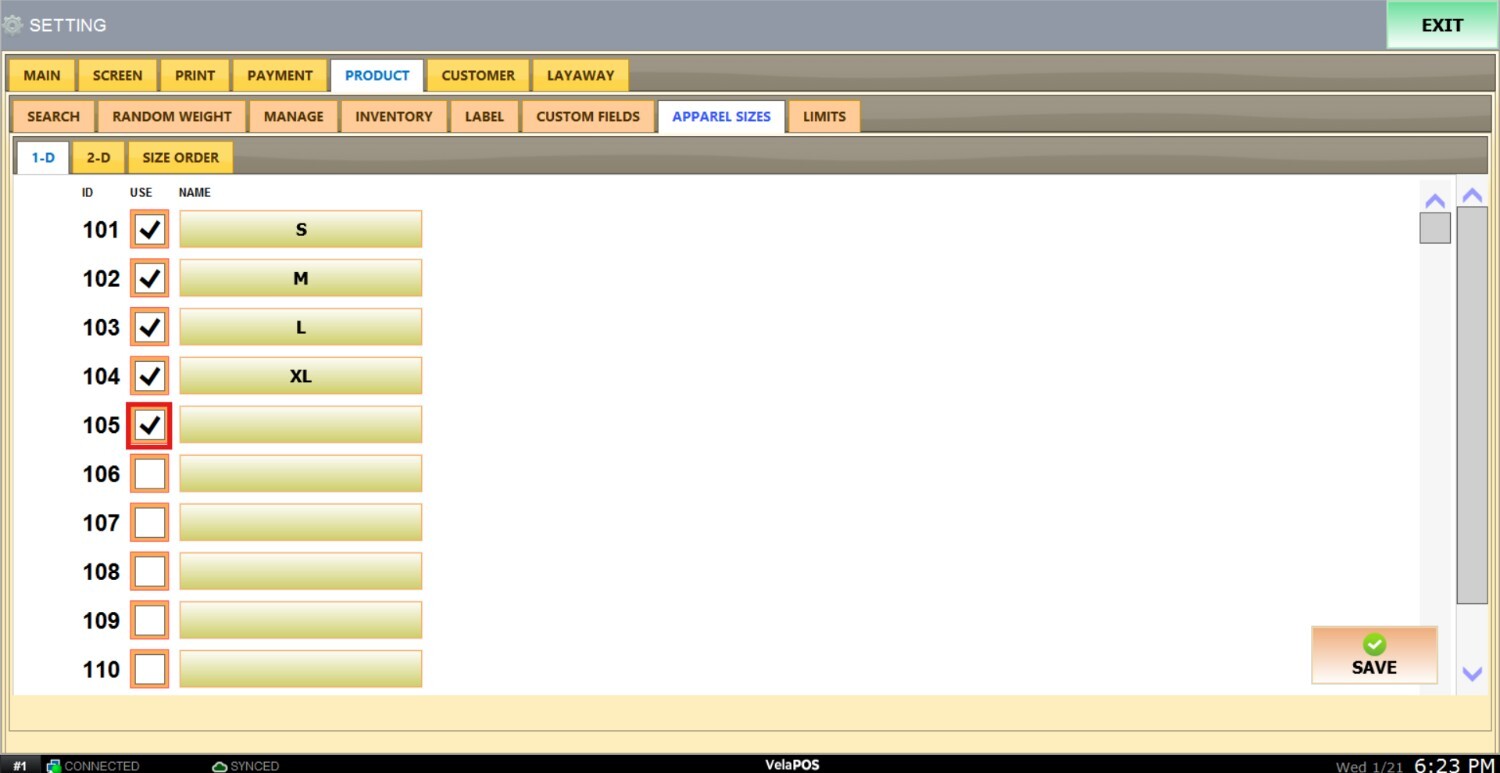
Press on the field and input the desired size.
Once you're done, press SAVE and RESTART to apply the changes.

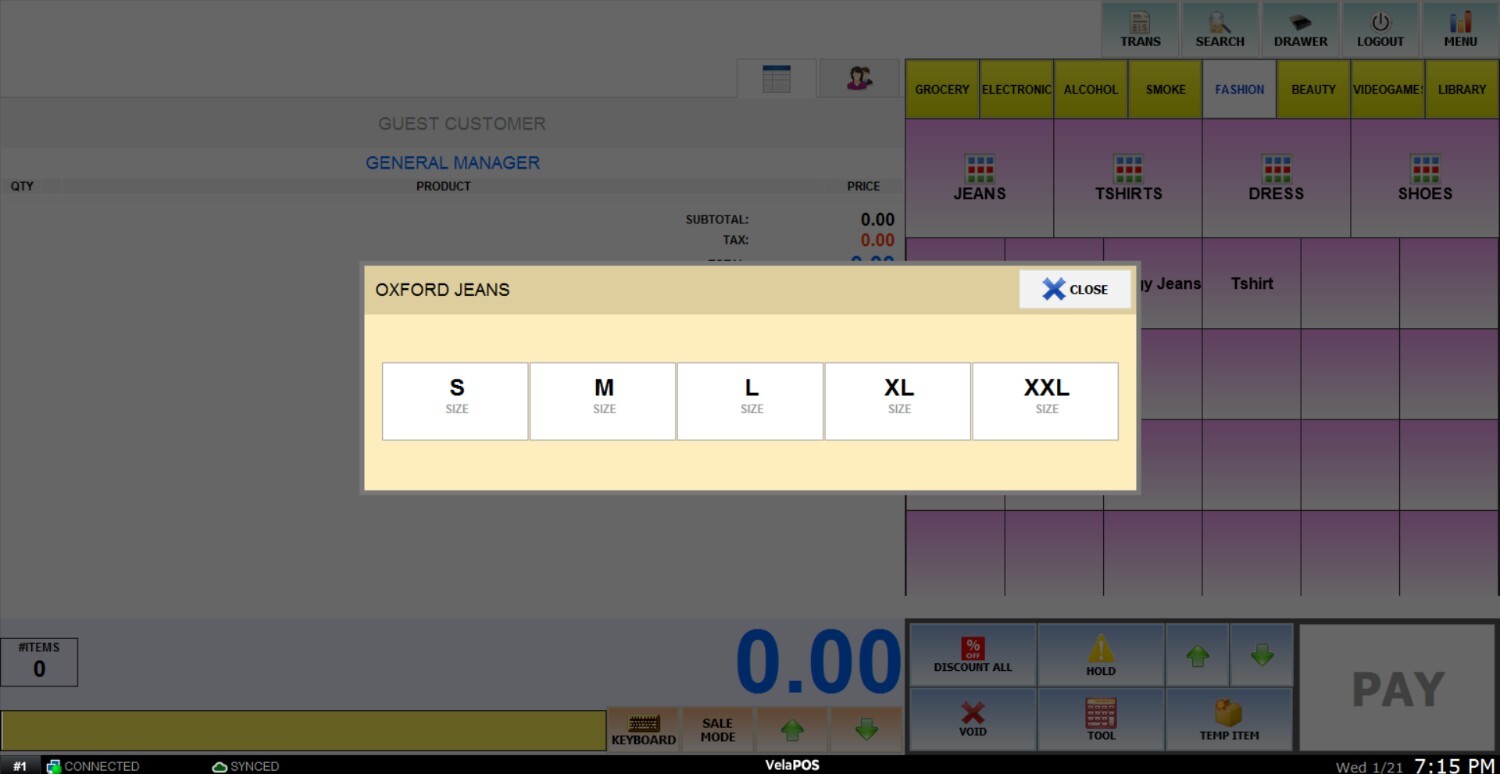
Result:
This is how these sizes will appear when ringing up products with this configuration.
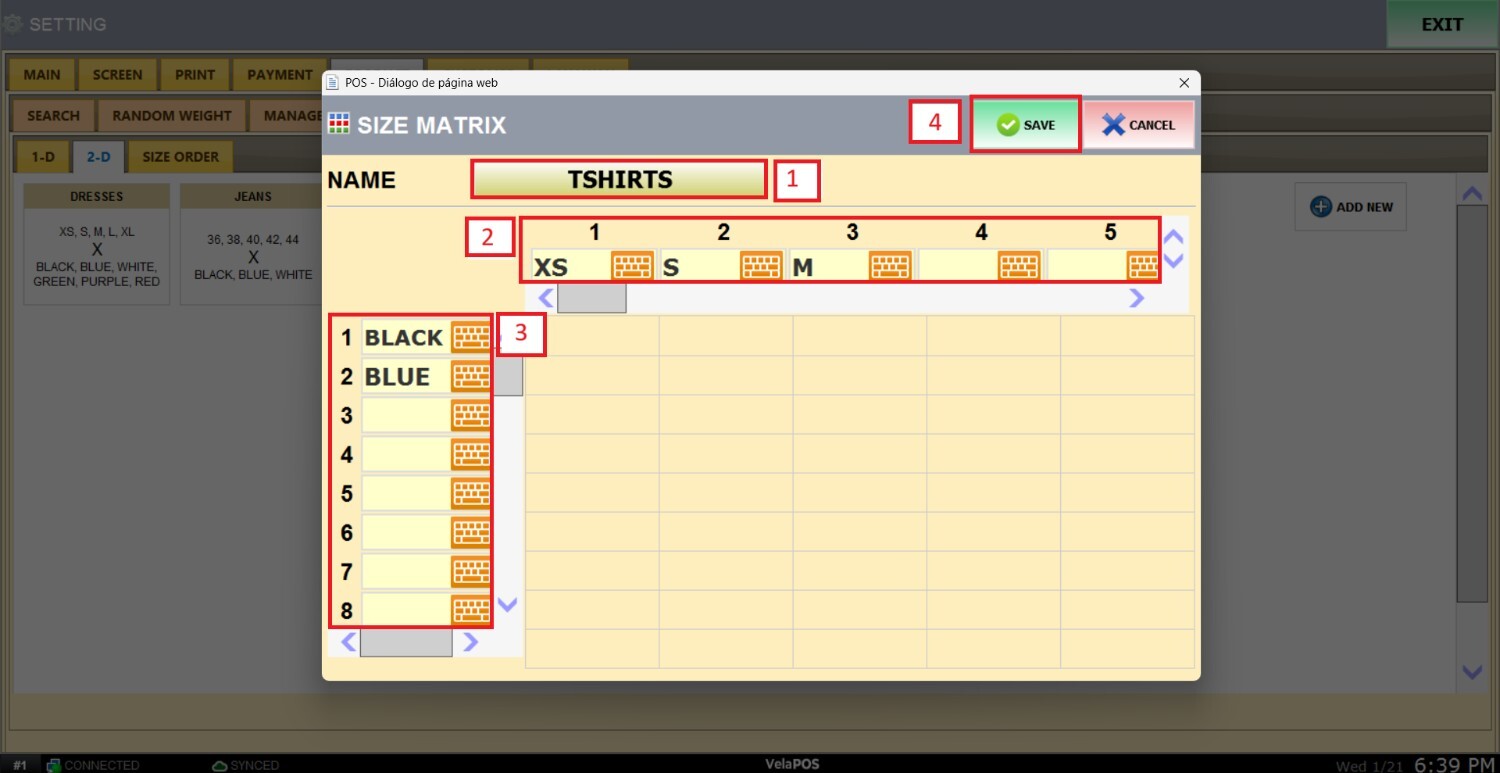
2-D
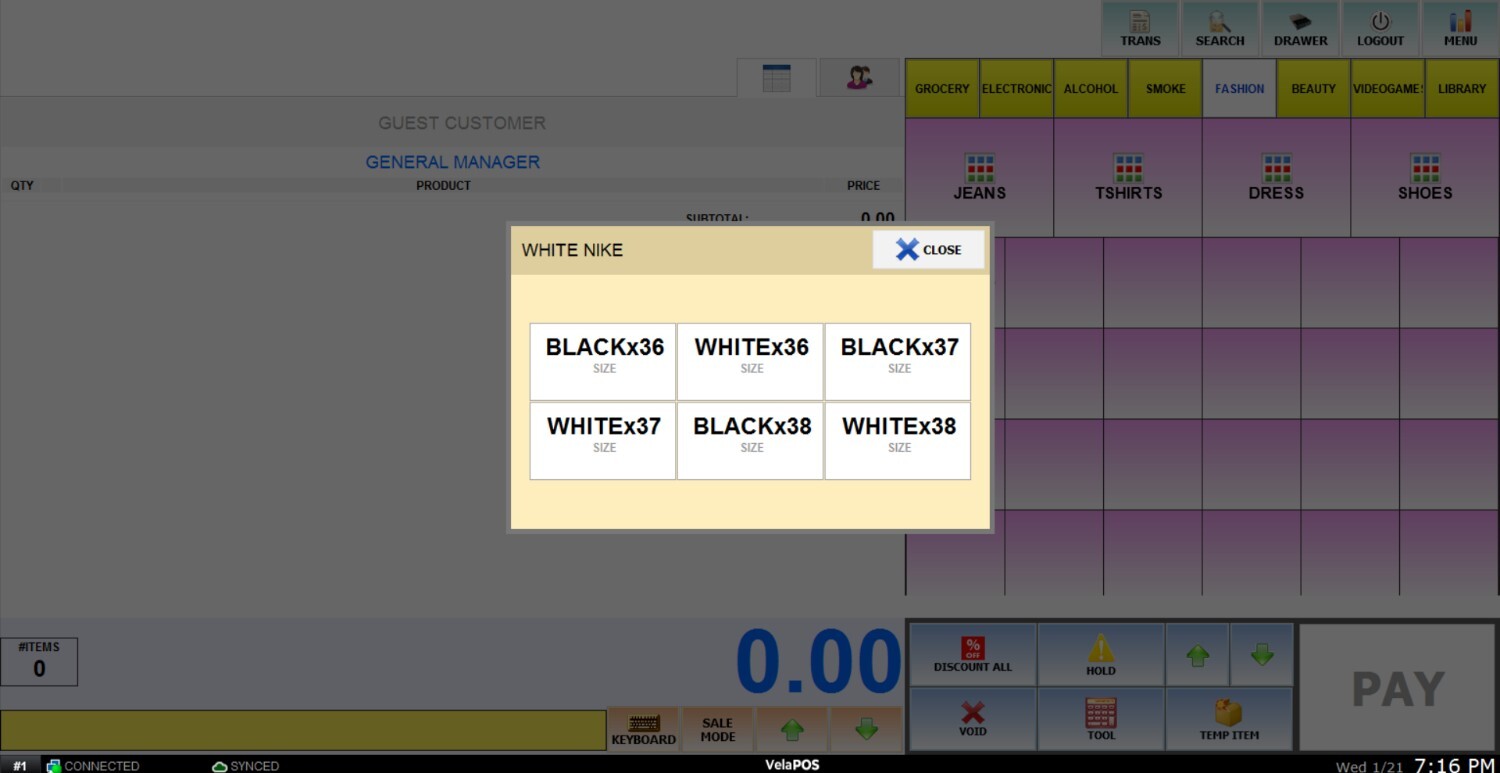
This option enables you to create a matrix that combines two product attributes, such as color and size.
To add a new matrix, go to the 2-D tab and press ADD NEW.
Press on the NAME field to name the matrix and enter the desired combinations.
When finished, press SAVE.
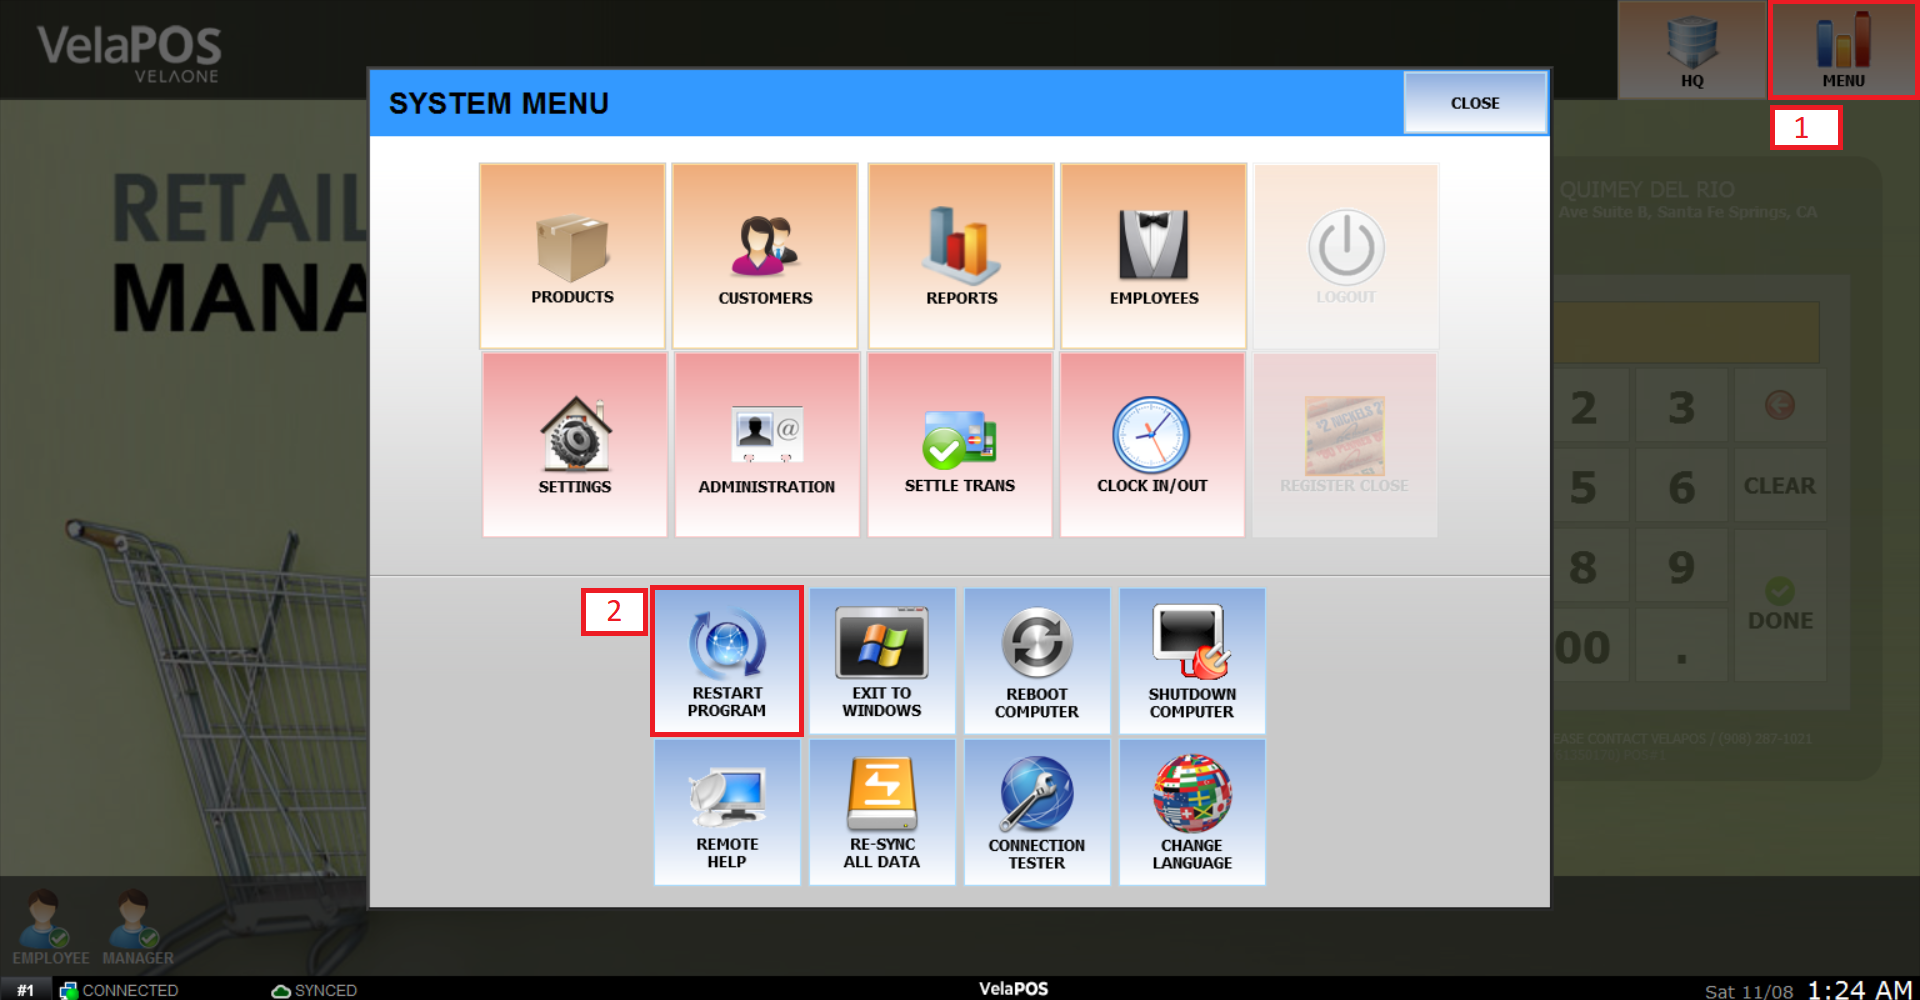
To apply the changes, go back to the main screen, go to MENU, and press RESTART PROGRAM.
Result:
This is how these sizes will appear when ringing up products with this configuration.
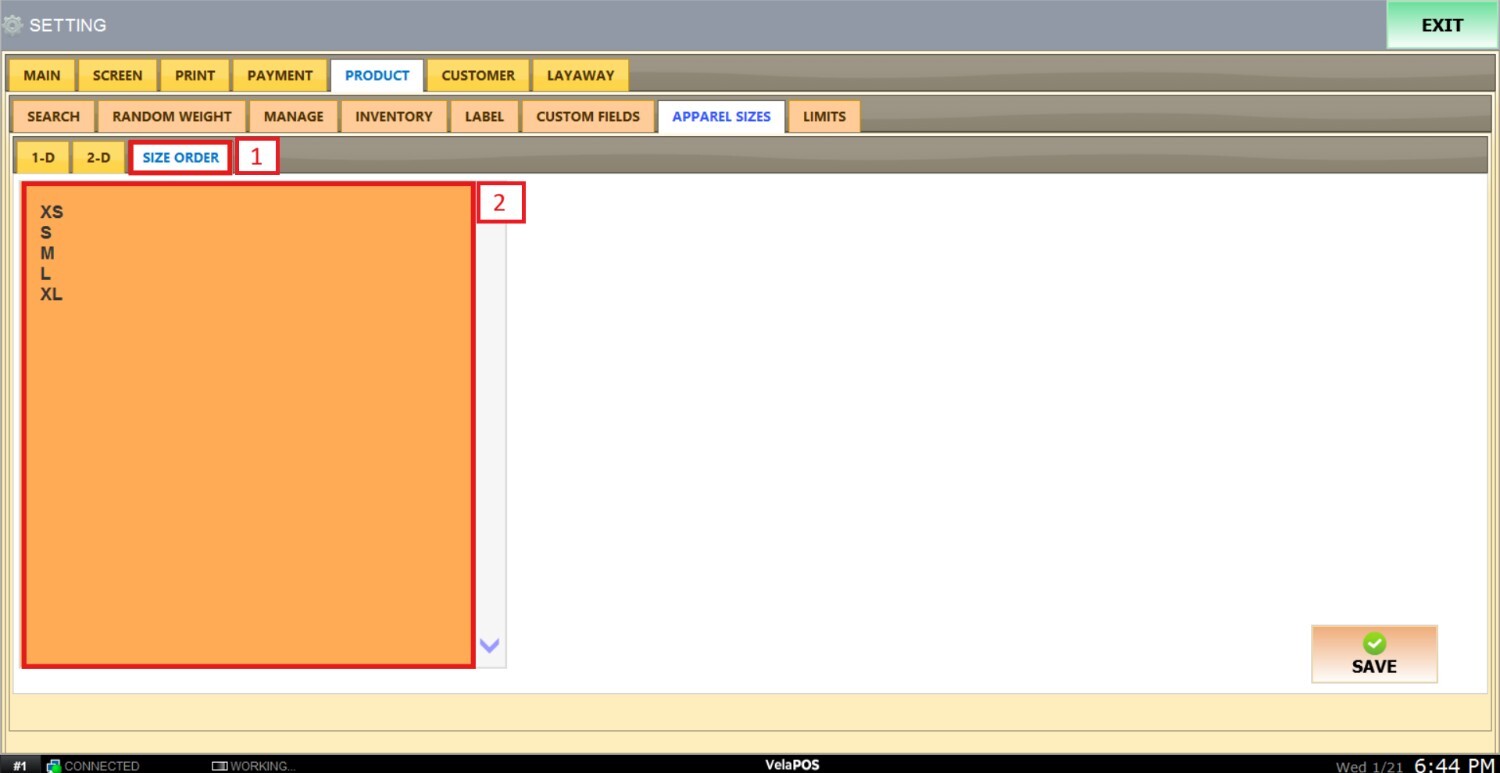
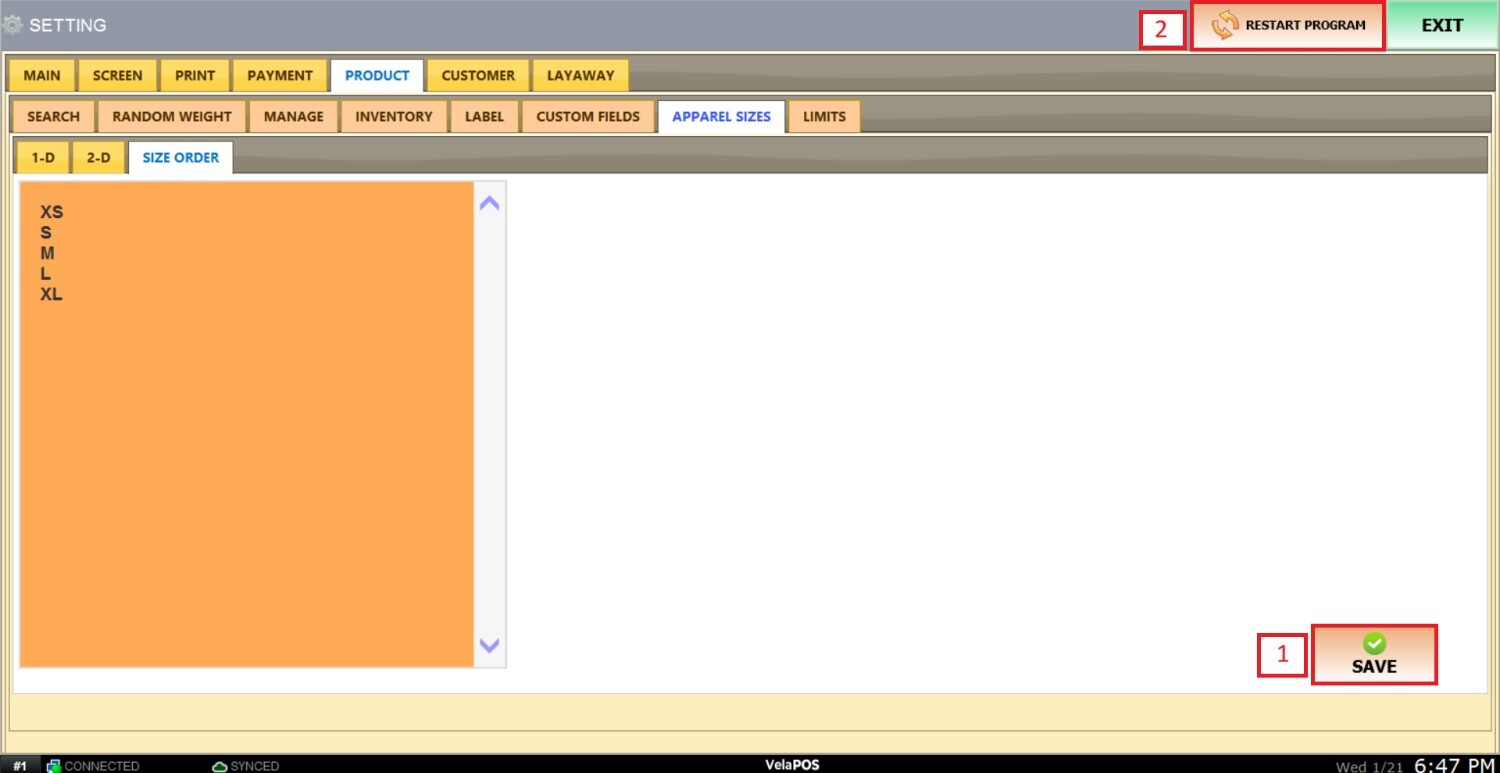
SIZE ORDER
With this option, you can set the order for the sizes.
Go to the SIZE ORDER tab and press on the orange square to input the order of your sizes.
To apply the changes, press SAVE and RESTART PROGRAM.
Hint: to see how to configure these sizes on the apparel categories, go to Sizes.