Setting
These settings determine how discounts are displayed and managed on the sales screen.
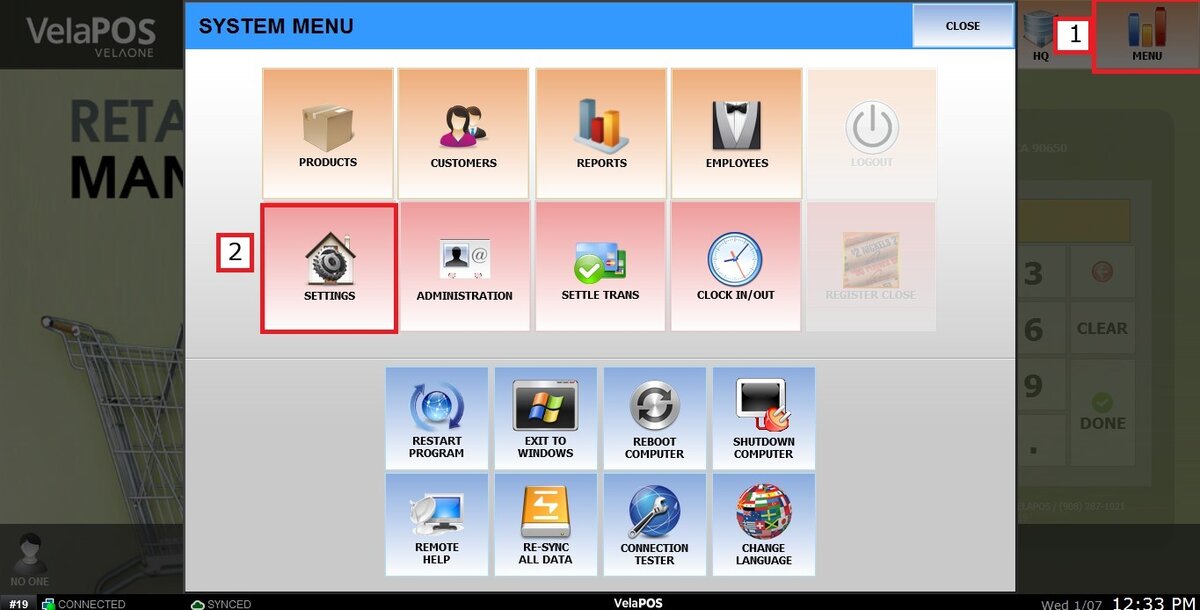
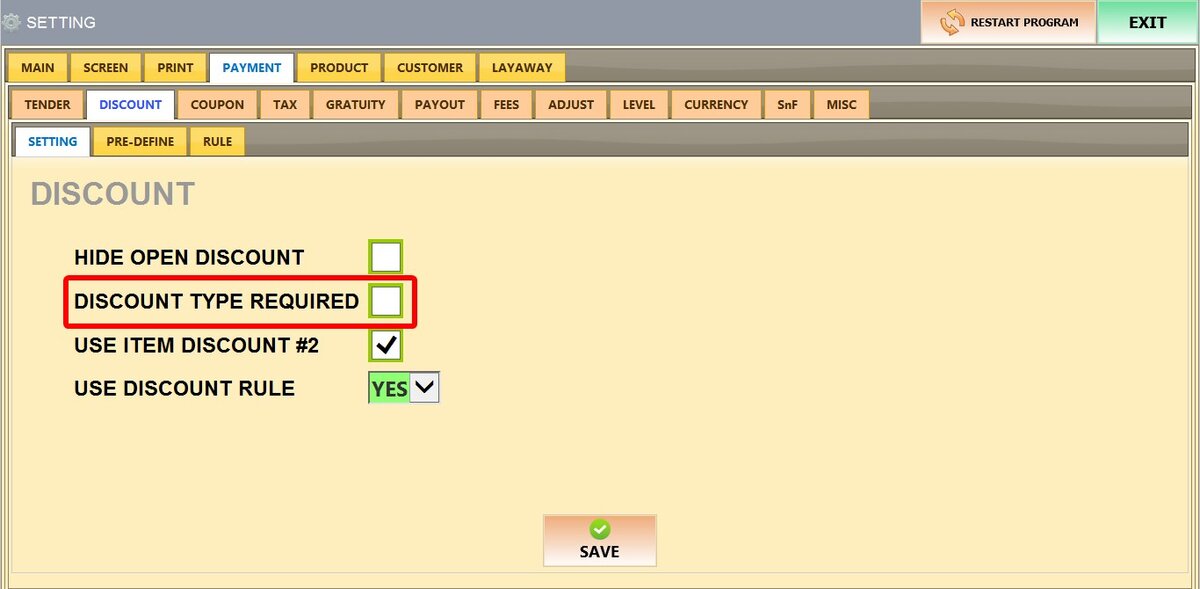
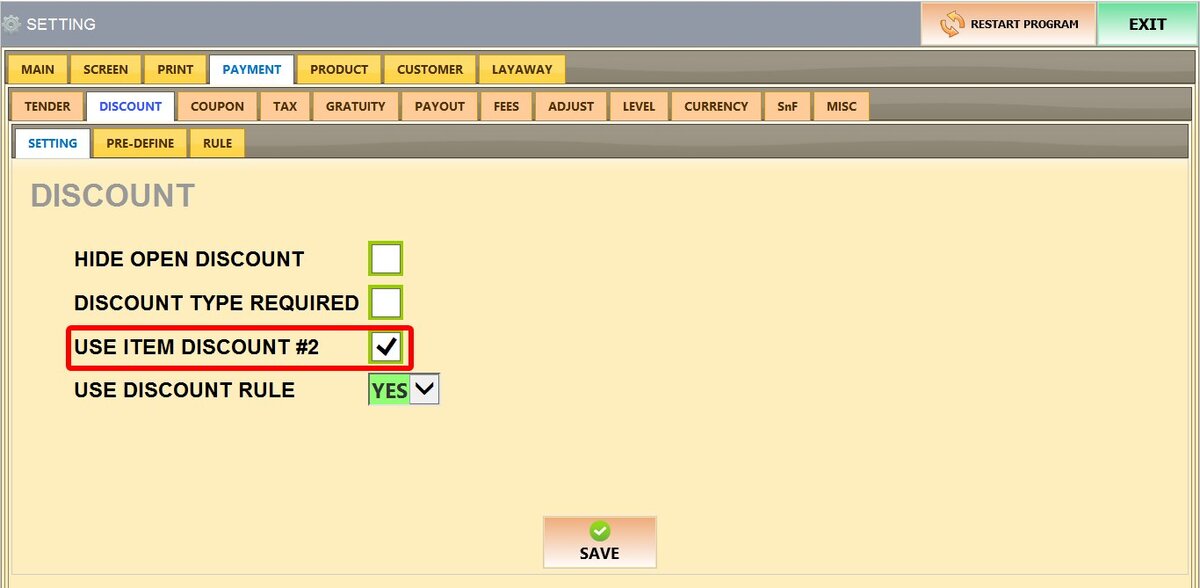
Main Screen > MENU > SETTINGS > PAYMENT > DISCOUNT > SETTING
Go to MENU then SETTINGS
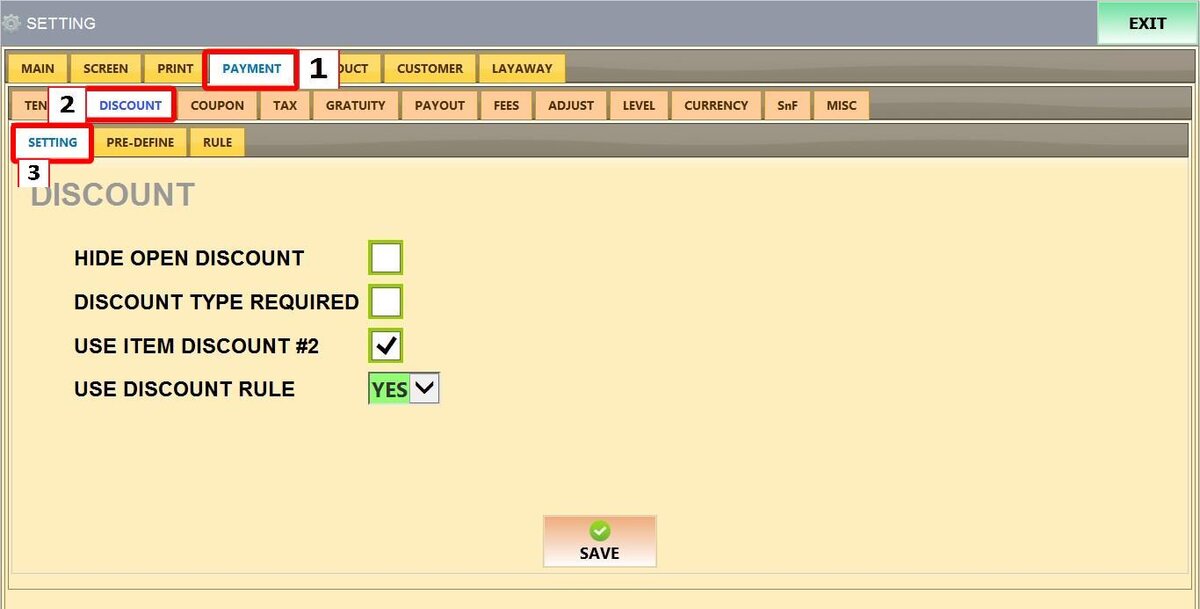
Go to PAYMENT then DISCOUNT and select SETTING
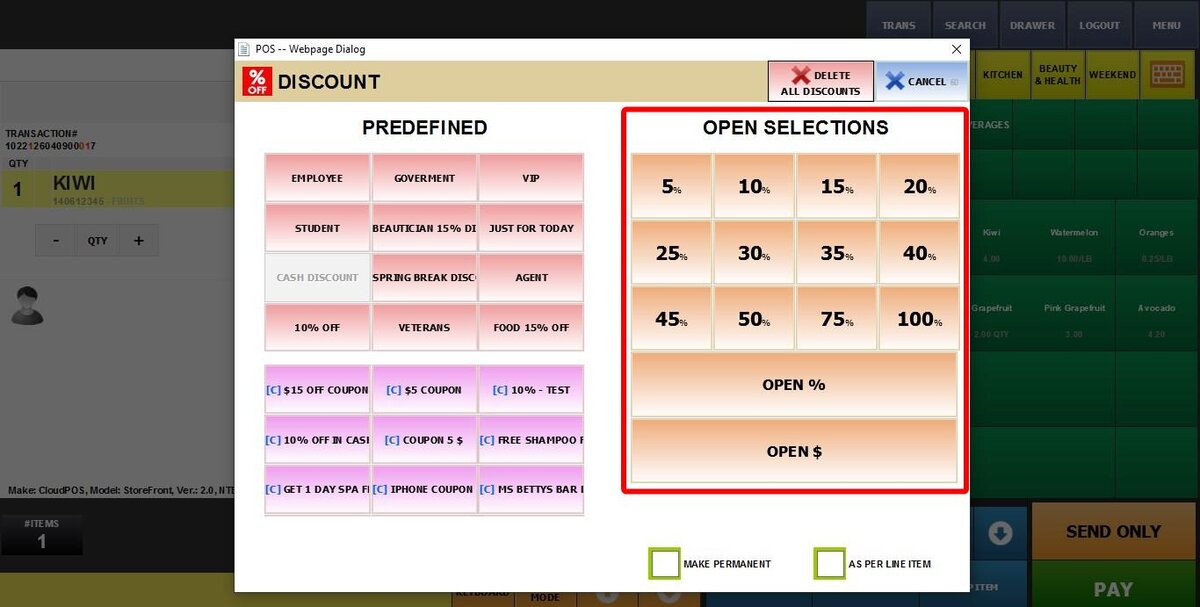
1. HIDE OPEN DISCOUNT: Controls how "Open" discounts (any % or $ amount as well as common discount % like 5%, 10%, 20% etc) appear on the discount screen in the Sales Screen
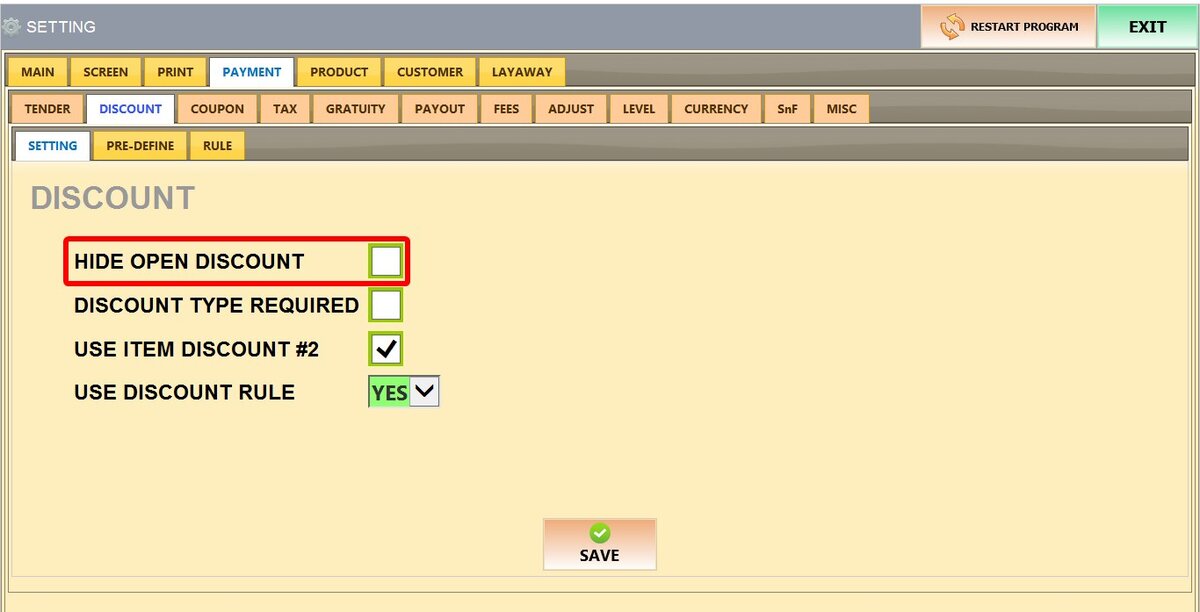
Unchecked: The open discount buttons are visible immediately when you enter the discount screen.
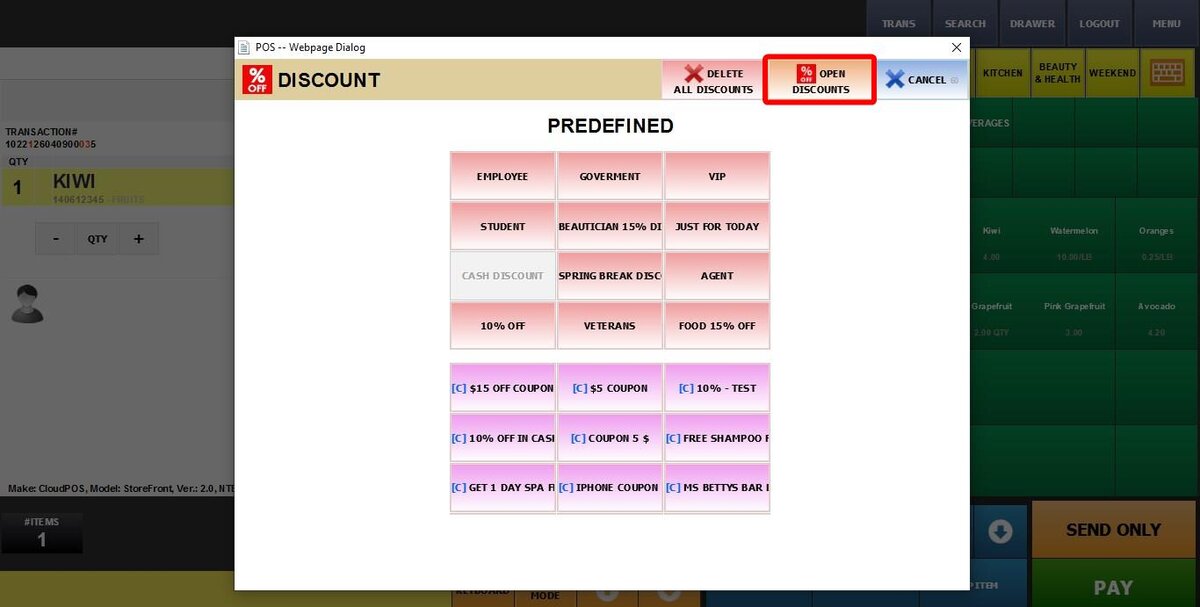
Checked: You must press a button labeled OPEN DISCOUNT to see them. This keeps the screen clean and focused on your standard discounts.
2. DISCOUNT TYPE REQUIRED: Determines if the cashier must give a reason for a discount.
Unchecked: Cashiers can apply discounts without selecting a reason.
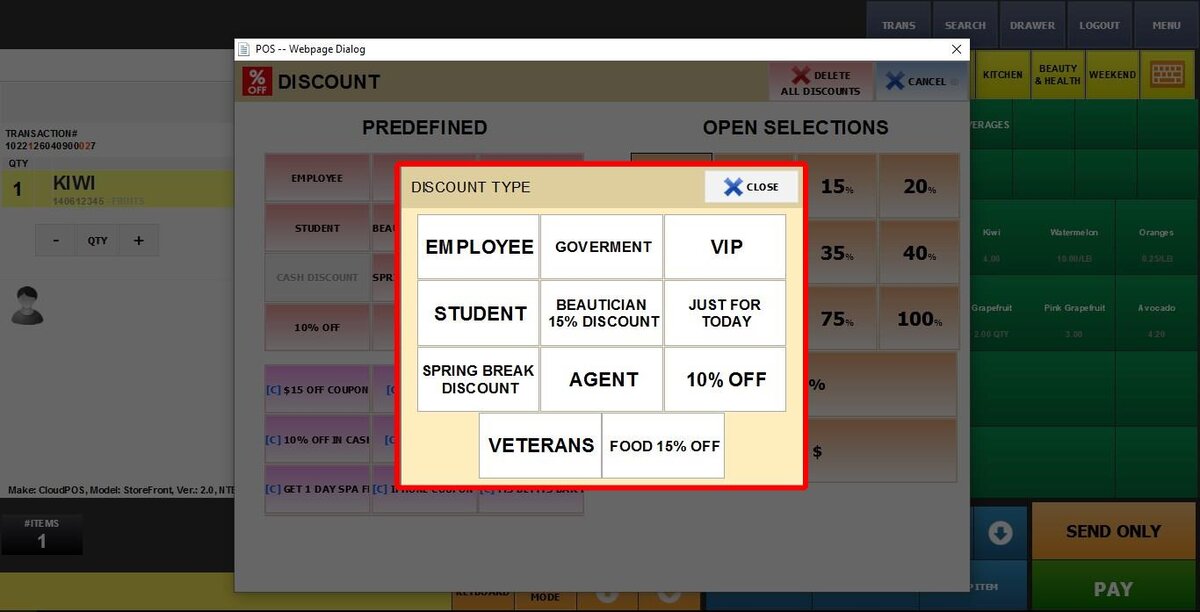
Checked: When selecting any discount. A window pops up requiring the cashier to pick a specific Discount Type (specifically called Predefined Discounts in the system) for the price reduction.
See Predefined Discounts for more information.
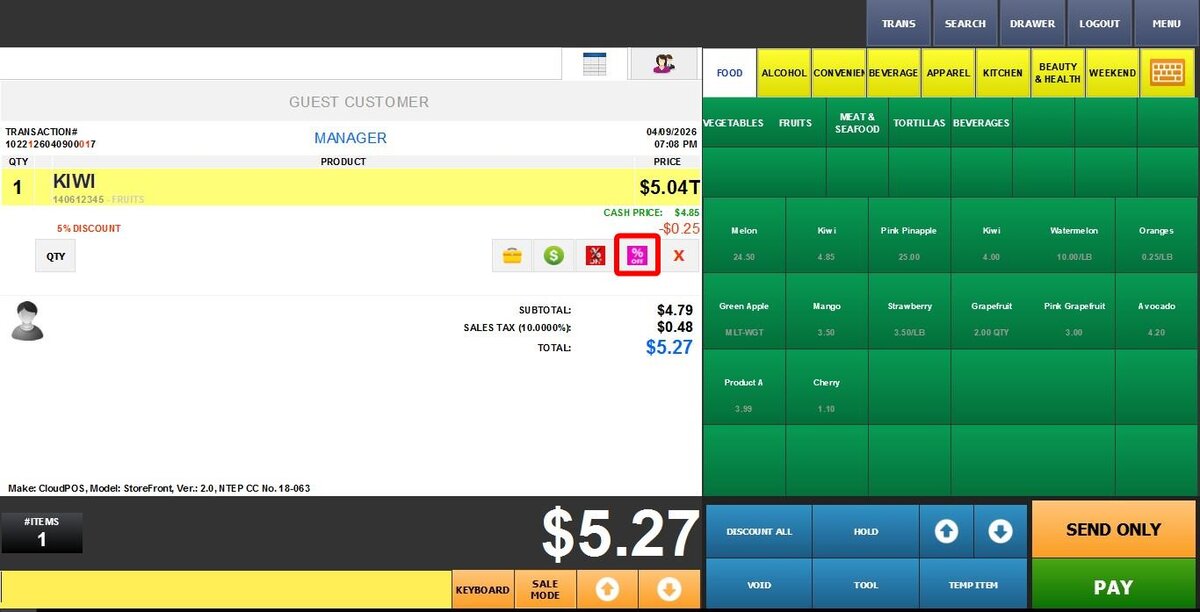
3. USE ITEM DISCOUNT #2: Controls the number of manual discount buttons available for each product.
Unchecked: Only one manual discount button appears under each item on the sales screen.
HINT: Automated discounts (like Customer Groups, Discount Rules, and Order-wide discount) can still apply even if this is unchecked.
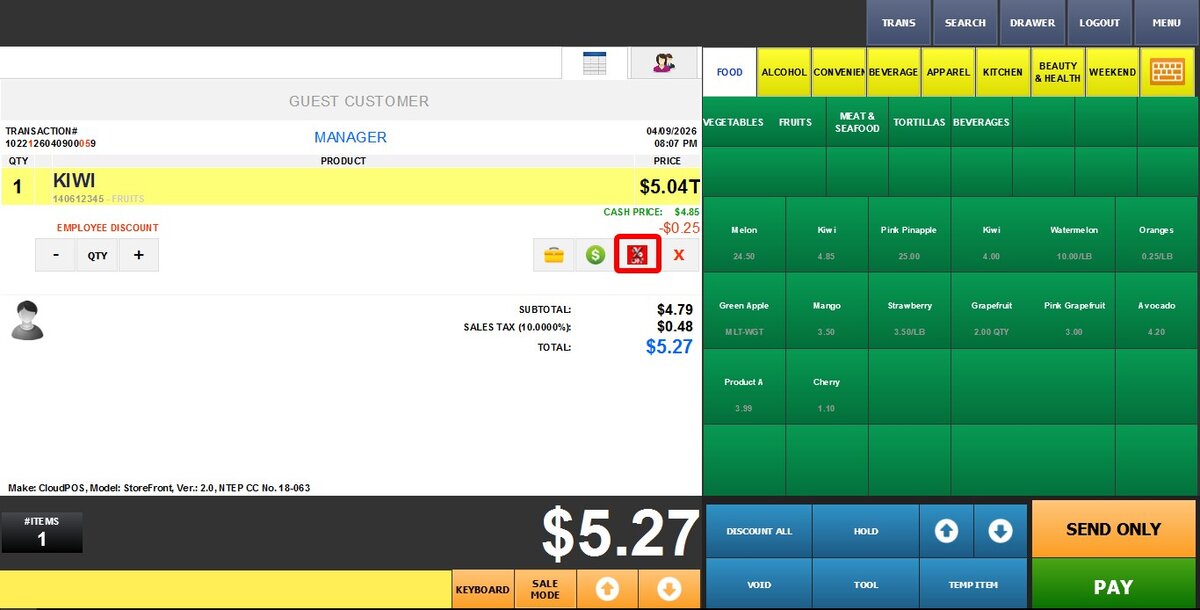
Checked: Once you've used the manual discount button for an item. A second (purple) discount button appears, allowing you to apply two different manual discounts to the same item.
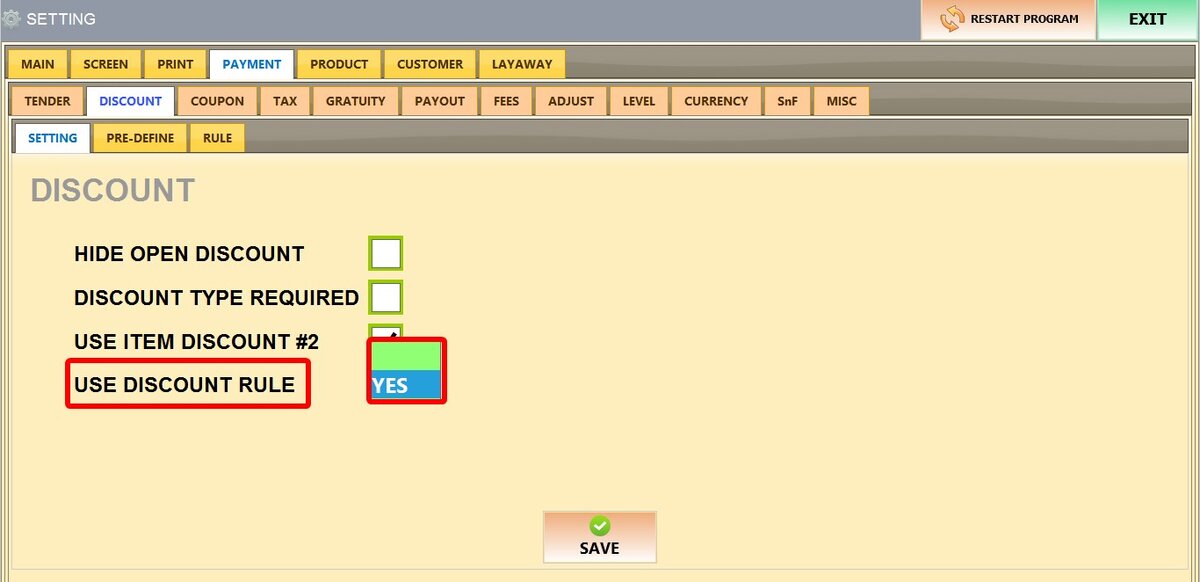
4. USE DISCOUNT RULE: Enable or disable Discount Rules, which allow for complex deals like "Buy 2 Get 1 Free," Mix-and-Match bundles, or tiered volume pricing (e.g., $1 each or 3 for $2.50).
See Discount Rule to learn more about it.
BLANK: Discount rules are not applied.
YES: Automatically applies discount rules and deals when the qualifying conditions are met.
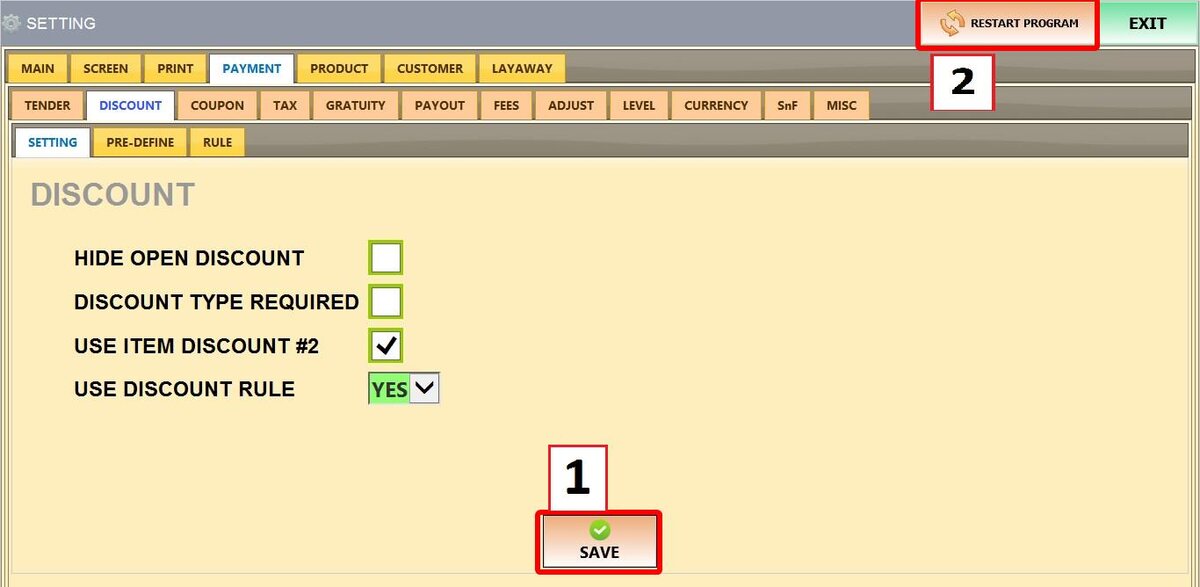
Click SAVE and RESTART THE PROGRAM.