Modify Employee Groups and Permissions
Manage employee groups with our restricted access administration section by setting access permissions, assigning roles, and customizing what each member can do. You can also rename groups to match the team functions or organizational updates.
Main Screen> MENU> ADMINISTRATION> USER LIST
On the USER LIST, you will see all the different available slots for employee groups.
Within each employee group, select MODIFY GROUP to open an information window where you can customize NAME and PERMISSIONS. 
Name a group
To name or rename a group, locate the NAME field and use the on-screen keyboard to update it.
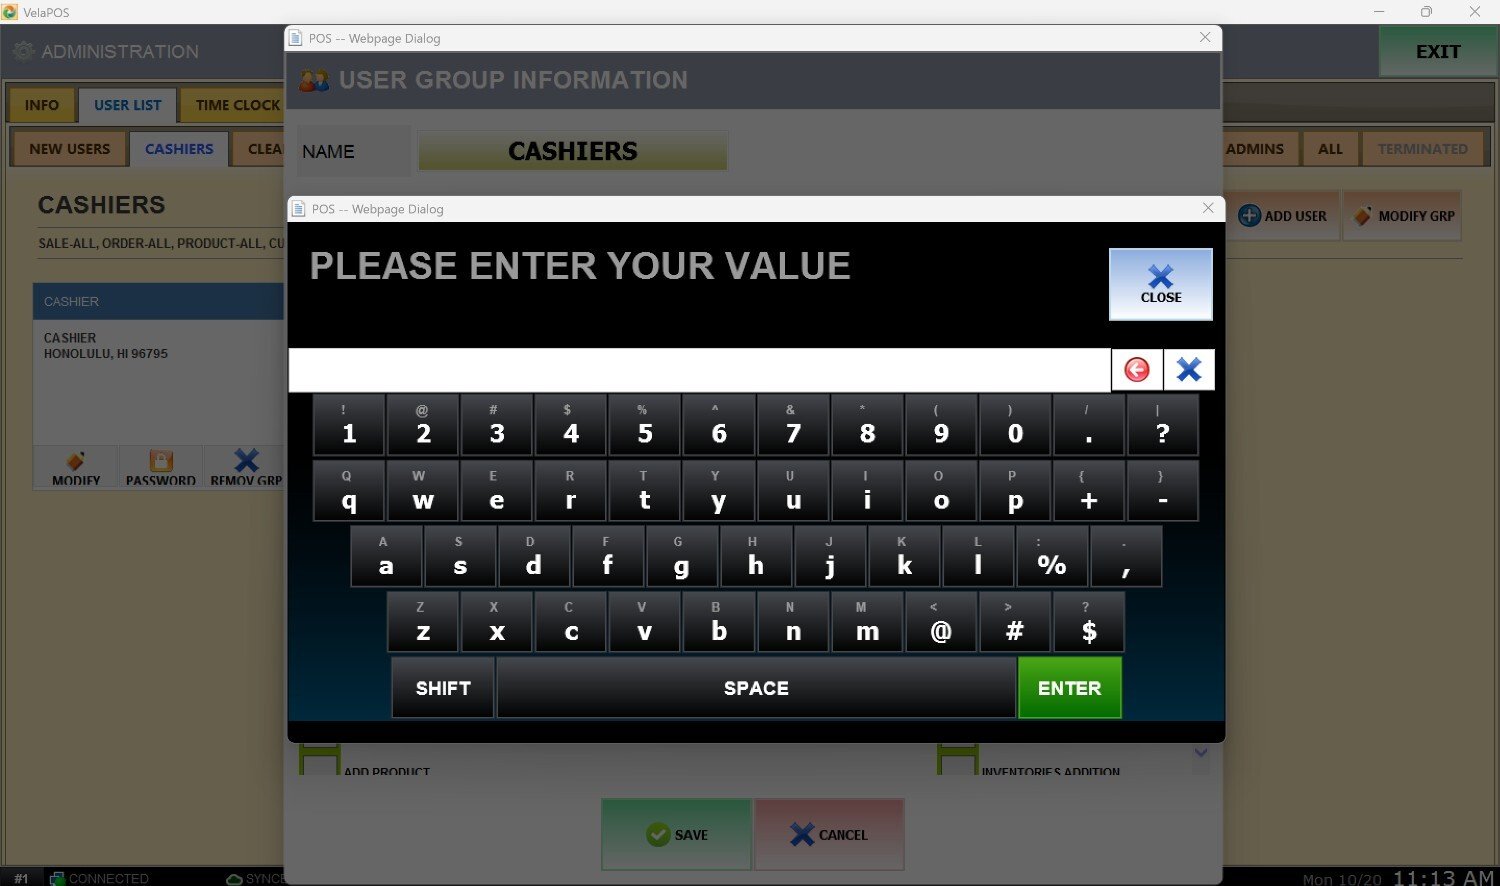
Press on SAVE to confirm the changes.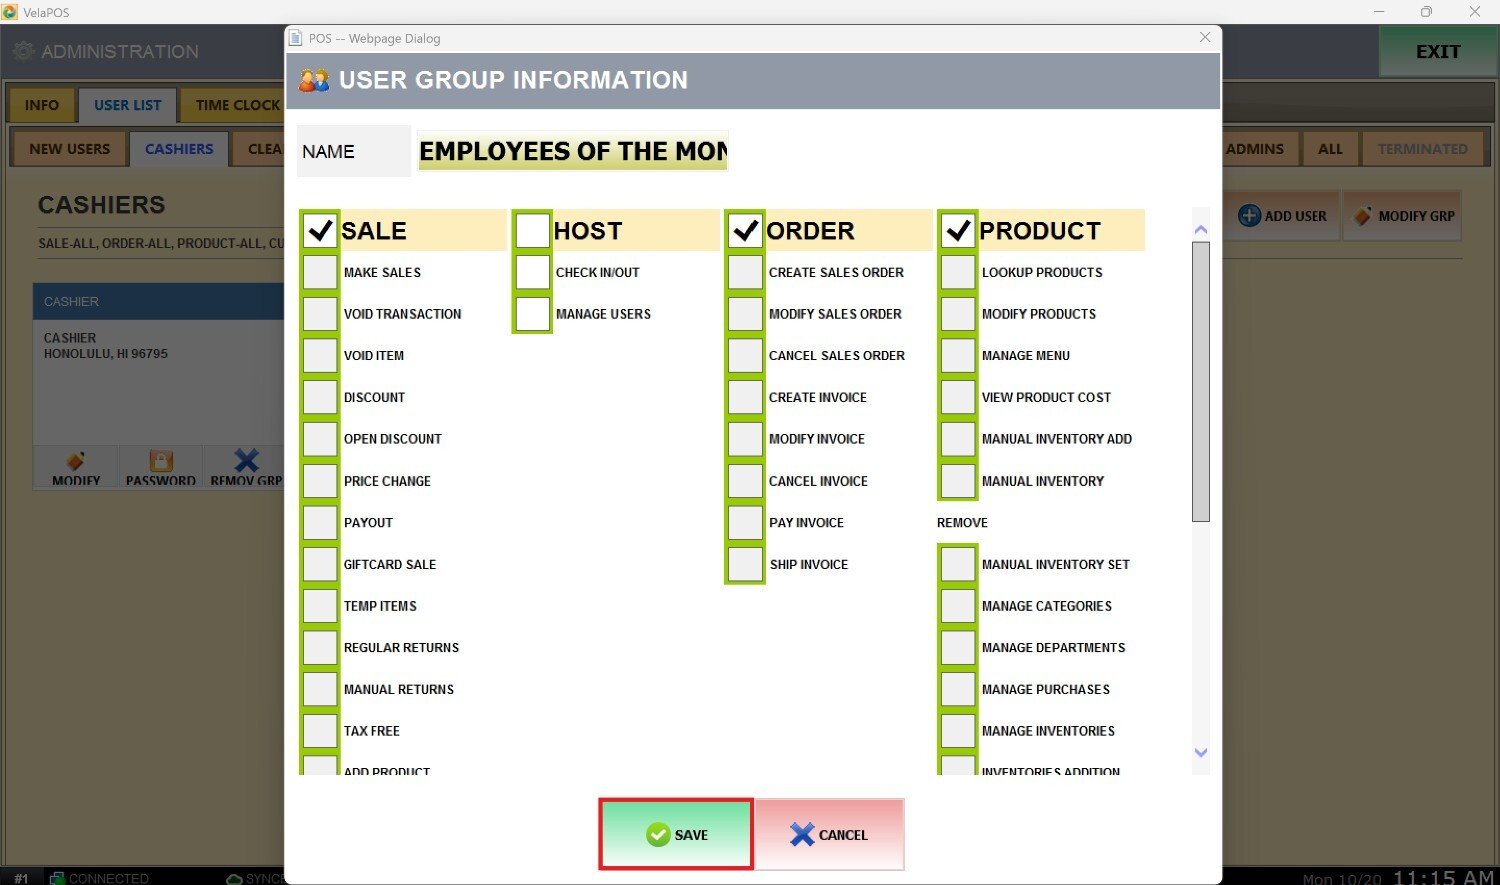
Result:
Configure Permissions
Below the name, you can find the complete set of permission options for that employee group.
Check or uncheck boxes next to specific permissions to enable or disable them one by one.
To grant all permissions within a section, check the box next to the section title.
After making your selections, press SAVE to apply the changes.
You can open any tab to view that group's allowed permissions listed below the group name.