Import Categories
This feature allows you to create and import departments and categories in bulk using our CSV template.
Main Screen > MENU> ADMINISTRATION> TOOLS> IMPORT DATA> CATEGORIES
Go to MENU and click ADMINISTRATION.
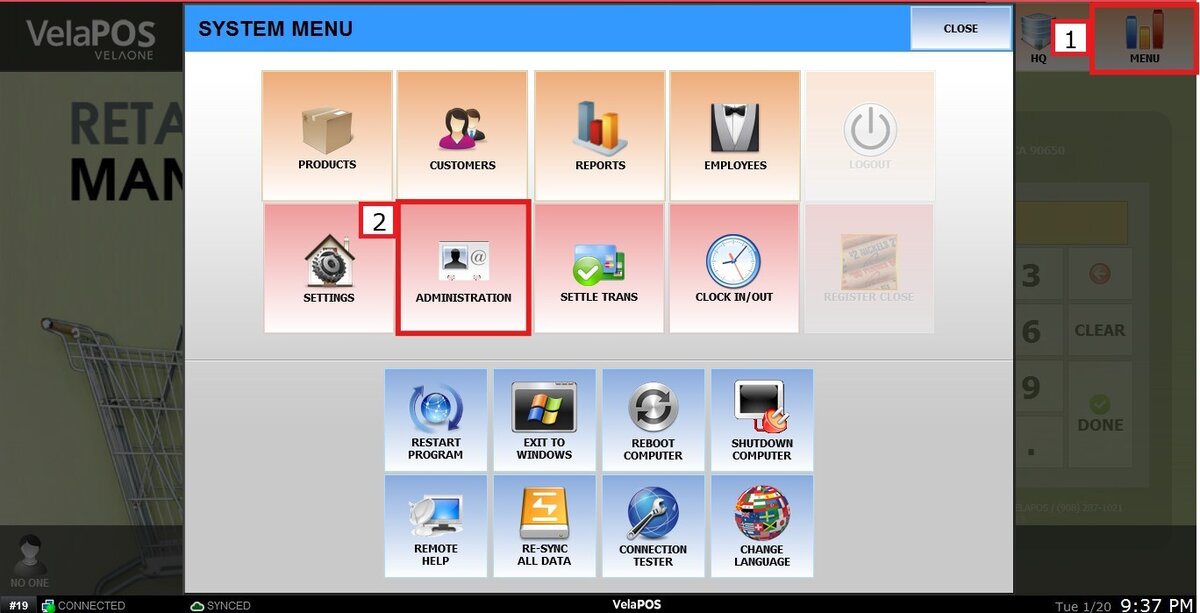
In ADMINISTRATION, go to the TOOLS tab, press on IMPORT DATA and click on the CATEGORIES box.
The system will prompt you to copy and paste the data. Use the provided CSV template to fill in the required information beforehand.
The CSV template can be obtained from the EXPORT DATA section. For detailed instructions, please refer to Export Categories.
CVS File Structure
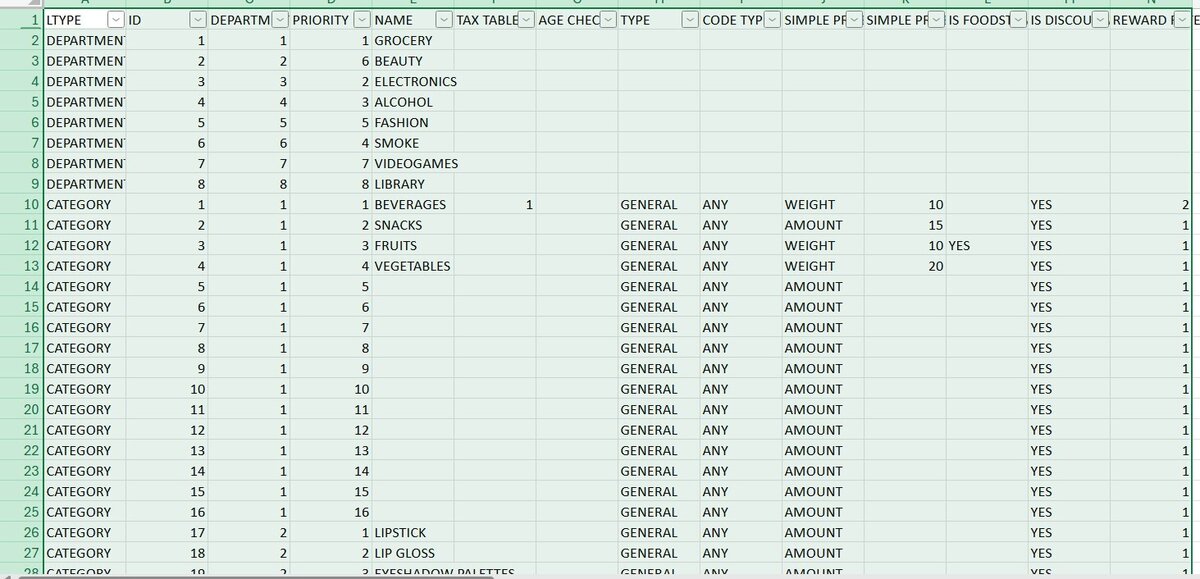
The CSV file should follow the structure shown below:
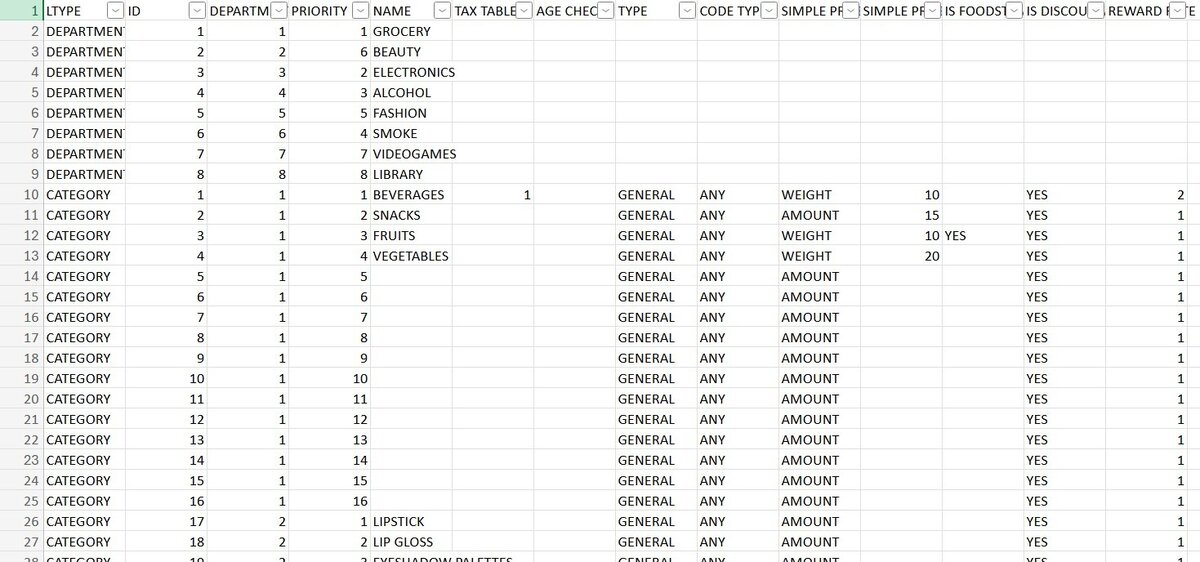
The minimum required fields are:
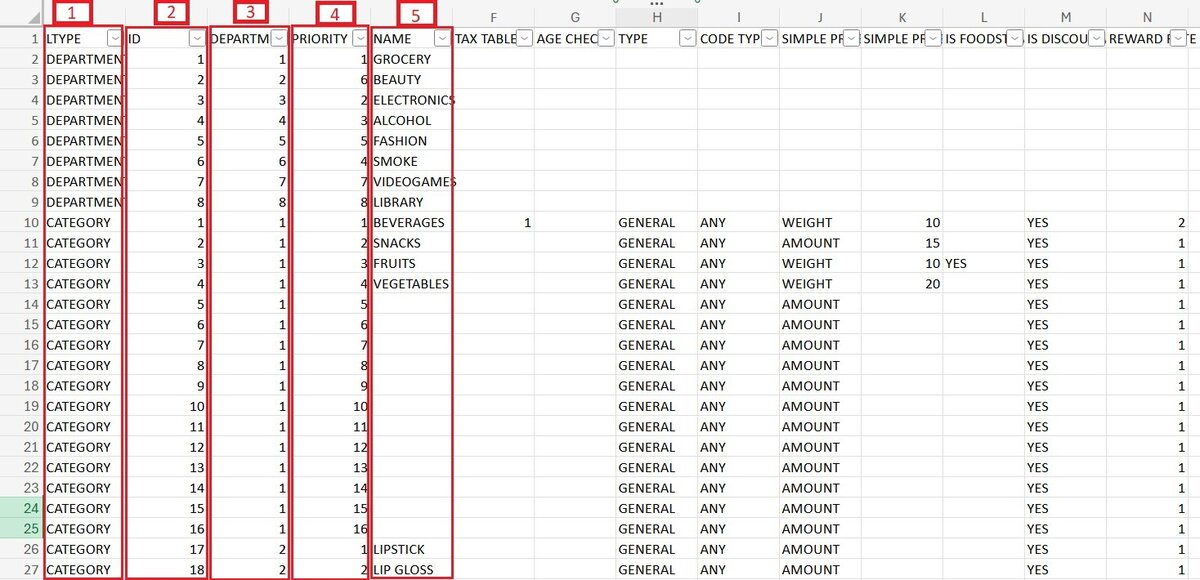
1. LTYPE: Defines whether the entry is a Department or Category.
2. PRIORITY: Dertermines the order in which the tiles appear in the menu.
3. NAME: Name of the category or department.
4. ID: The ID is unique and ranges from 1 to 128.
5. DEPARTMENT ID: Must be unique within 1 to 8, as the system supports up to eight departments.
You can include additional information as needed.
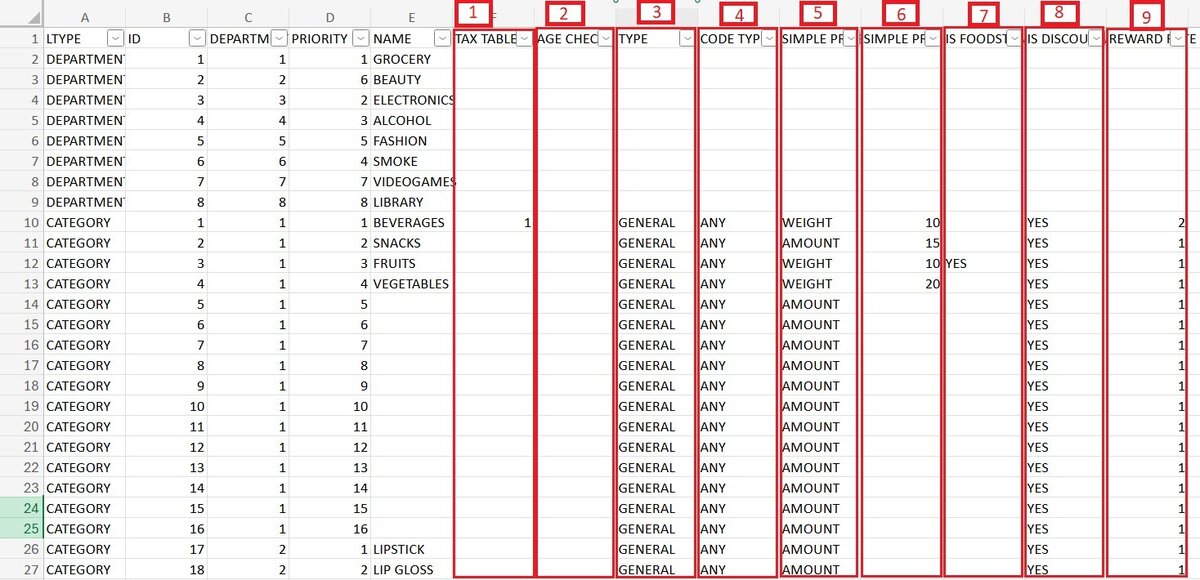
1. TAX TABLE: Assigns a default tax rate to all items in the category.
Hint: The numbers have to match the TAX TABLE previously created.
2. AGE CHECK: Sets the minimum customer age required for ID verification.
3. TYPE: Assigns a classification based on the type of items within the category.
4. CODE TYPE: Defines the barcode format used for items. Input ANY for automatic barcode detection.
5. SIMPLE PRICE TYPE: Defines the pricing method for items within the category (e.g., simple, multiple, or weight-based).
6. SIMPLE PRICE: Used with the SIMPLE CATEGORY LAYOUT option to assign a single price to the entire category when individual items are not required.
7. IS FOODSTAMPABLE: Specifies whether items can be purchased using EBT.
8. IS DISCOUNTABLE: Determines if discounts can be applied.
9. REWARD RATE: Sets the rate used to calculate rewards.
Importing the File
Copy the data you wish to import, making sure to include column headers.
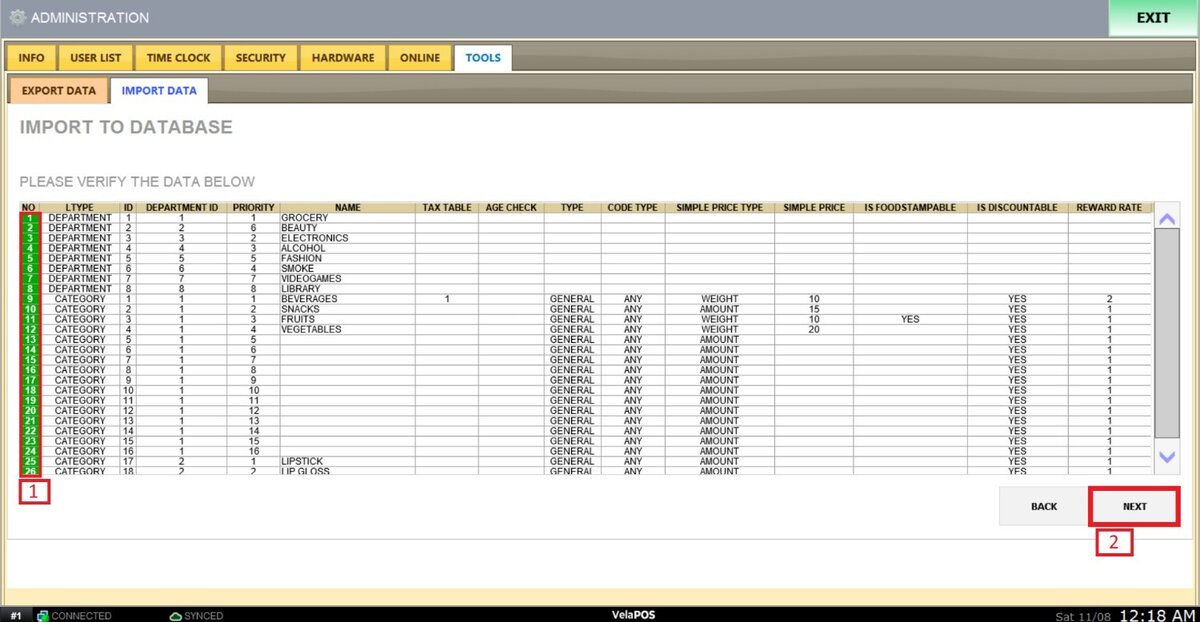
Paste the data into the provided field and press NEXT.

If the file is correctly formatted, the first column will be highlighted in green.
Press NEXT to complete the import.
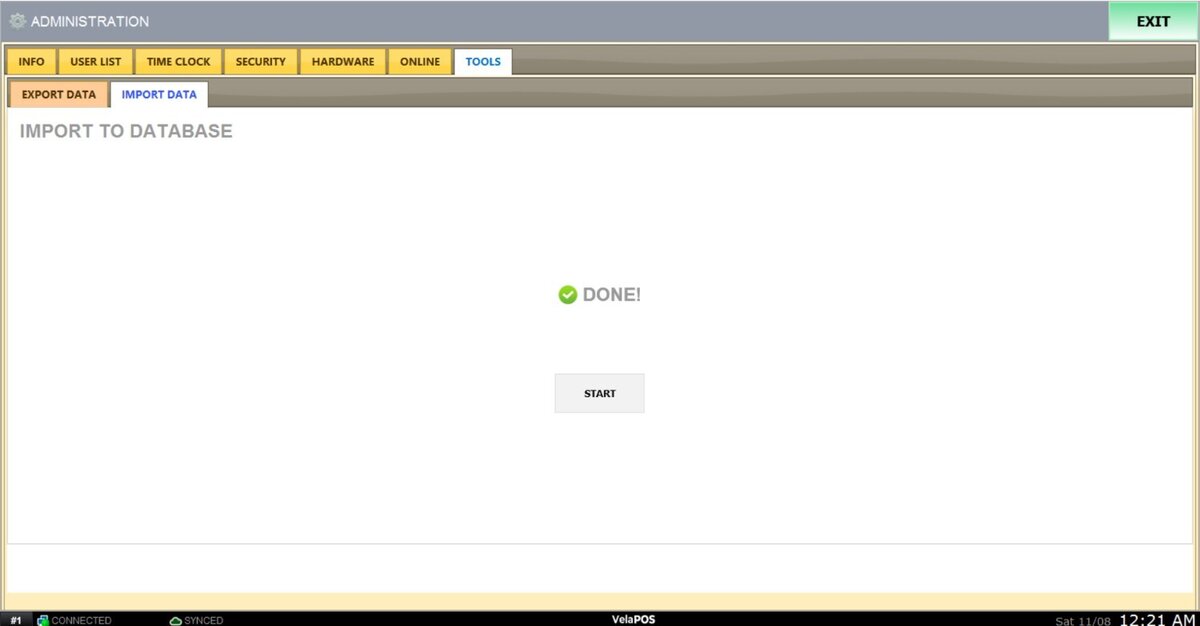
A confirmation message will be displayed on the screen.
On the main screen, go to MENU and RESTART PROGRAM to apply the changes.
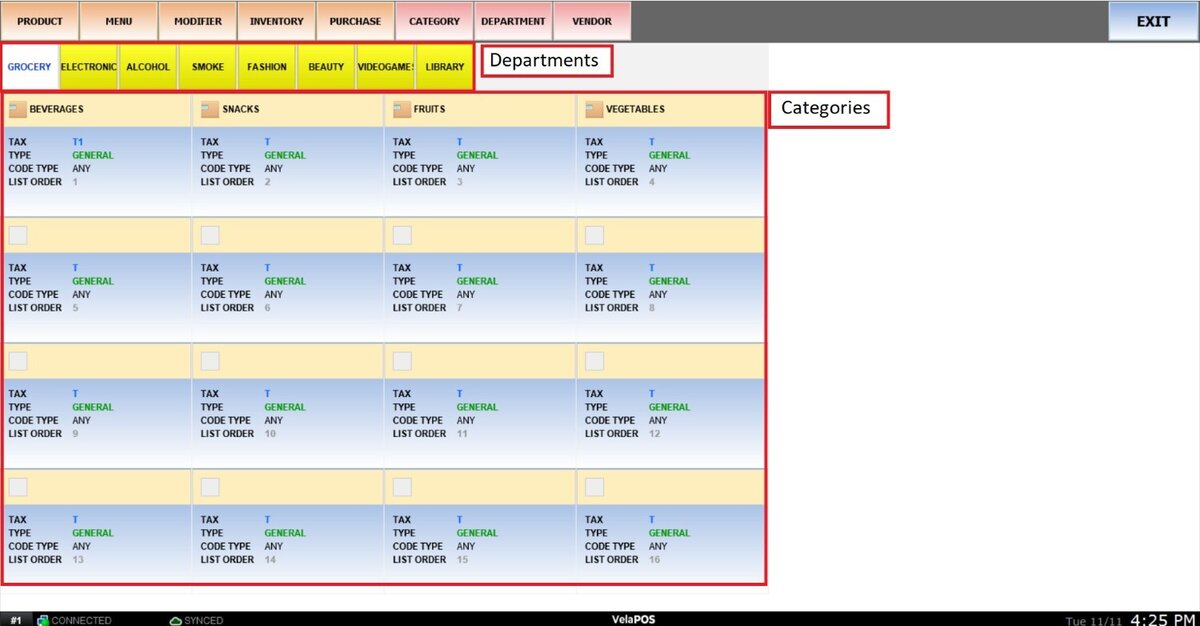
Result:
You can view the imported inventory departments and categories. To manually edit or modify them, refer to Creating Inventory Department and Creating Inventory Category.