Sales Screen Customer
This guide explains how to assign a customer account to a sale.
Main Screen> Number Pad> Sales Screen> Customer tab
From the Main Screen, click on the numberpad and input the assigned personal password to log in.
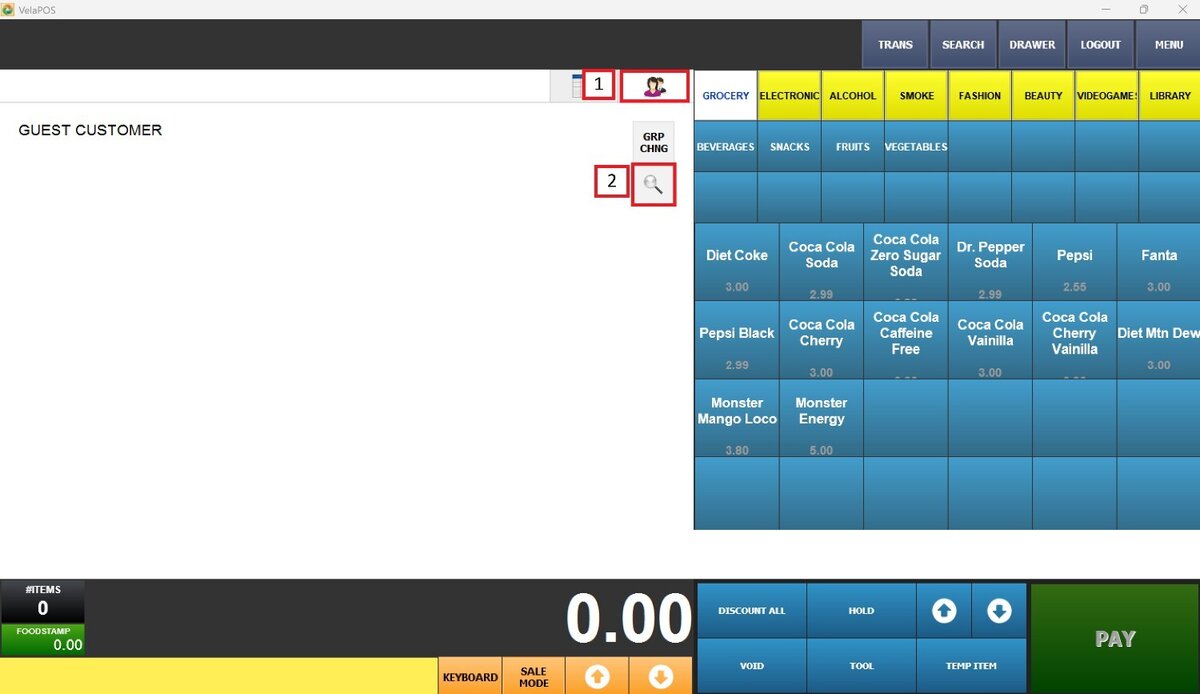
Once on the sales screen, press the two person icon and on the customer panel select the magnifying glass to open the customer search screen.
In the pop-up window, press ENTER on the keyboard to load the complete list of customers, including their names, contact details, and other relevant information.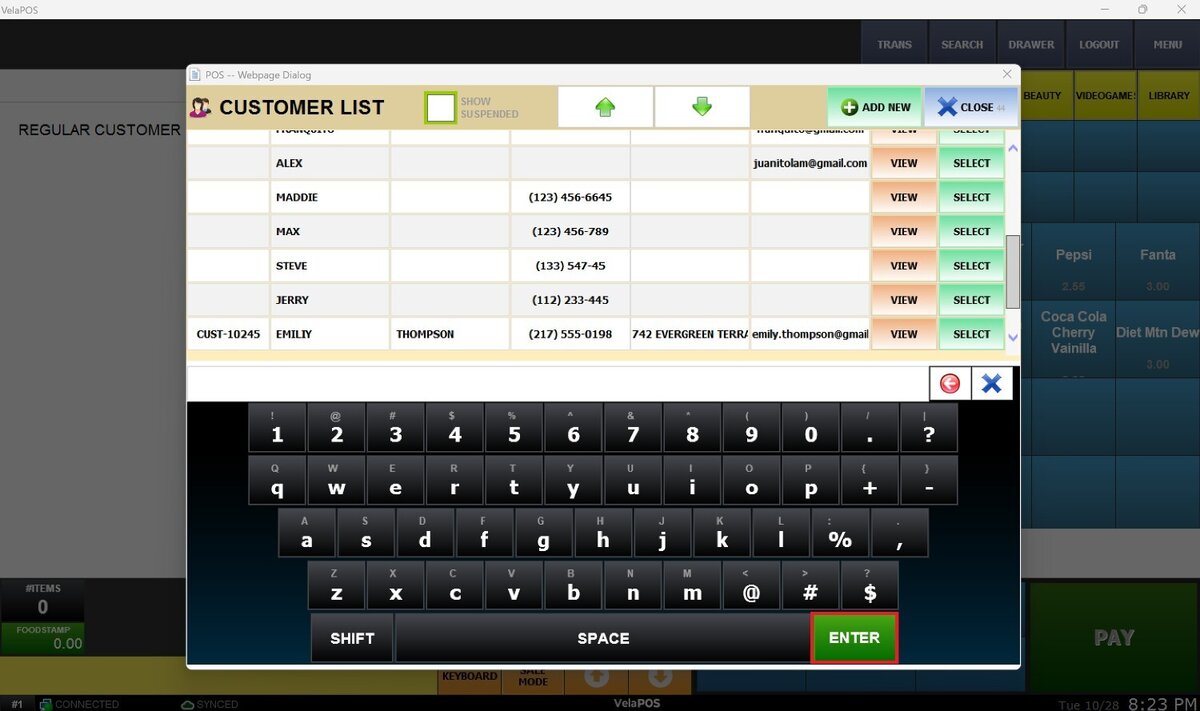
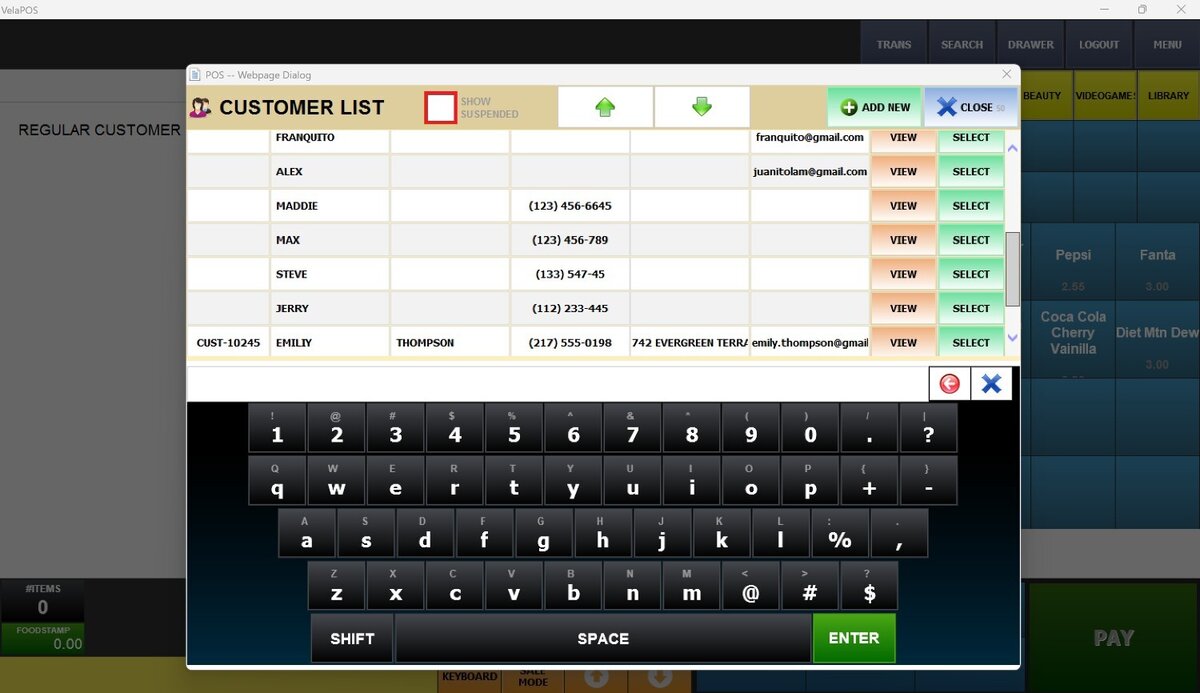
Hint: To include suspended customers on the search, check the box labeled SHOW SUSPENDED.
VIEW
To see more information about a specific customer, press VIEW next to their name.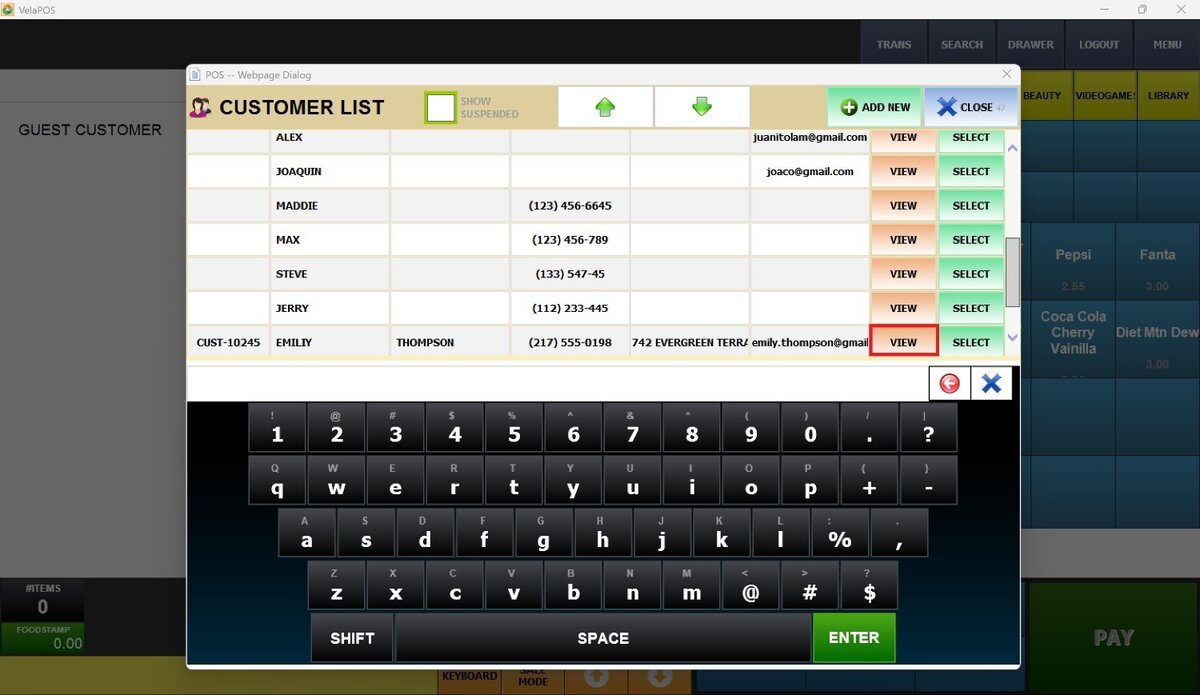
SELECT
Once the correct customer is found, press SELECT to link the customer account to the transaction. 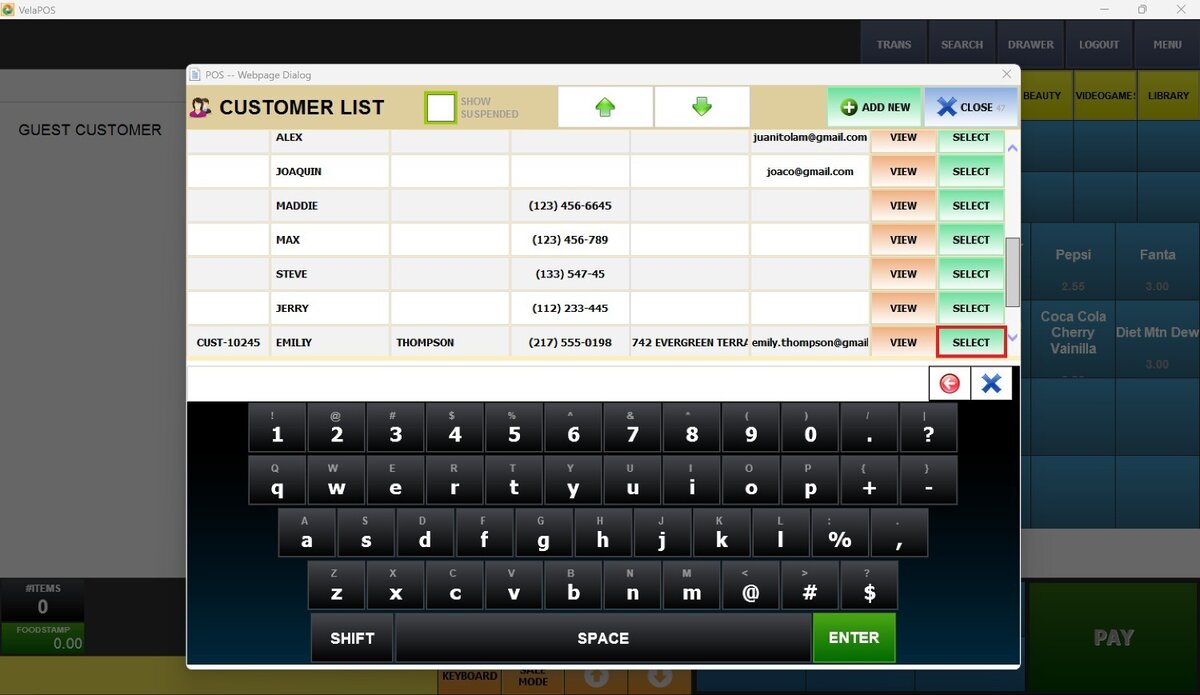
The customer will appear as shown below, featuring their personal information, the points they've earned and some actions you can perform. 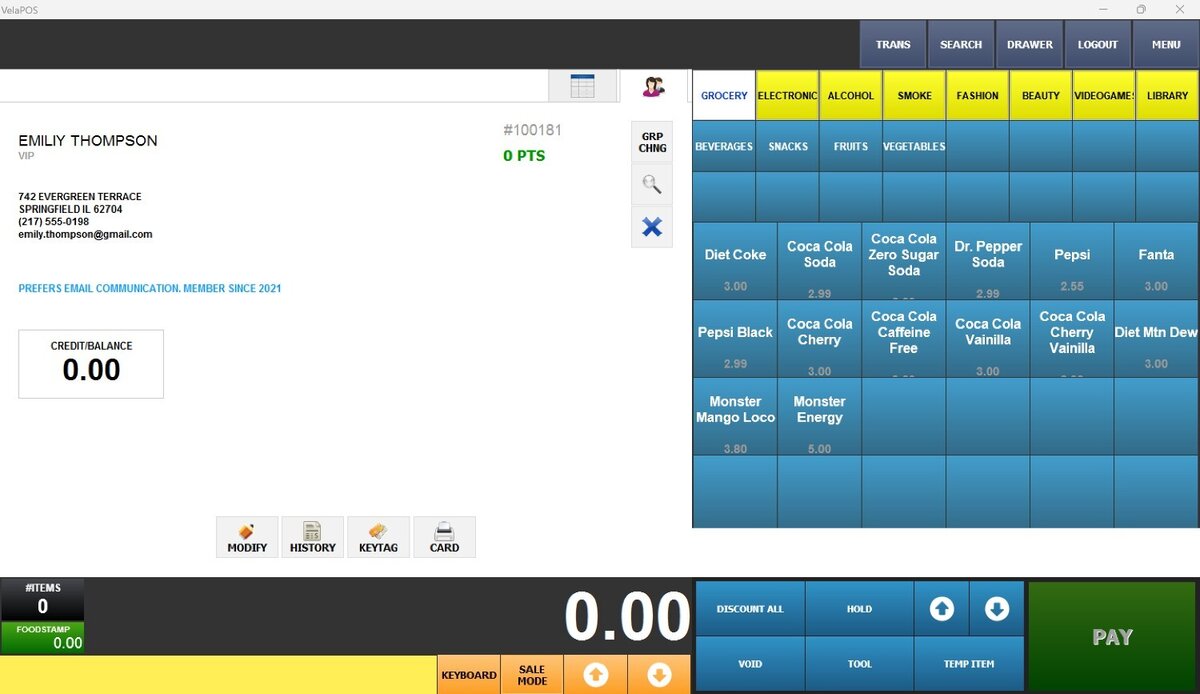
Actions
1. MODIFY: Opens the customer profile for editing.
2. HISTORY: Displays the customer's transaction history.
3. KEYTAG: Displays a keypad where you can enter the keytag number to connect the sale to a customer's account.
4. CARD: A screen appears displaying the customer's membership card, along with the print option.
5. COUPON: A screen will open, displaying to the customer all their eligible coupons.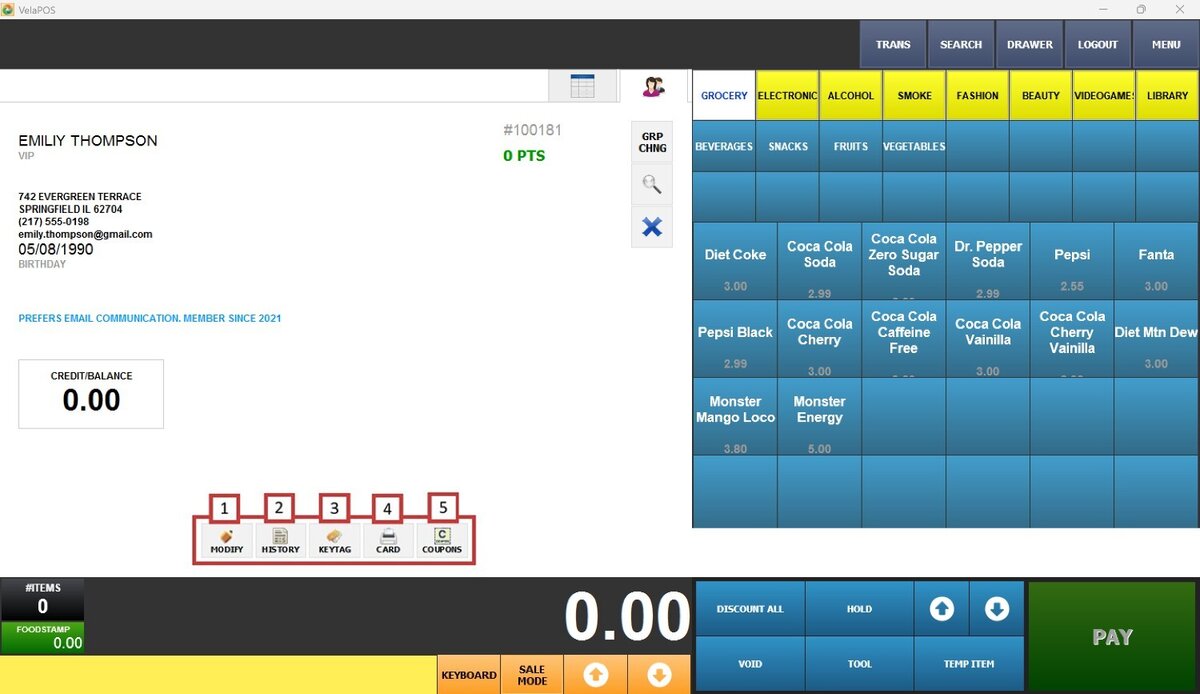
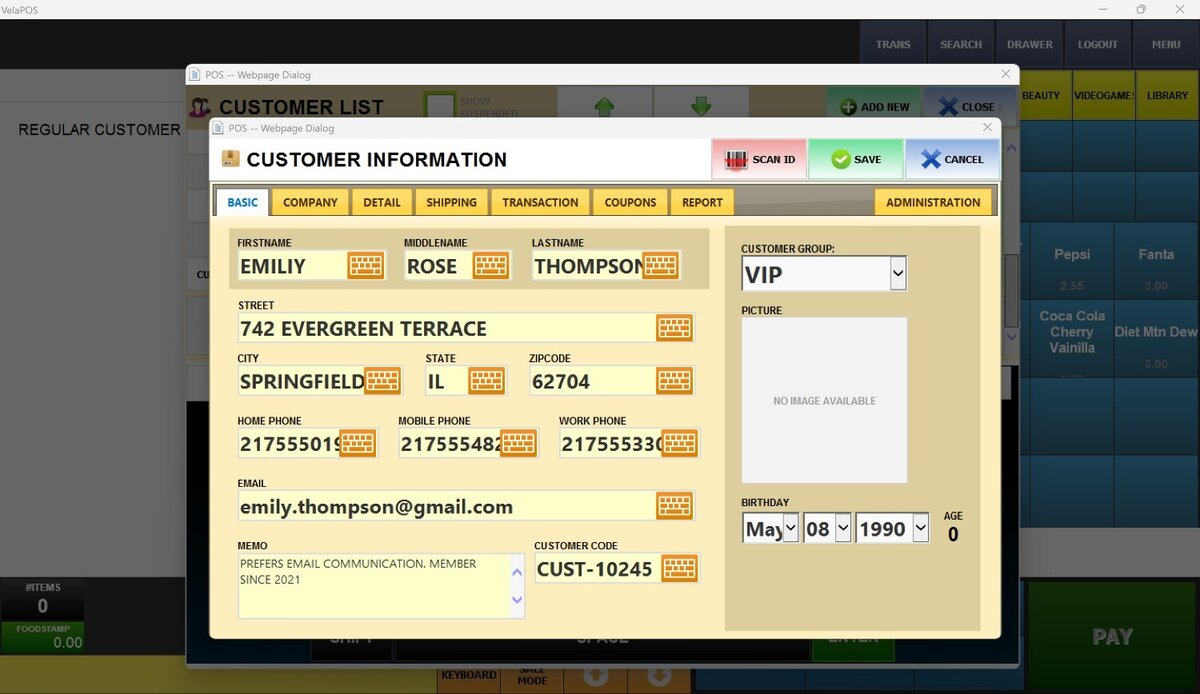
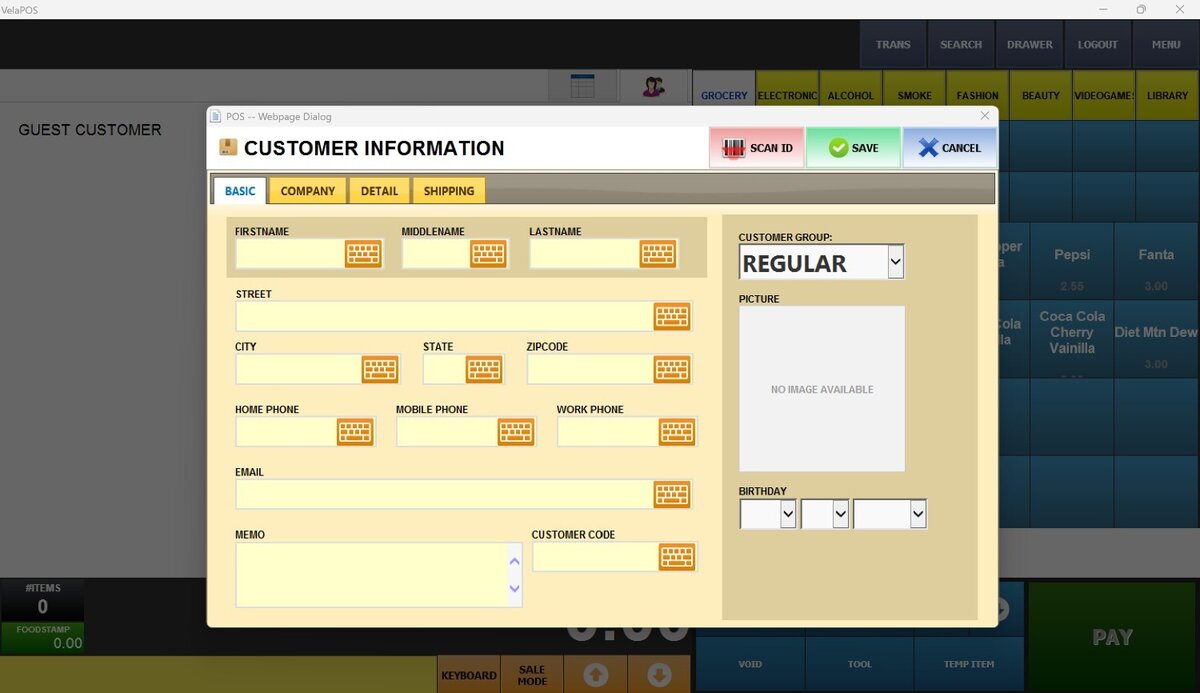
Hint: If the customer account hasn't been created yet, press ADD NEW in the pop-up window, and you'll be able to enter the details. Press SAVE to register them in the system.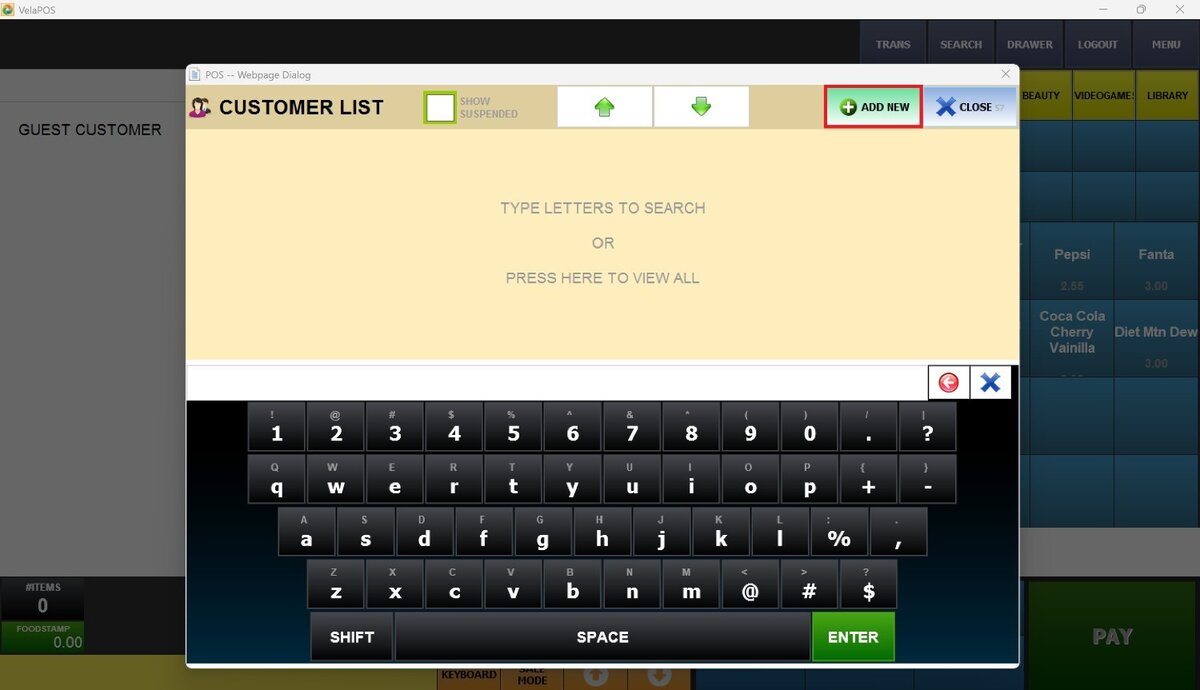
To create a new customer account from scratch, see How to Create a Customer Account.