Limits
This article explains how to configure product purchase limits and customize their settings step by step.
Main Screen>MENU>SETTINGS>PRODUCT>LIMITS
Go to MENU and press SETTINGS.
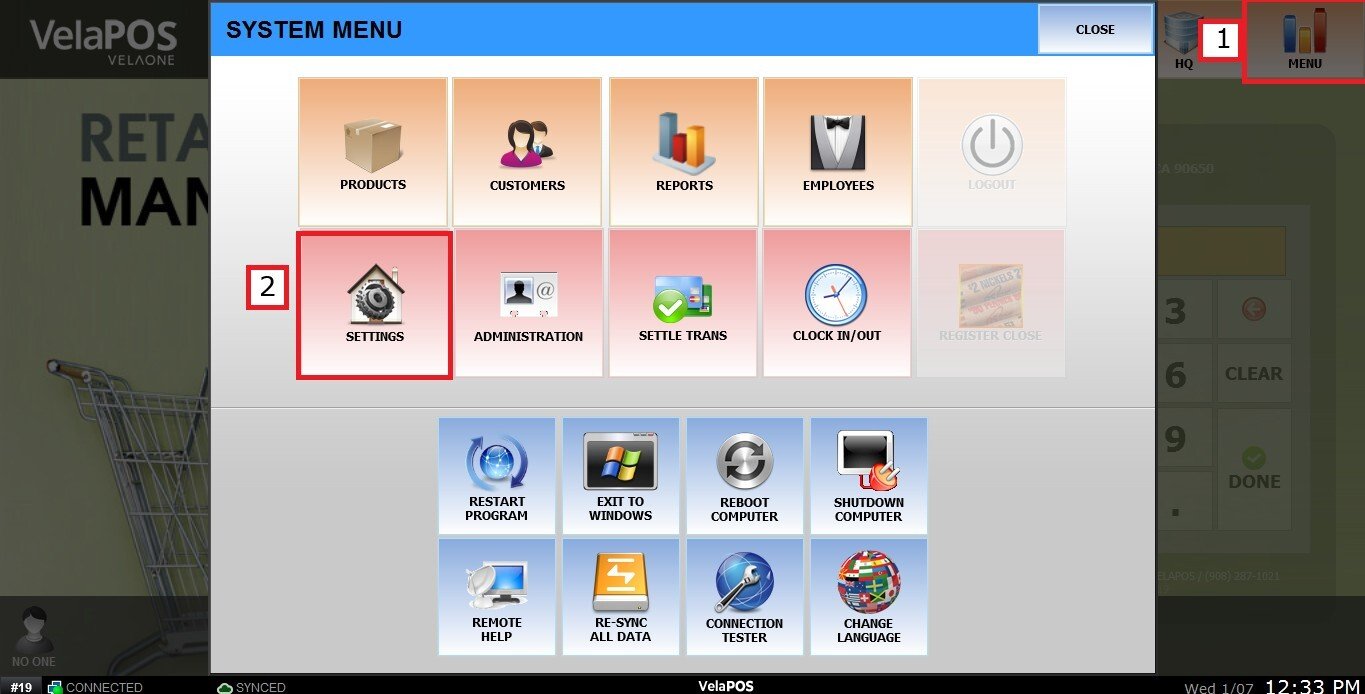
Select PRODUCT and press on the LIMITS tab to see the configuration.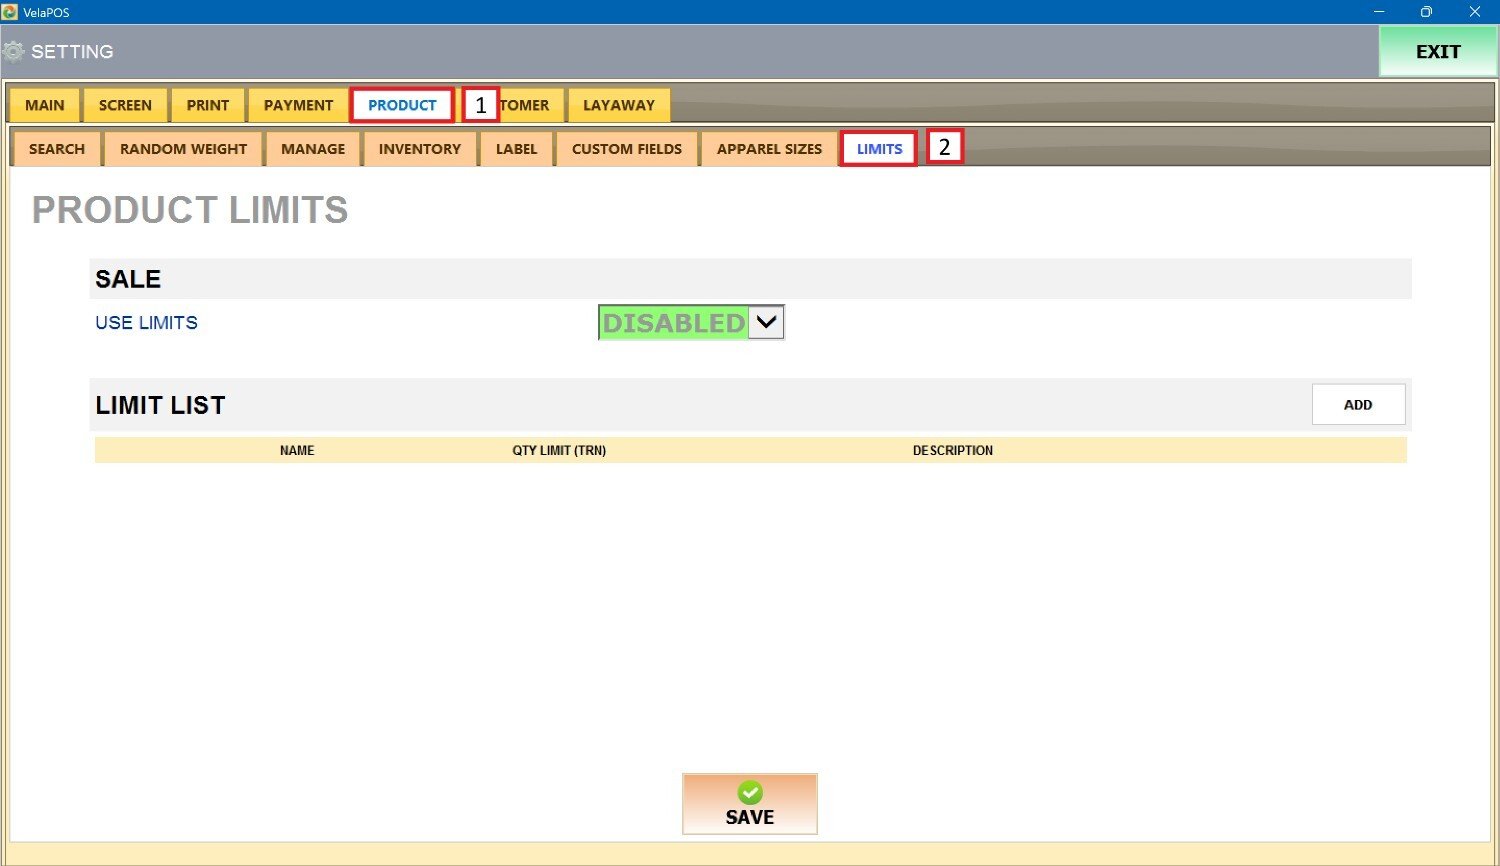
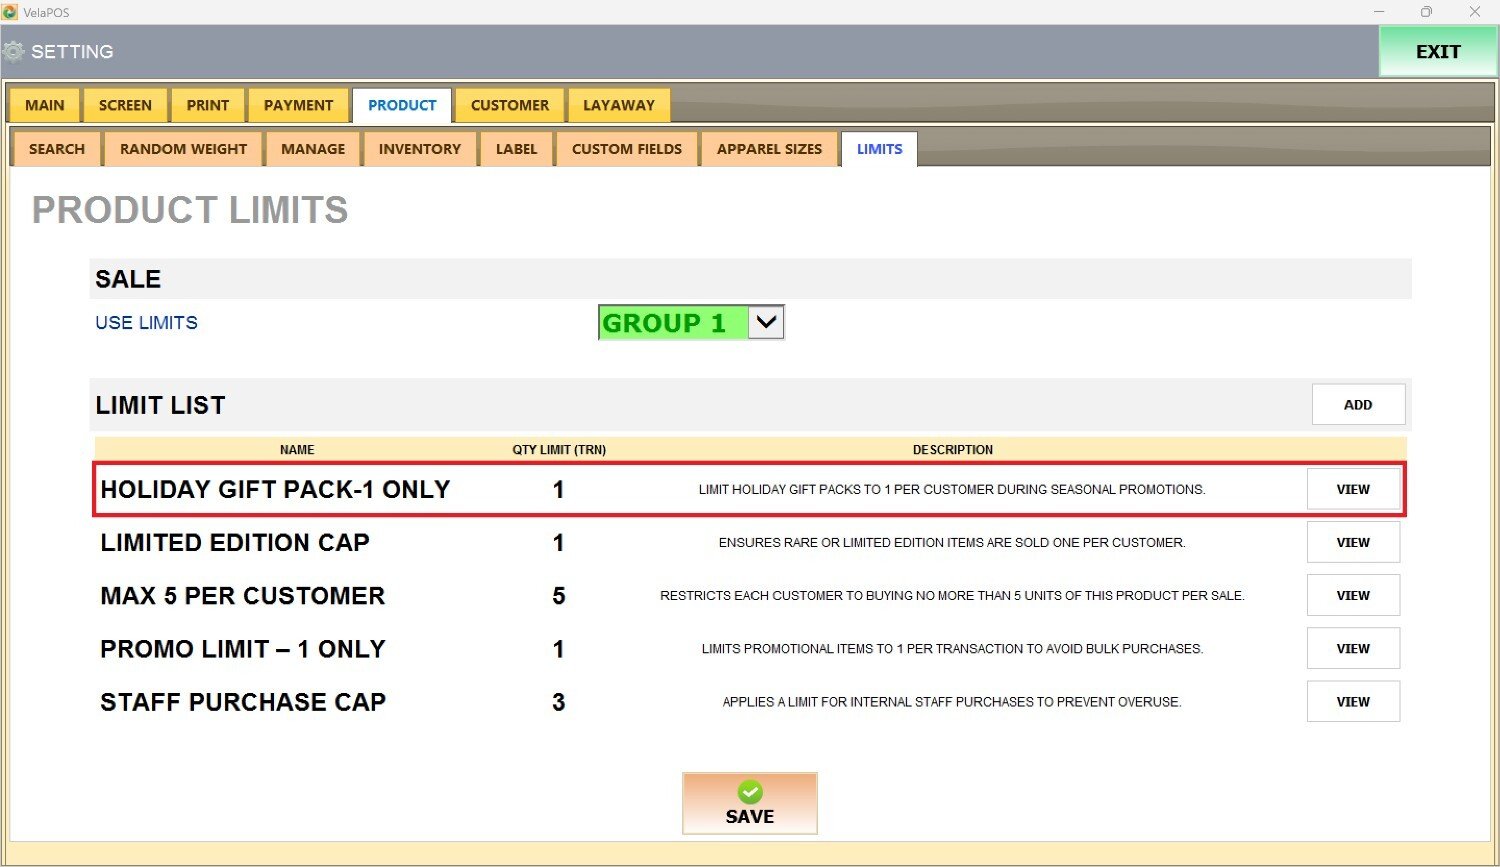
SALE
Under SALE, you will find the USE LIMIT drop-down menu. This setting determines whether product purchase limits are enforced during checkout and which limit group will apply.
1. DISABLED: No product limits are enforced at checkout.
2. GROUP 1-5: Select the limit group that will be enforced during checkout.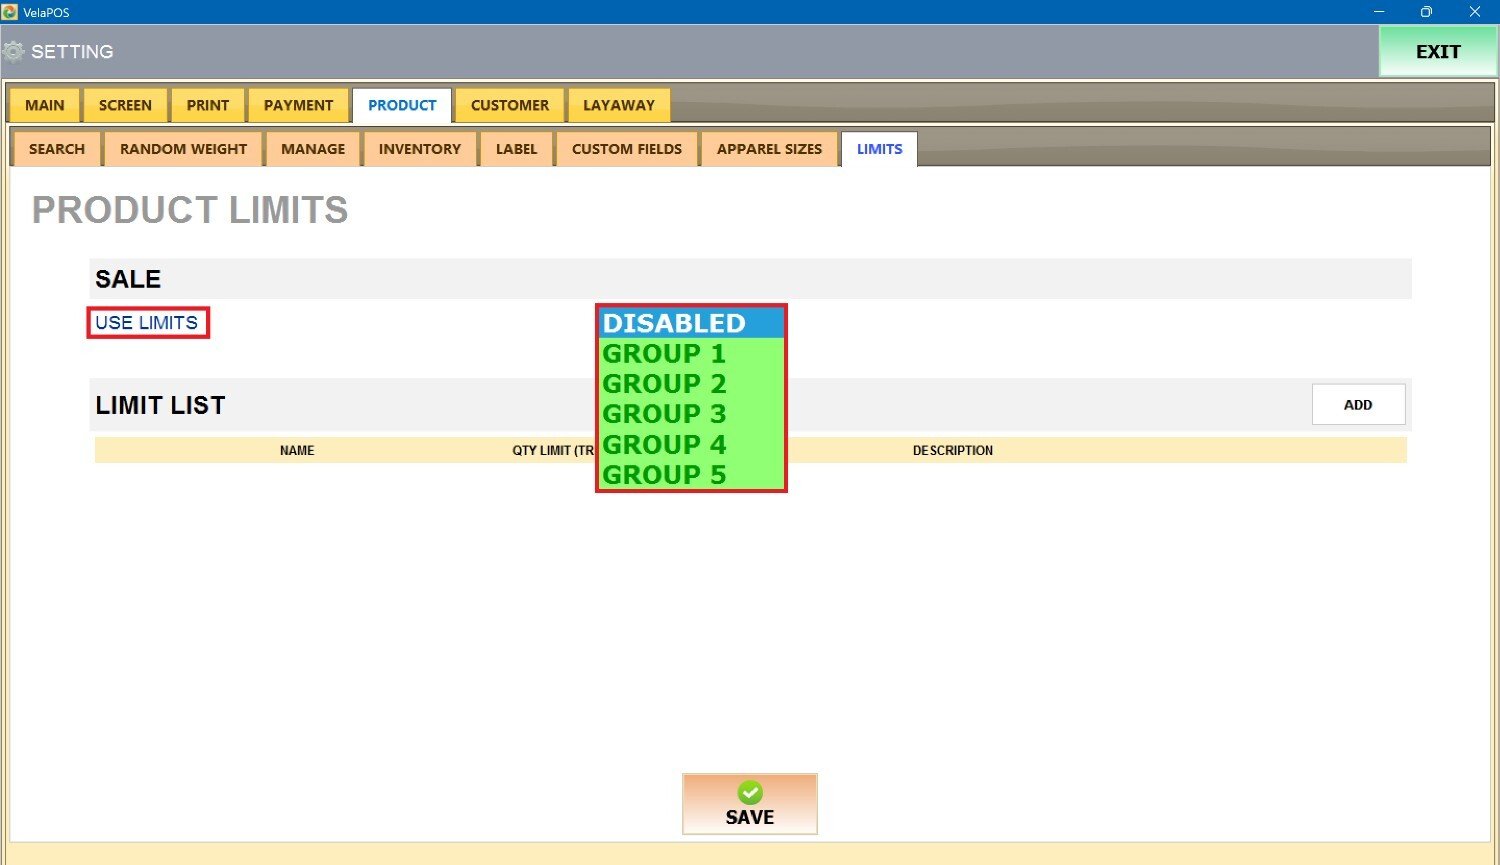
LIMIT LIST
This section displays all limits currently created in the system.
To create a limit, press ADD next to LIMIT LIST.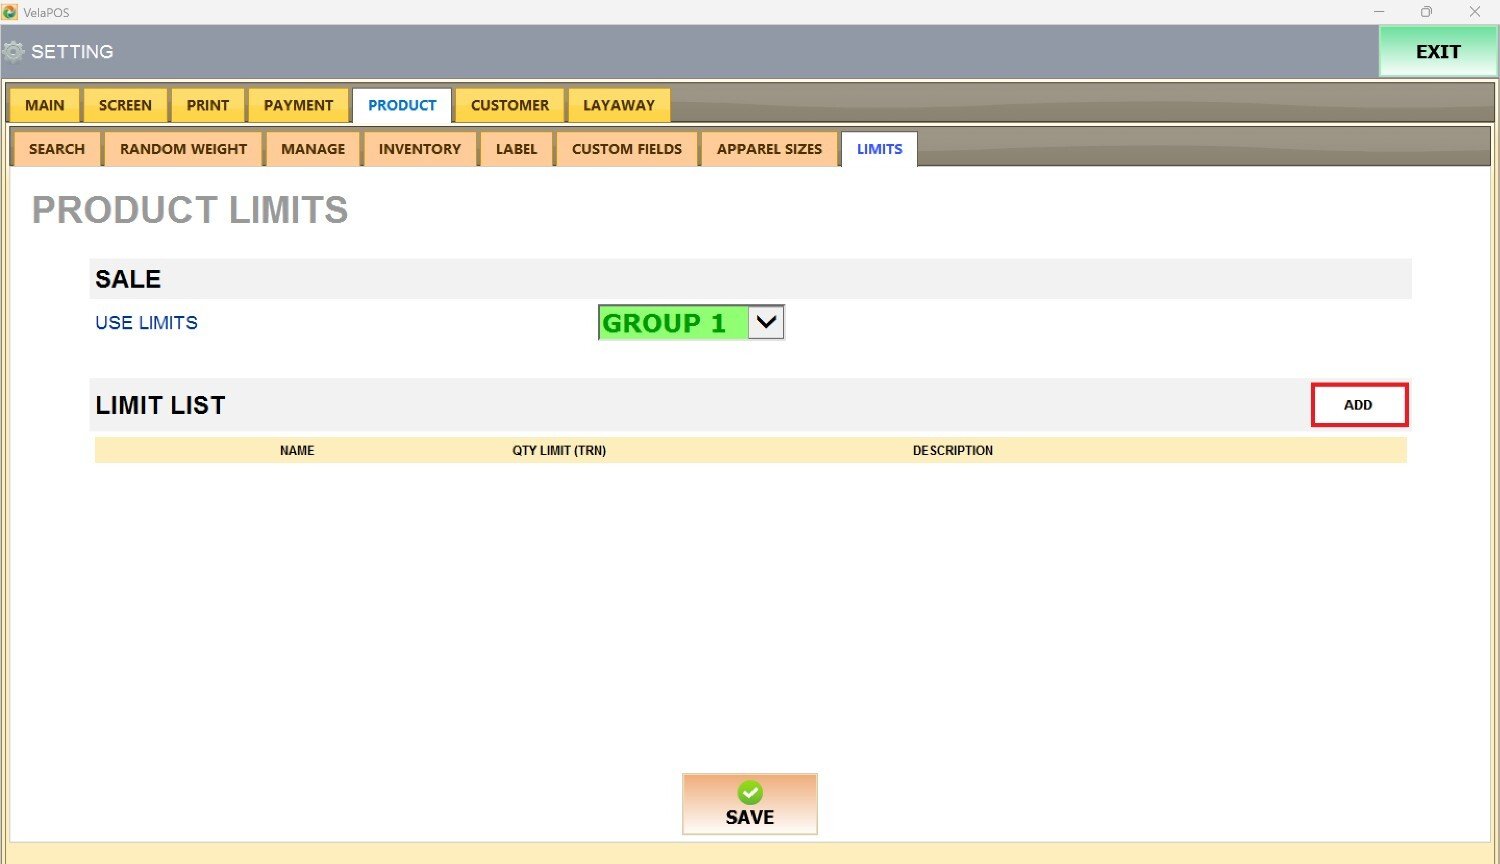
A configuration window will appear where you can enter the limit details.
LIMIT CONFIGURATION FIELDS
1. NAME: Enter a name for the limit. This label will appear in the Limit List.
2. QTY LIMIT PER TRANSACTION: Define the maximum quantity of a product that can be sold within a single transaction.
3. DESCRIPTION (MESSAGE FOR EMPLOYEES): Add a short note explaining the purpose of the limit. This helps staff understand the policy and communicate it to customers if needed.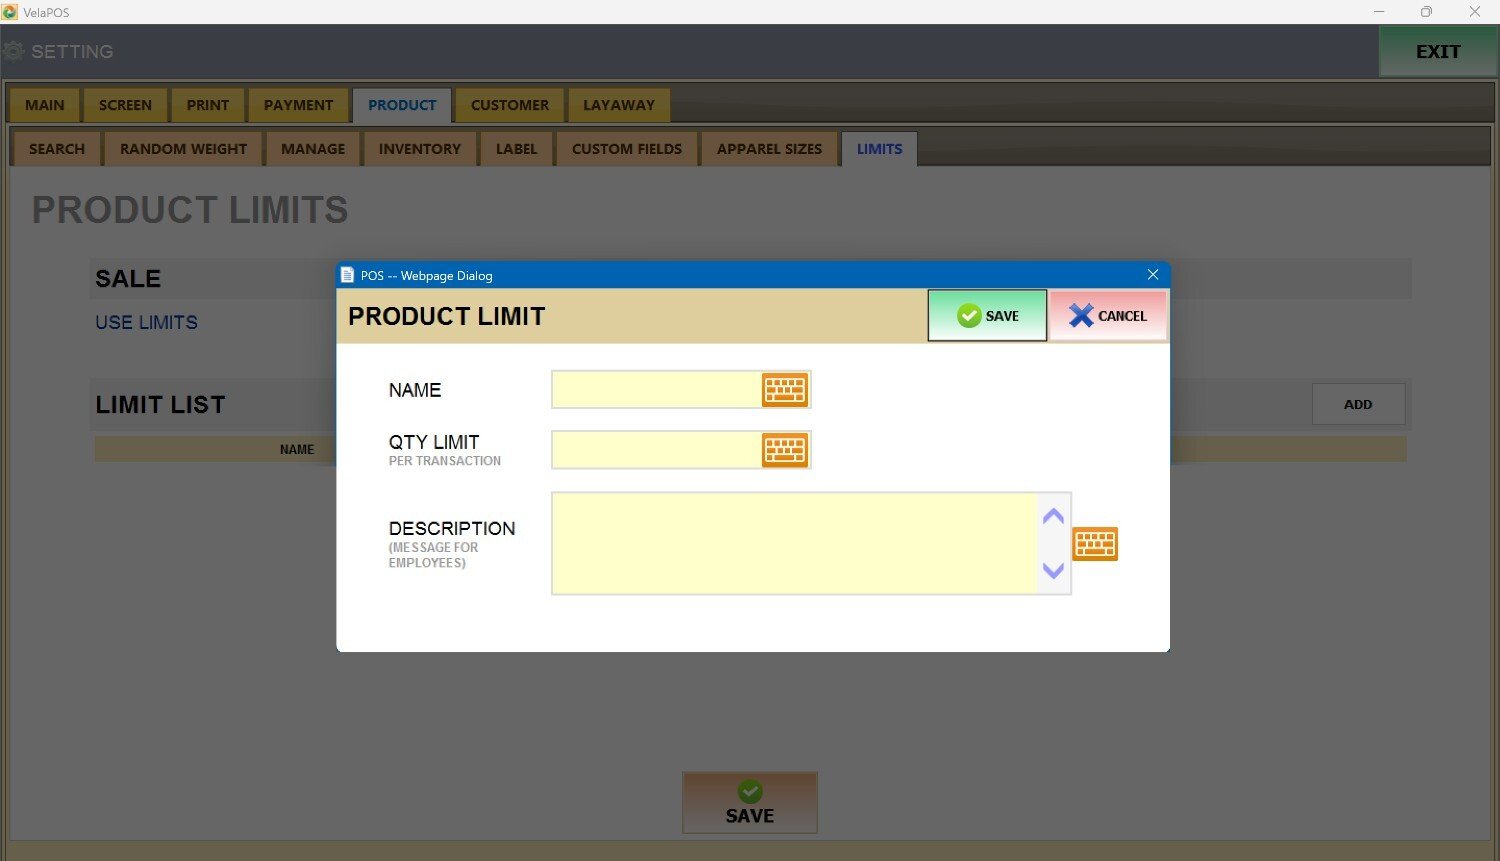
Once all information has been entered, press SAVE to create the limit.
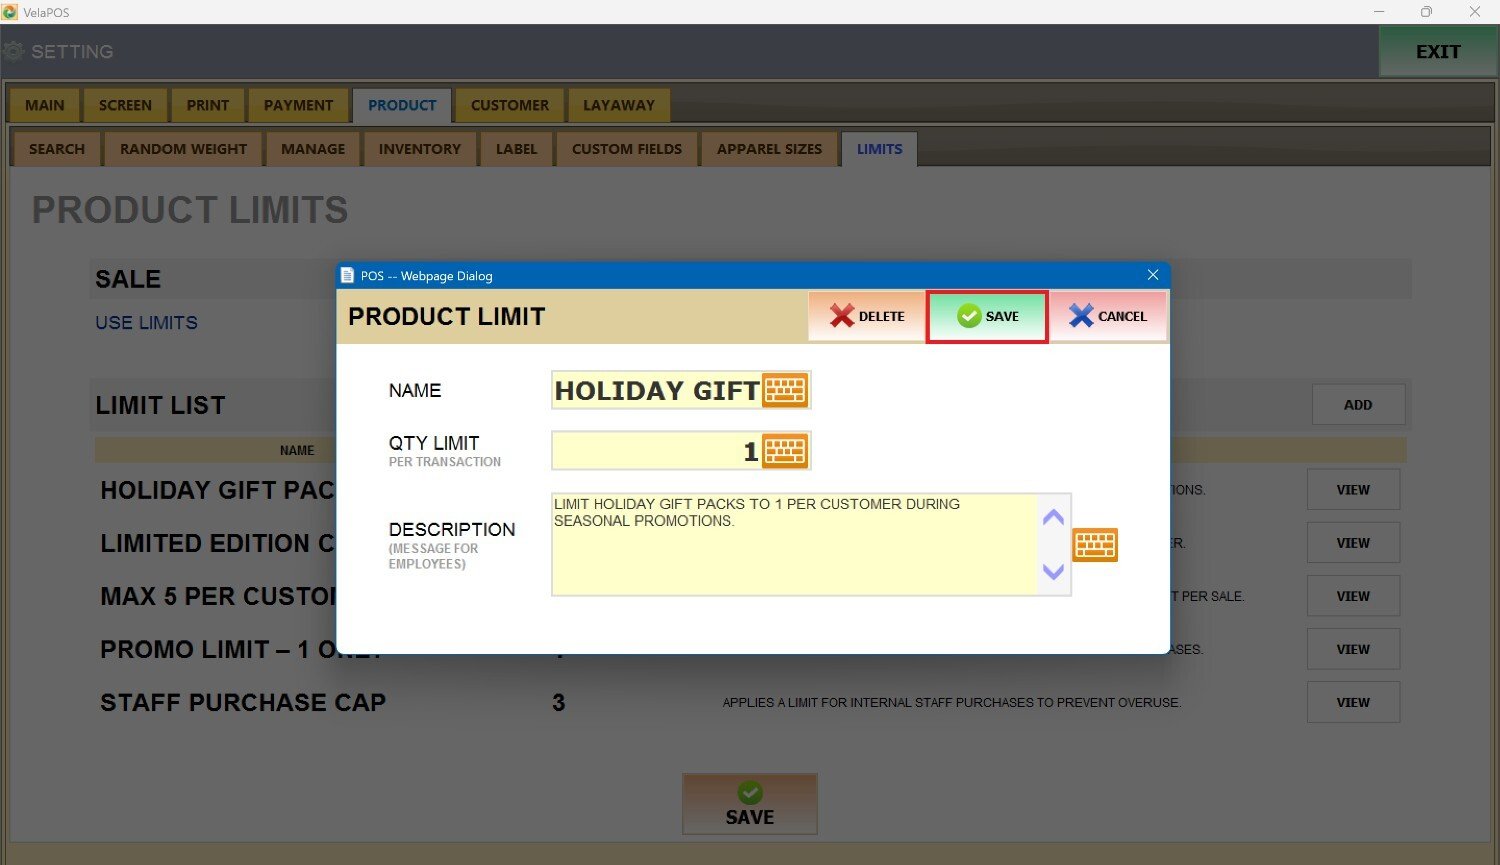
Result:
To apply limits to a specific product, refer to Limits. To apply limits to an entire category, see Category Limits.