New Apparel
This feature enables you to record new inventory quantities for apparel products added through invoices and distribute them across your different locations.
Main screen > MENU > PRODUCT > INVENTORY > ADDITIONS > NEW APPAREL
Go to MENU and select PRODUCTS.

Go to INVENTORY, select ADDITIONS and press on NEW APPAREL.

From the PRODUCT INFO tab, enter the product information. The minimum required details are the product code, name, category, and the selected vendor.
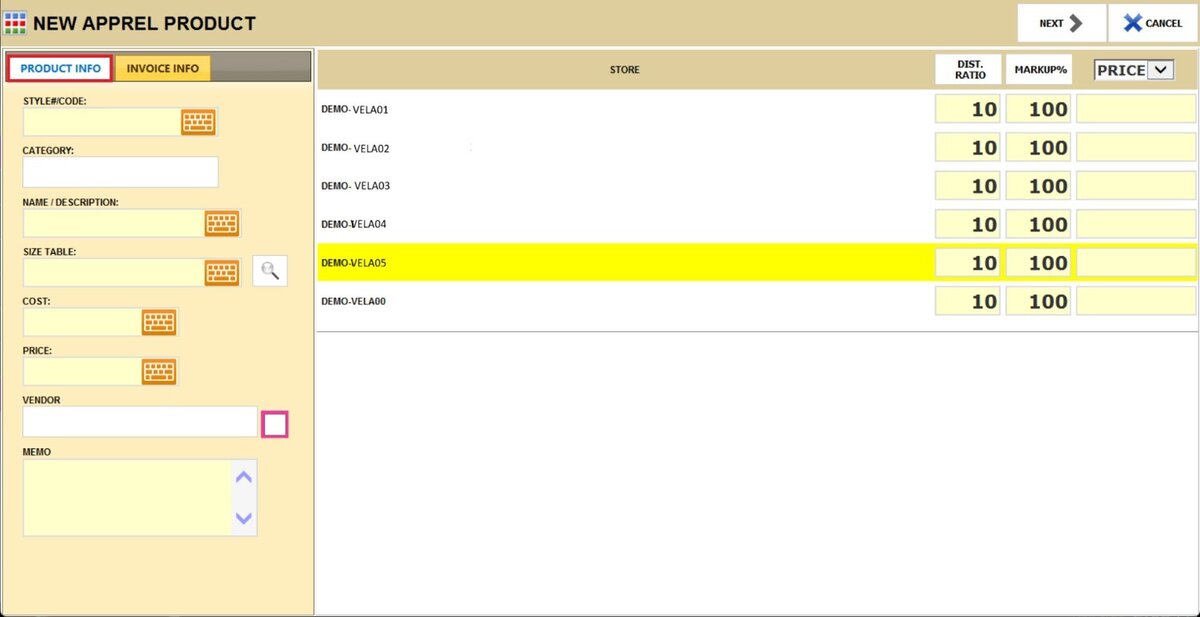
Enter the quantities in this table based on the apparel sizes already configured in the system.

Hint: To set the apparel product matrix, go to apparel sizes.
From the INVOICE INFO tab, you can enter the invoice details.

Once completed, click on NEXT.

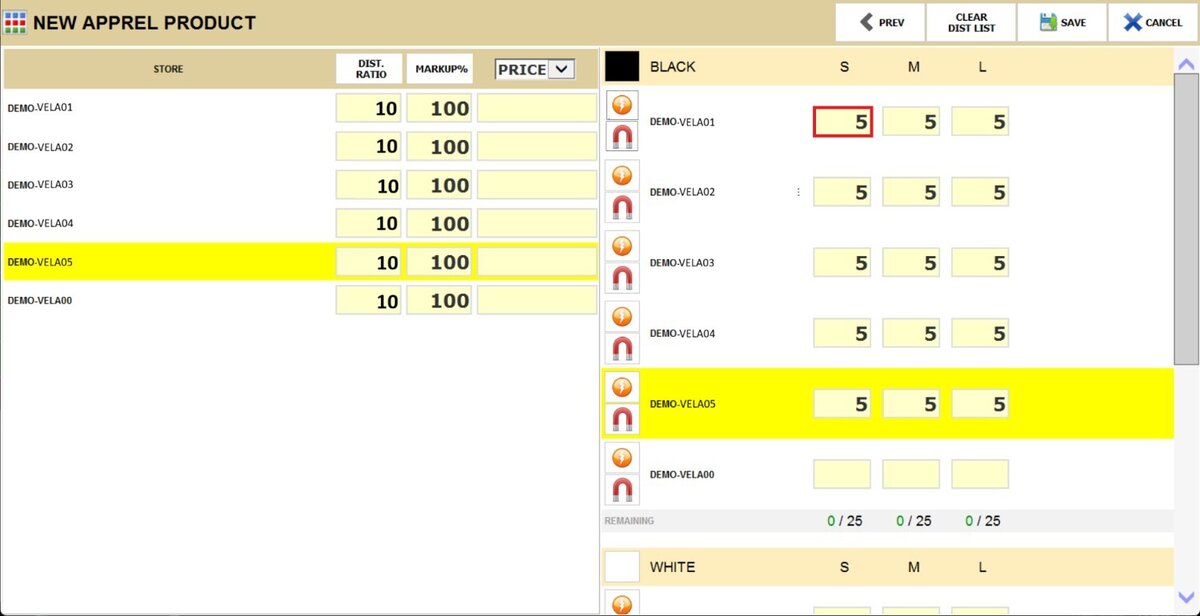
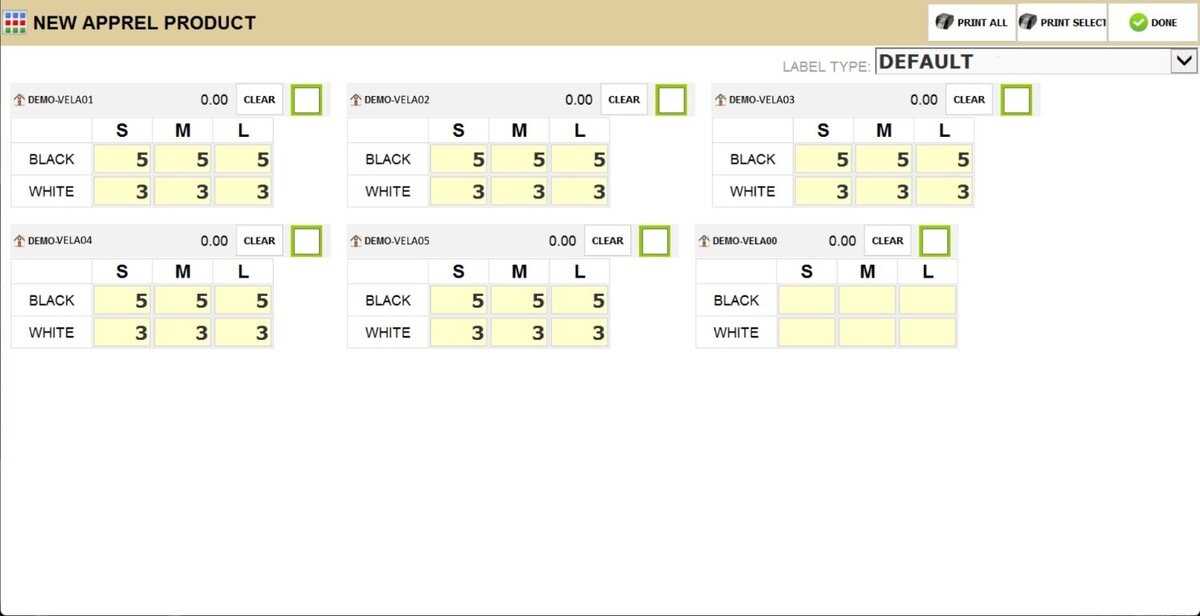
On this screen, you can distribute all the inventory across your stores.
Use the MAGNET icon to move all the inventory to a single store, or the LIGHTNING BOLT icon to distribute it based on the distribution ratio set in the DIST RATIO field.
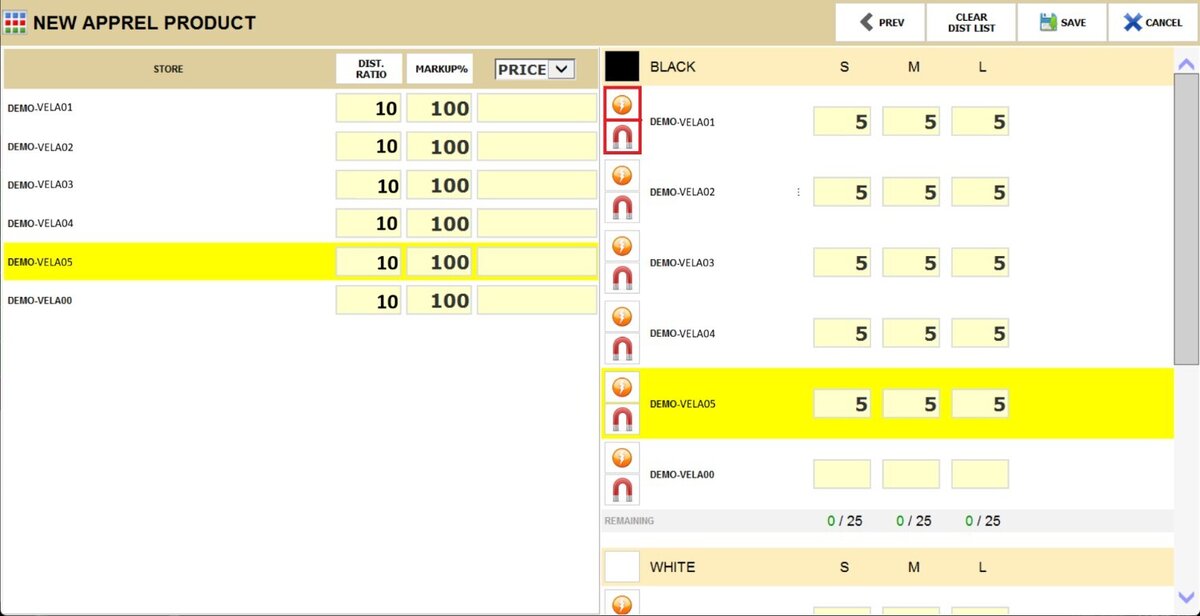
You can also input a specific amount by clicking on the size field.
Note: Use the CLEAR DIST LIST button to start over with the distribution.

After completing the process, click on DONE.

Press SAVE & CLOSE to save the invoice for later, or PROCESS & DISTRIBUTION to process and distribute the inventory across your locations.

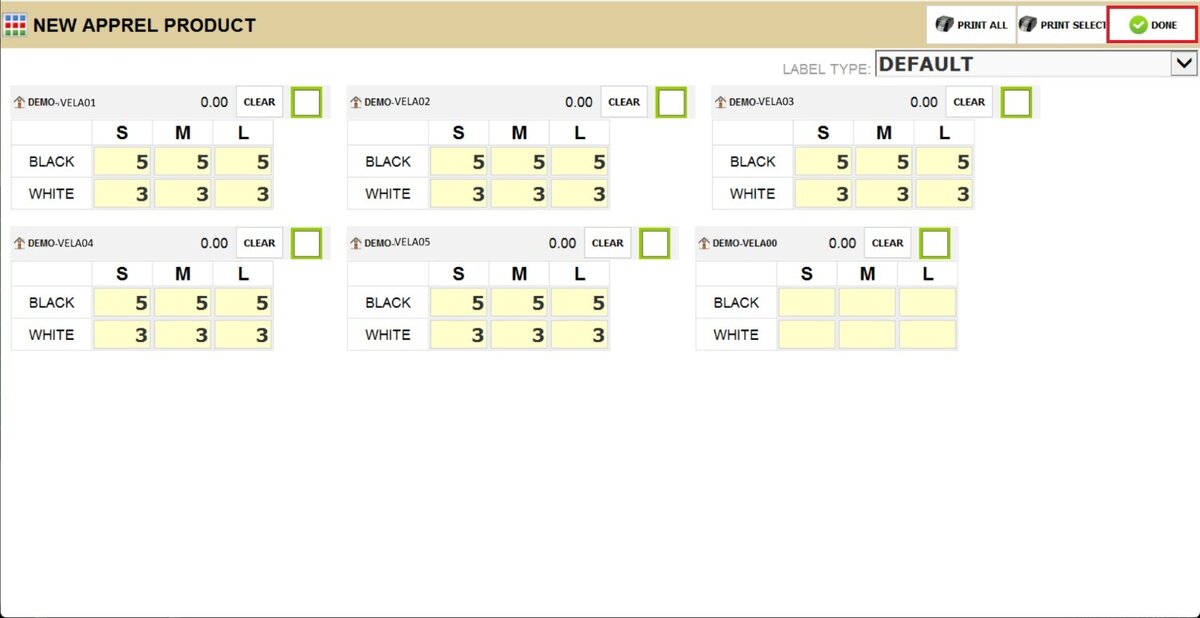
If you select PROCESS & DISTRIBUTION, the system will take you to this screen, where you can redistribute all the inventory, print the invoice, and print selected labels from your configured options for selected or all products.
Once completed, click on DONE.
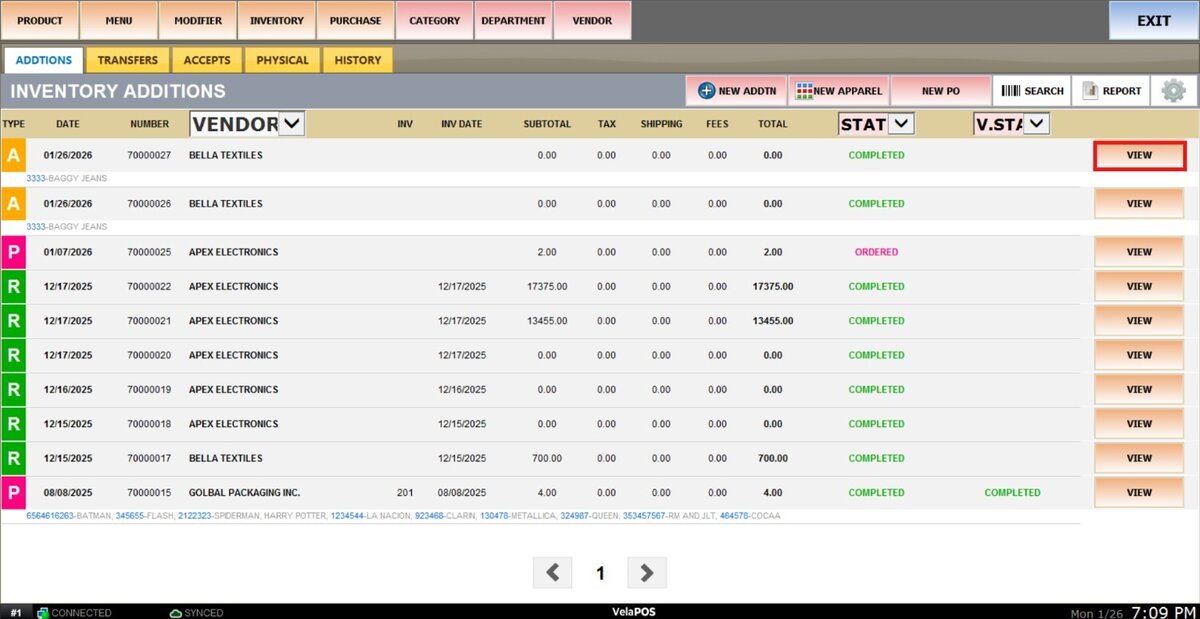
Result:
Here you can see the invoice with a COMPLETED status.

To keep editing the invoice, click on VIEW.