QSR
This setting allows you to create and hold orders before payment, helping streamline operations and improve efficiency during high-volume sales.
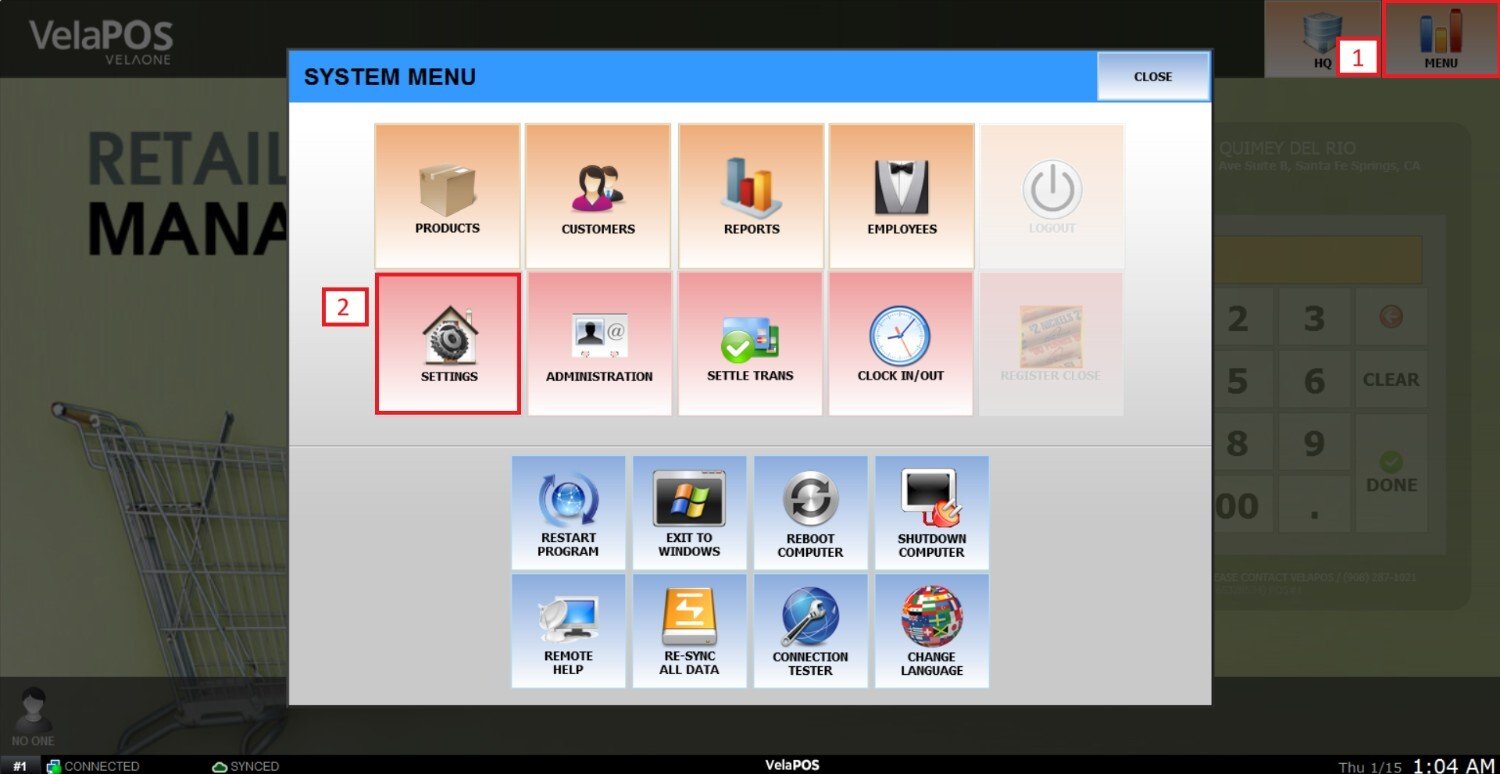
Main screen > MENU > SETTINGS > MAIN > QSR
From the main screen, go to MENU and click SETTINGS.
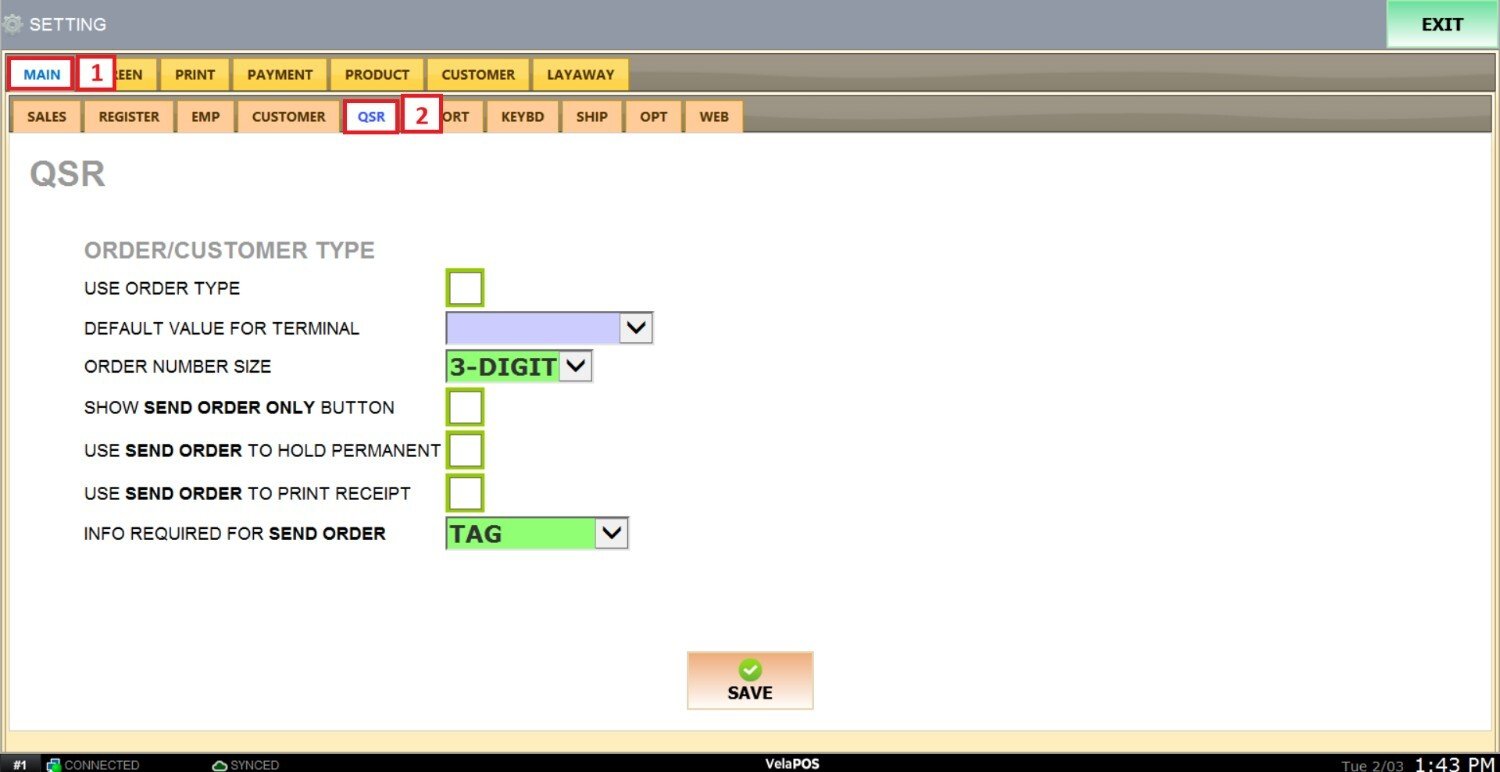
Under MAIN, open the QSR tab, there you will find different sections.
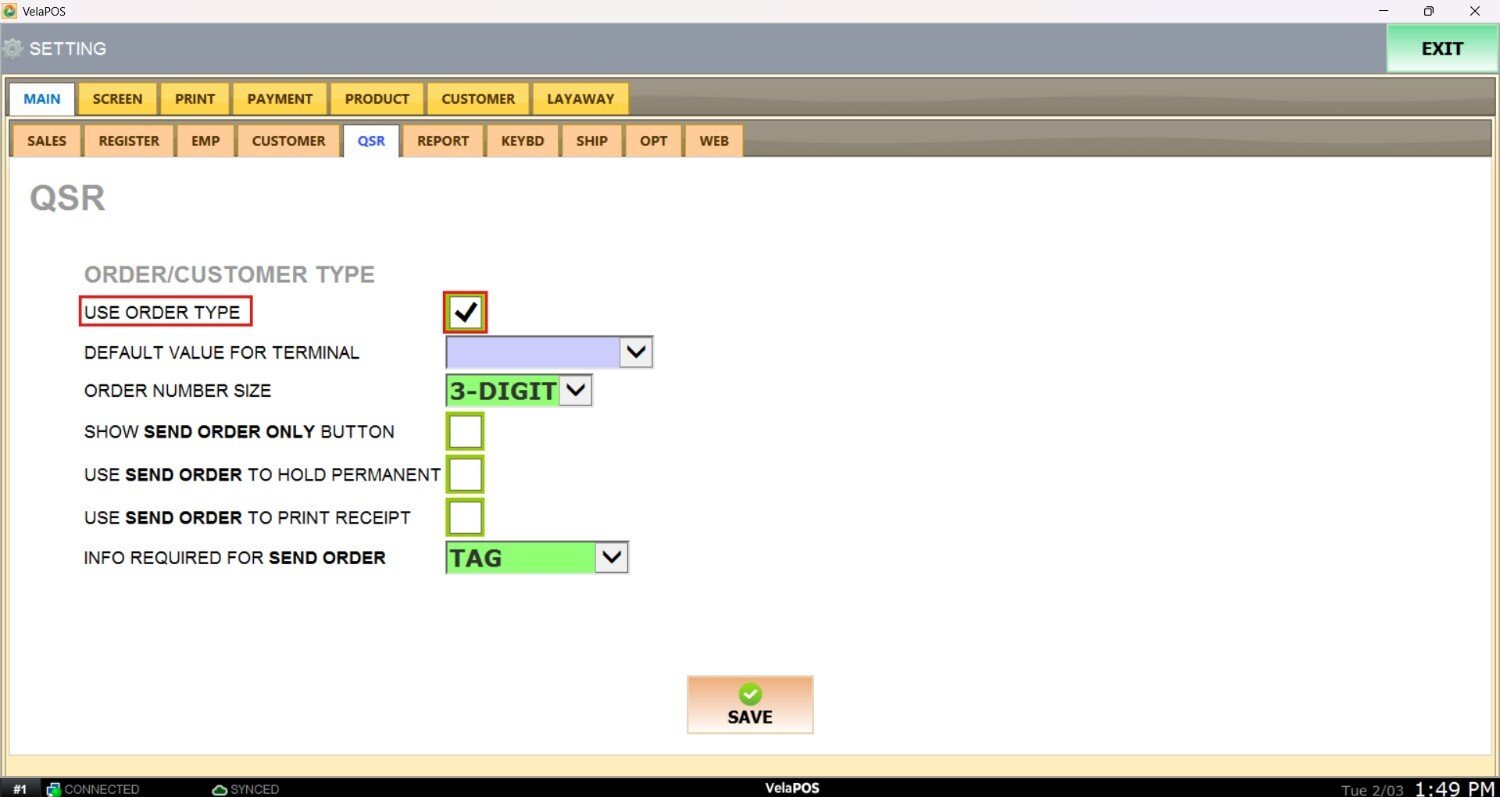
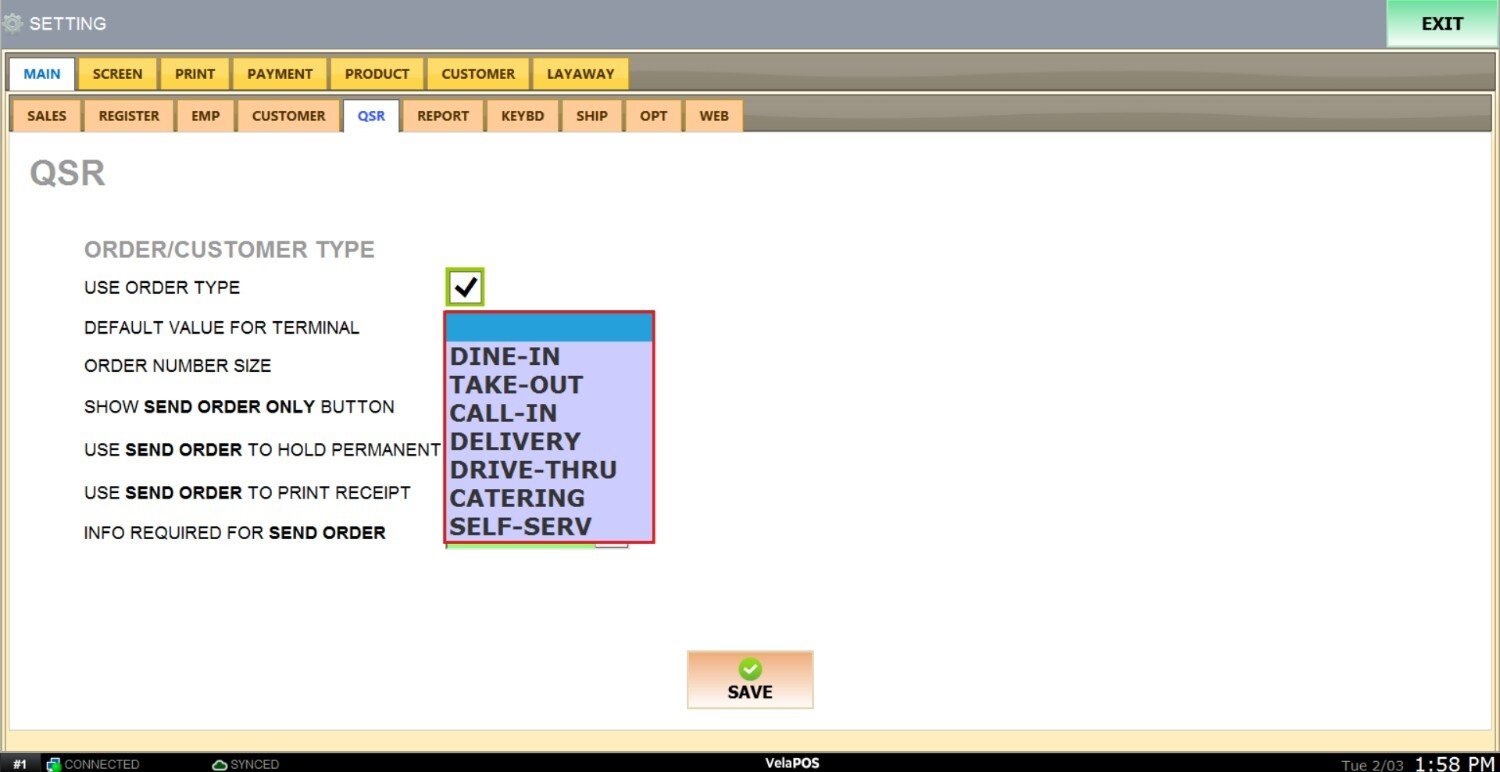
USE ORDER TYPE
Allows you to display a destination on the receipt. If no default order type is defined, the system will prompt a destination selection pop-up for the cashier to choose.
DEFAULT ORDER FOR TERMINAL
Defines the default order type used during sales.
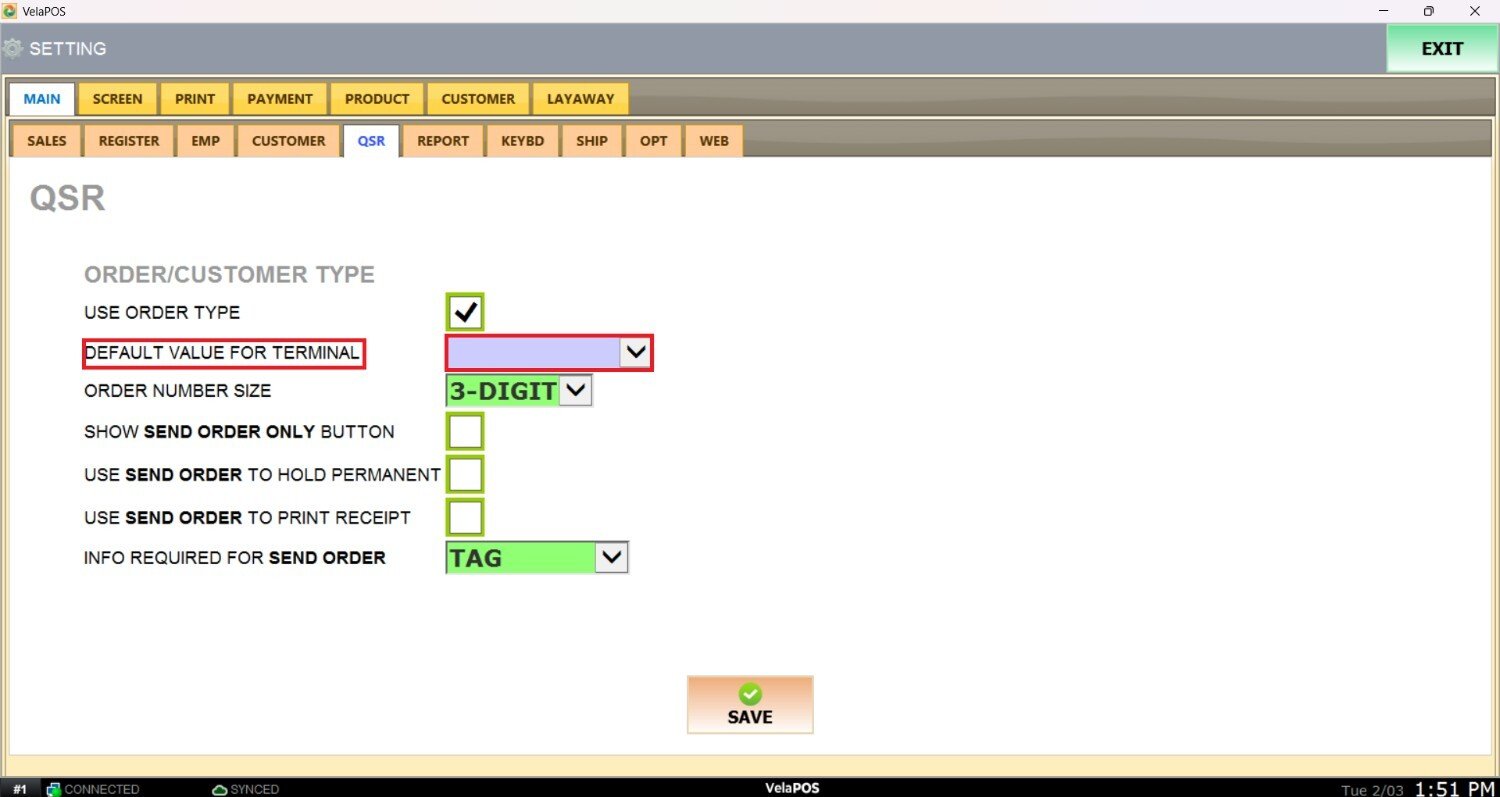
Select an option from the dropdown menu. If left blank, the system will prompt you to choose an order type each time you open the sales screen.
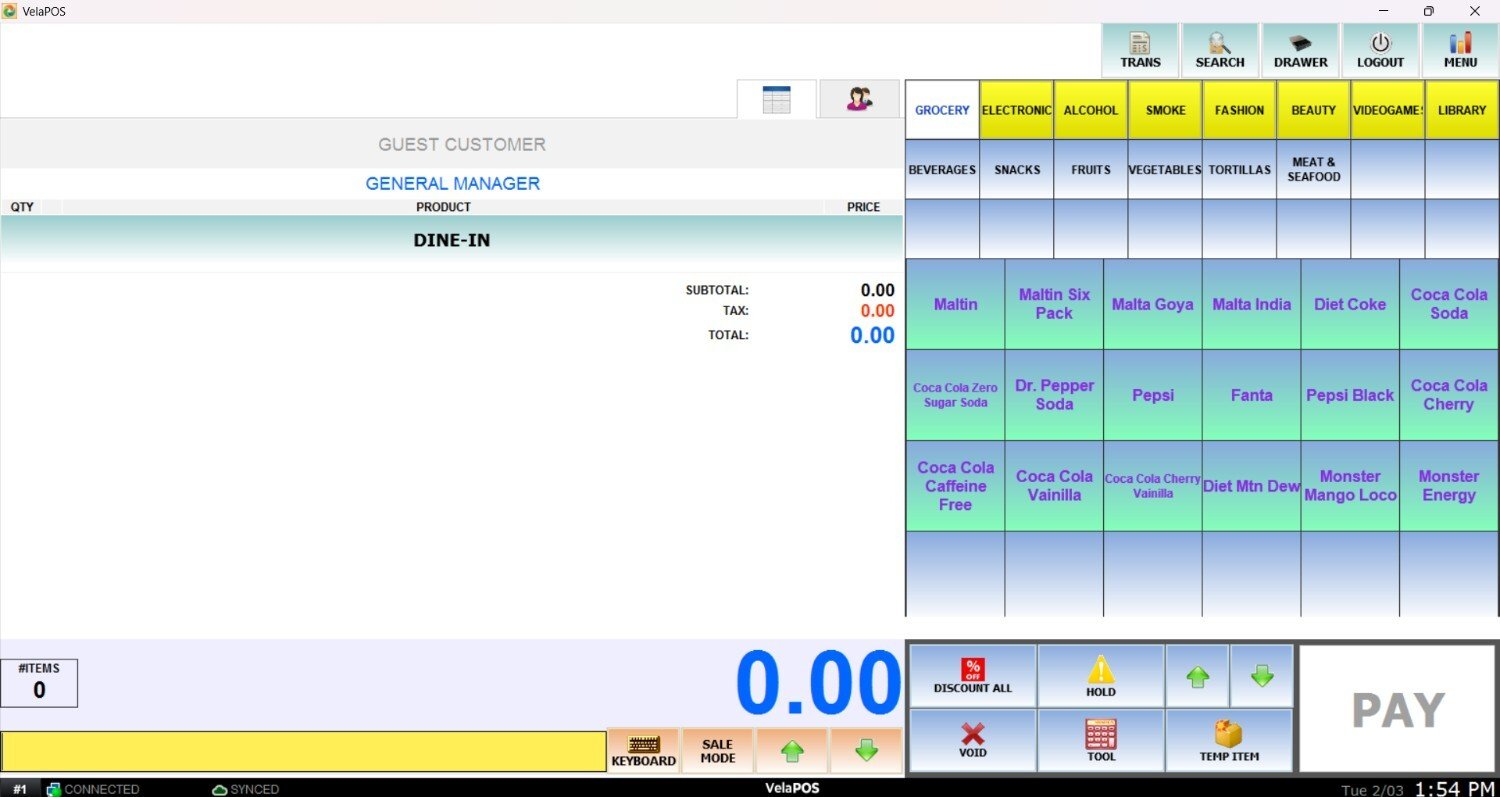
Result:
This is how the screen looks with this feature enabled.
This is the prompt that appears when the selection is left blank.

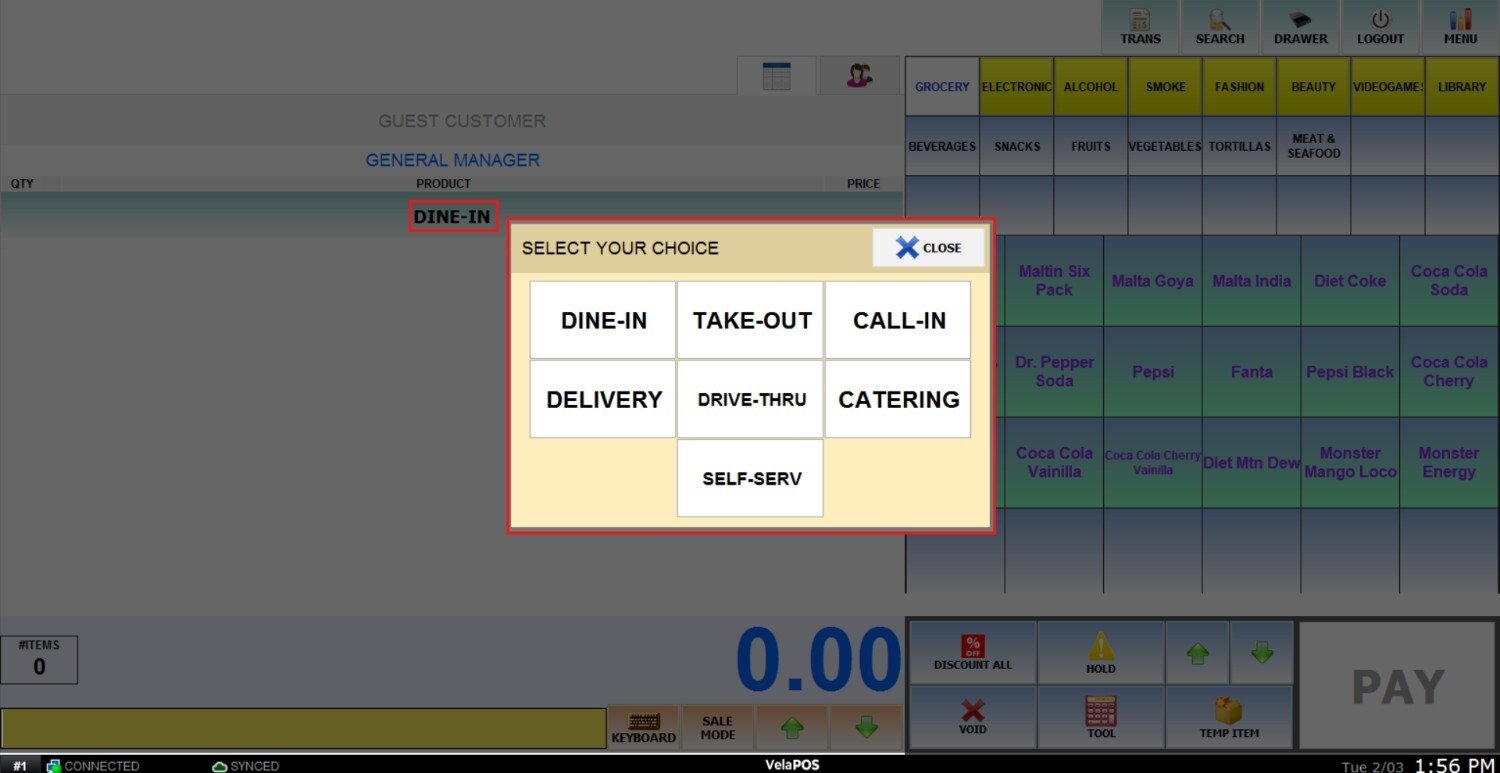
Note: You can also change your selection from the sales screen by pressing on the order type name.
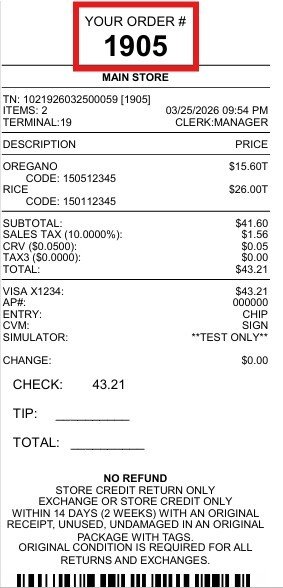
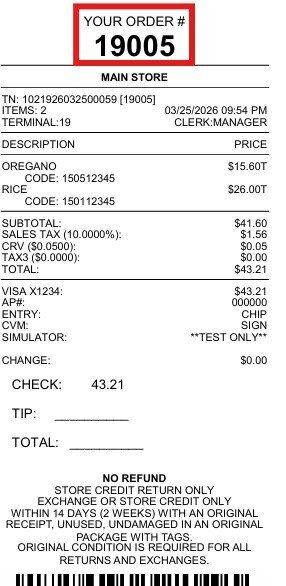
ORDER NUMBER SIZE
Defines the length of the order number displayed in the system. You can choose between a 2-digit or 3-digit format.
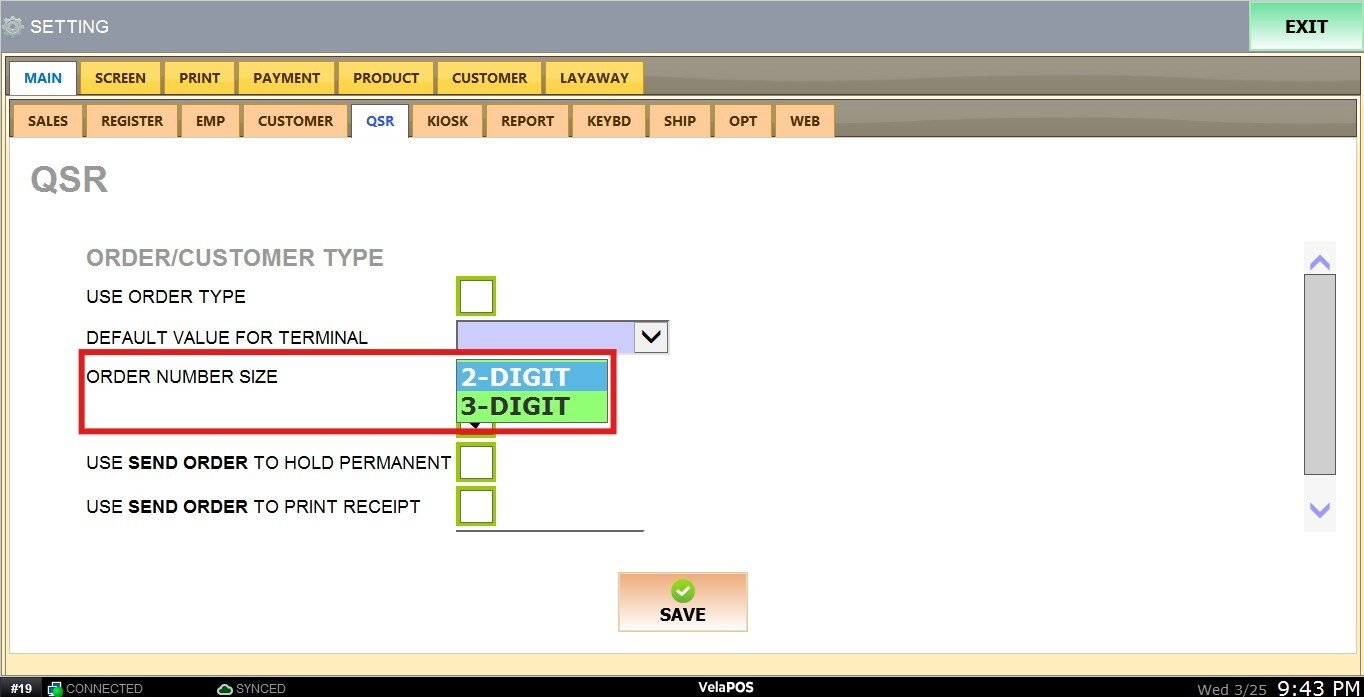
Result:
If you select the 2-digit option, the order number will be displayed as follows:
If you select the 3-digit option, the order number will be displayed as follows:
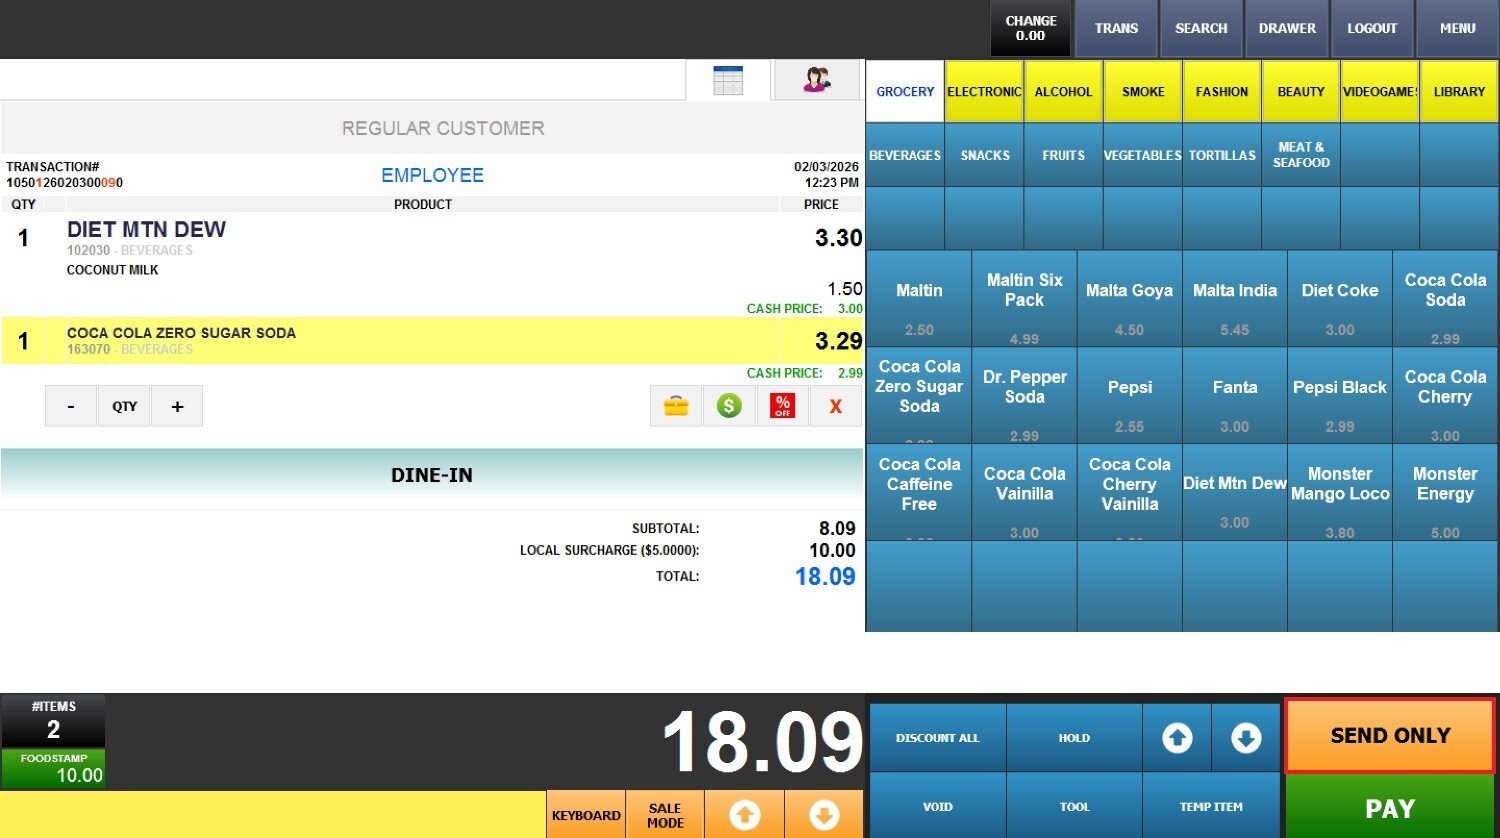
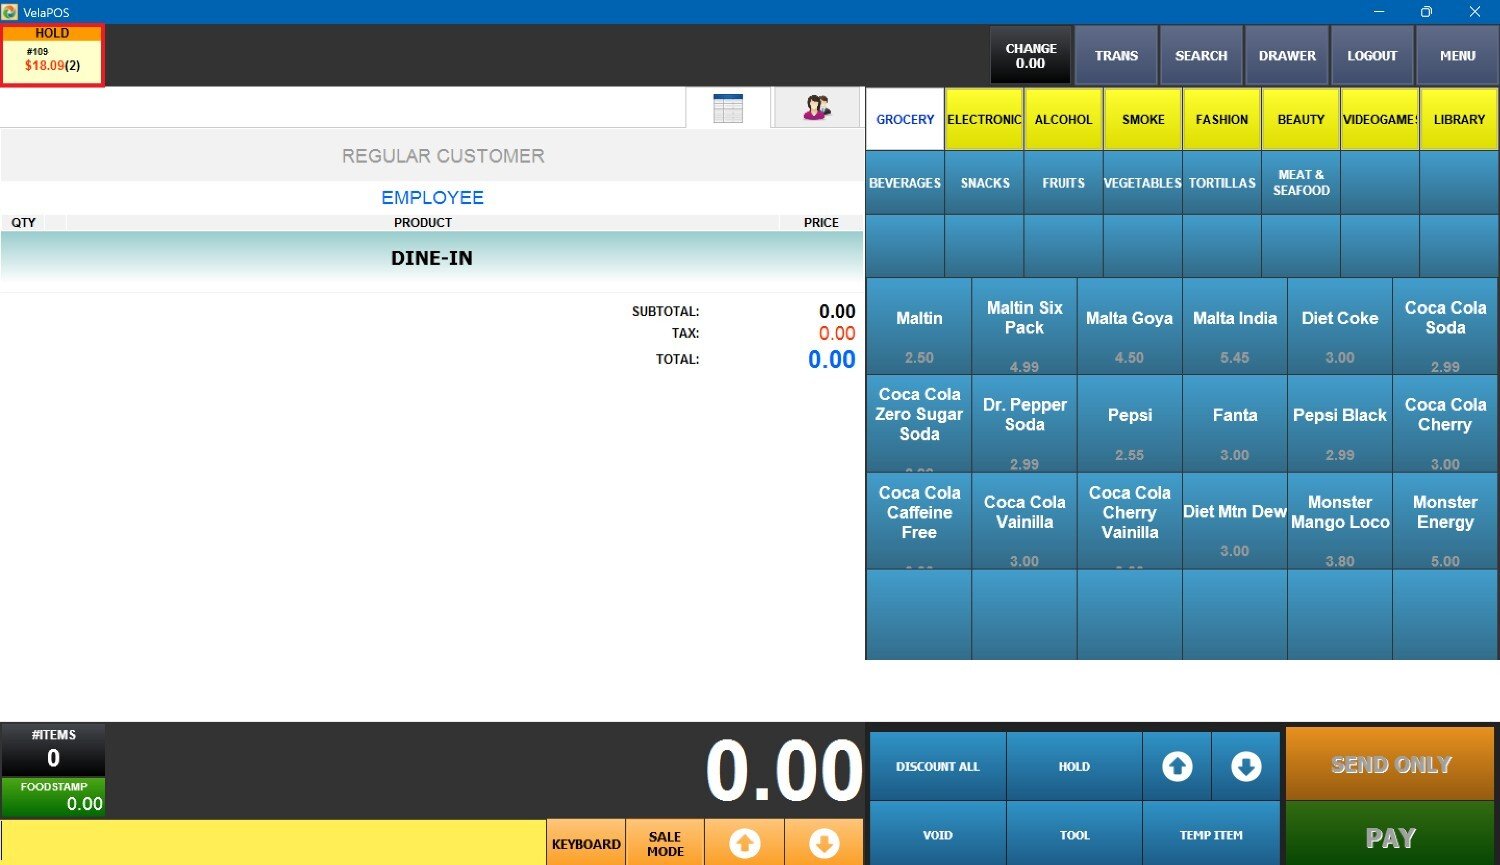
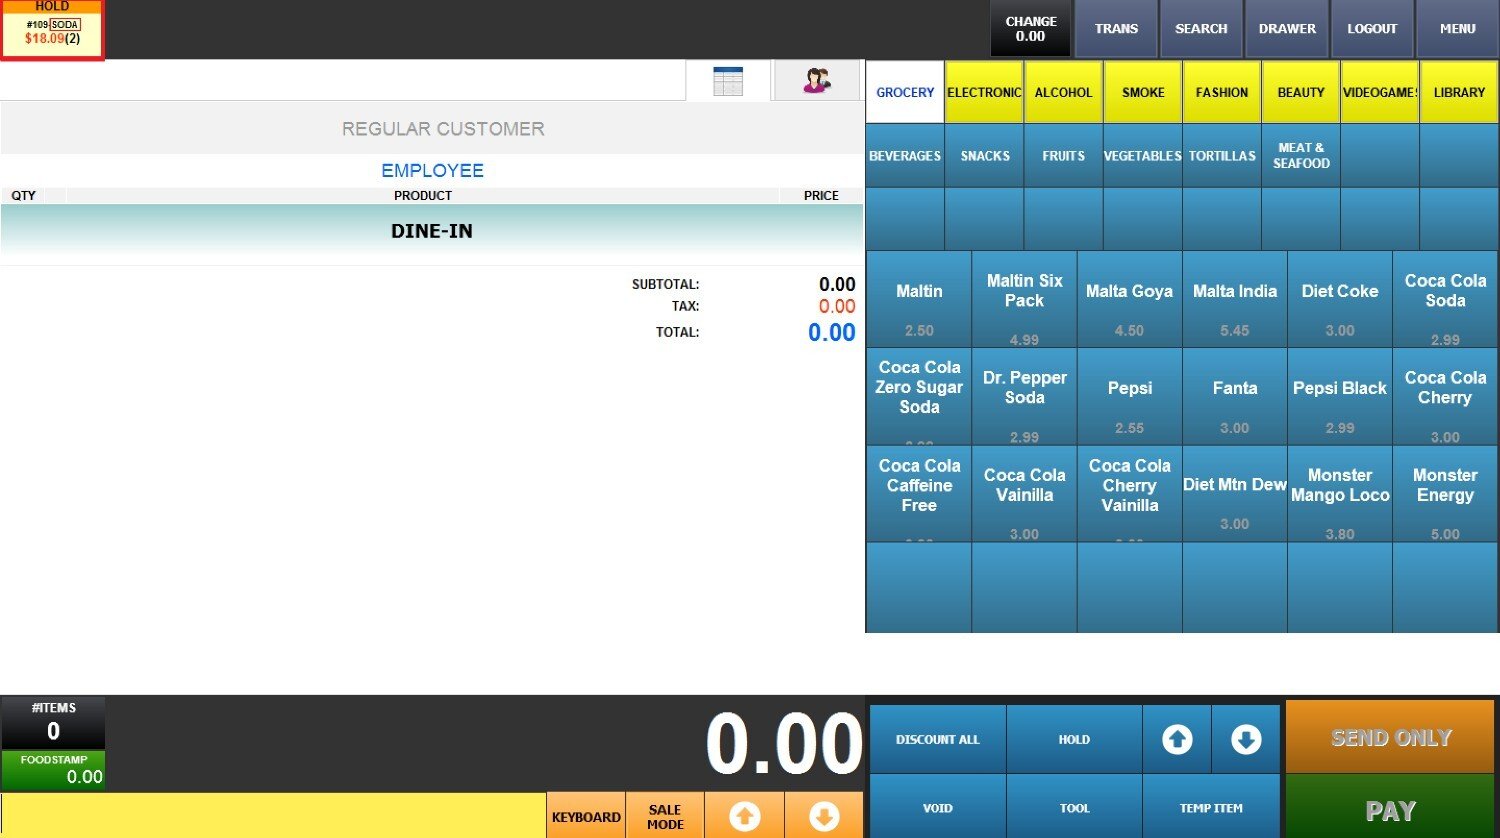
SHOW SEND ORDER ONLY BUTTON
Adds a button that allows you to hold an order and send it to the kitchen without completing payment.
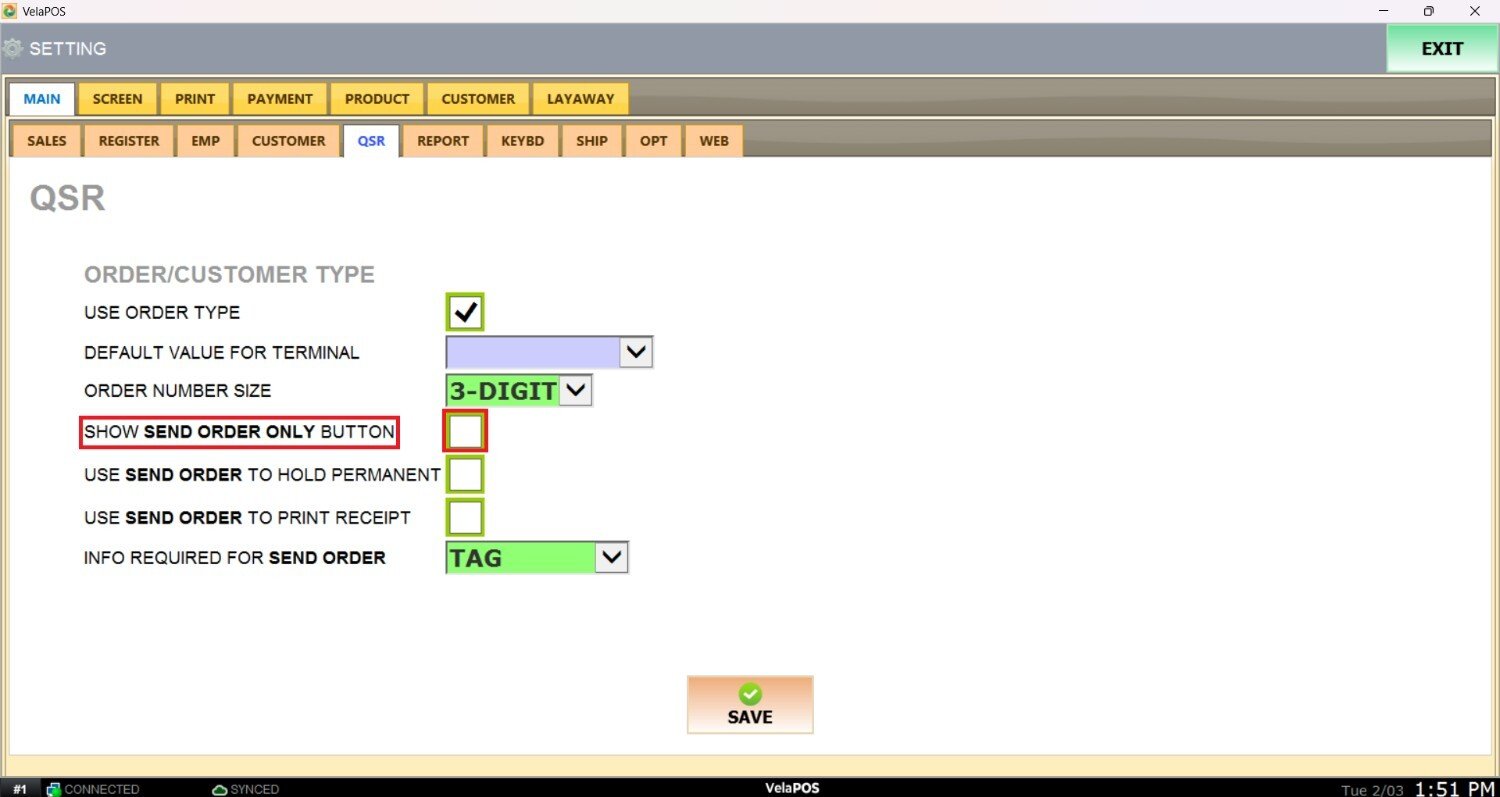
Check the box to enable this option.
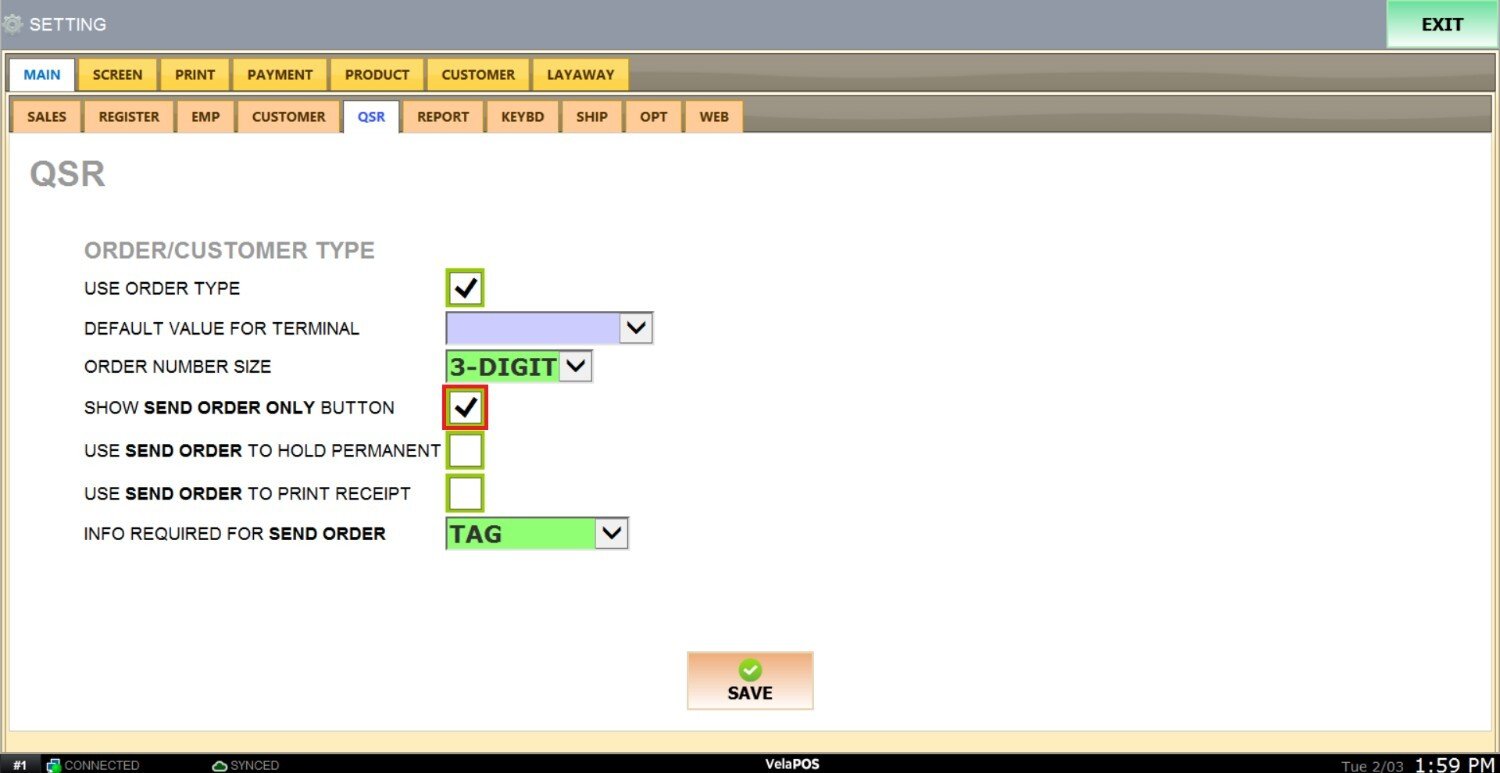
Result:
This is how the button looks on the screen.
This is how the hold order will look on the sales screen.
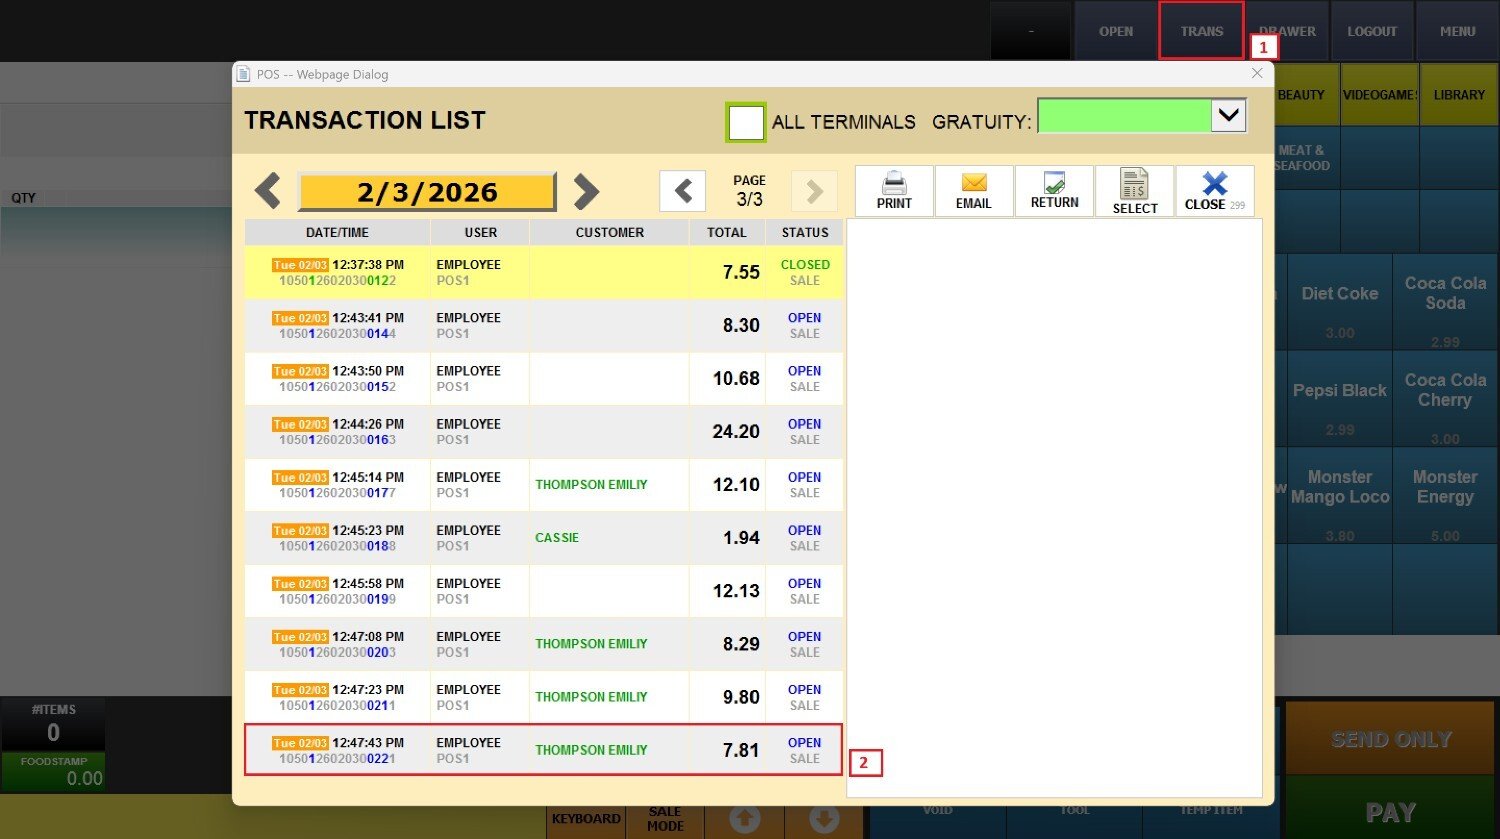
USE SEND ORDER TO HOLD PERMANENT
Keeps the order saved as an open ticket in the transaction list when using the Send Only button.
Note: Requires SHOW SEND ORDER ONLY Button to be enabled.

Check the box to enable this setting.

Result:
This is how the hold order will look on the transaction list.
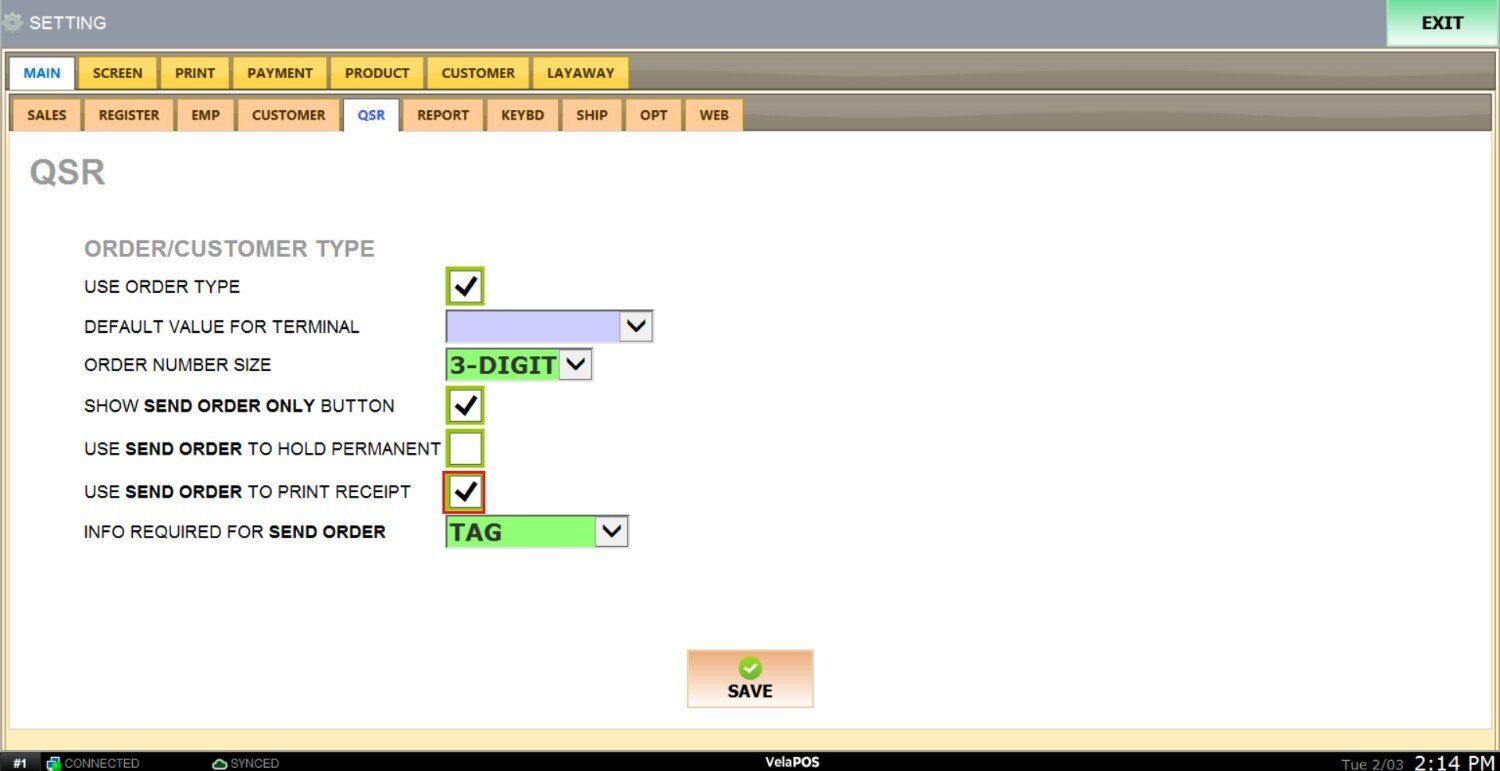
USE SEND ORDER TO PRINT RECEIPT
Automatically prints a receipt when the SEND ONLY button is used.
Note: Requires SHOW SEND ORDER ONLY Button to be enabled.

Check the box to enable this setting.
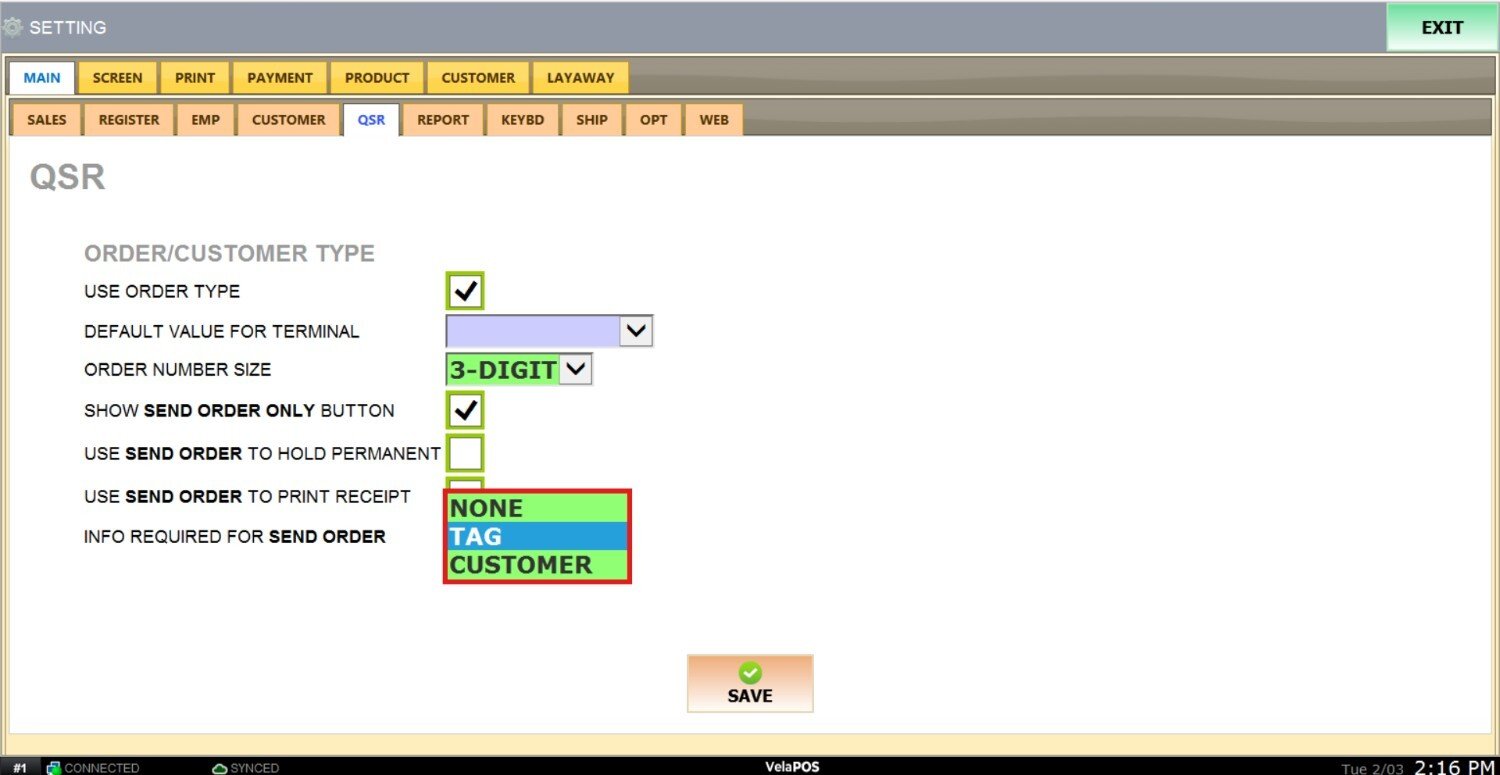
INFO REQUIRED FOR SEND ORDER
Defines whether additional information is required before sending an order to hold.
Note: Requires SHOW SEND ORDER ONLY Button .
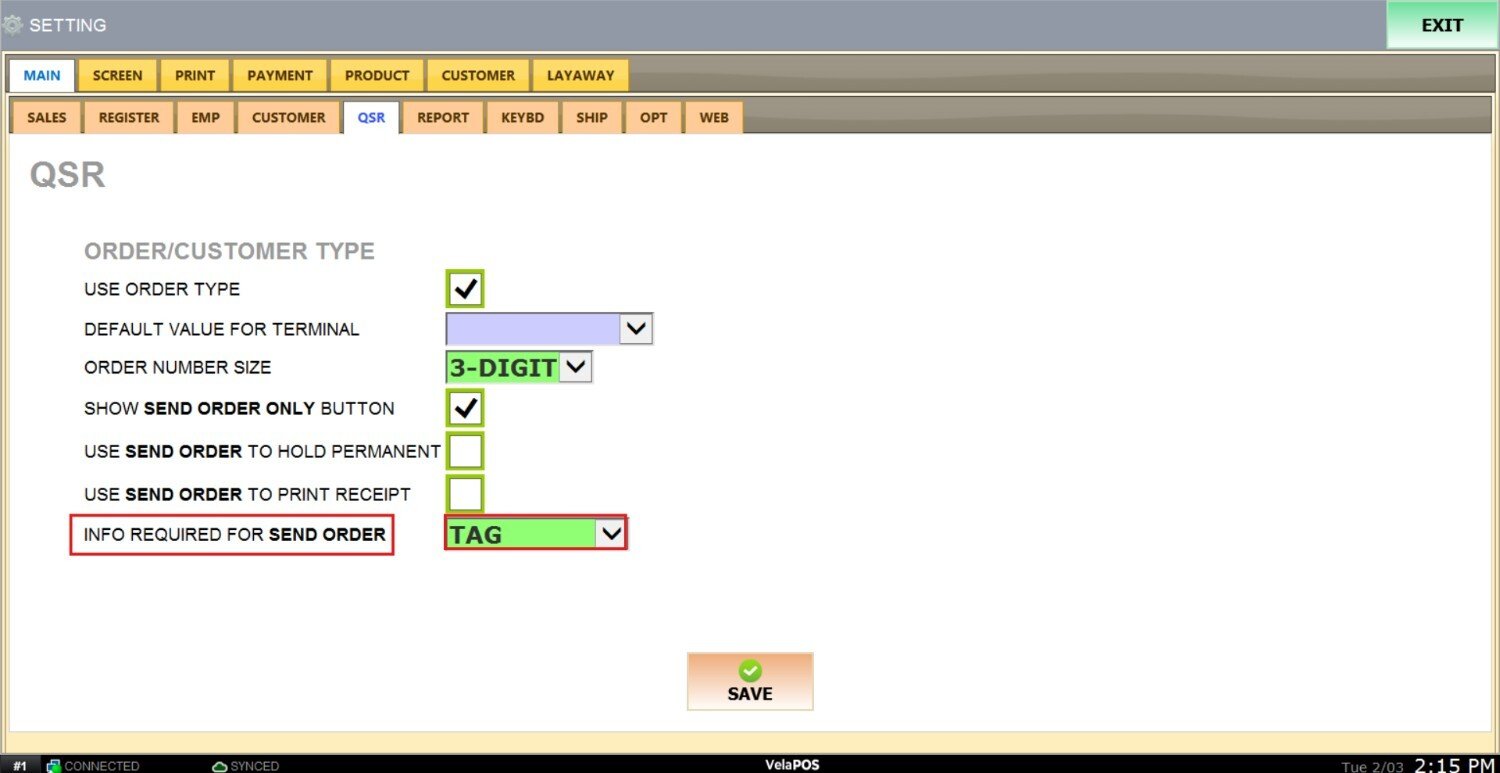
Select one of the following options:
1. TAG: Adds a custom label to identify the order.
2. CUSTOMER: Associates the order with customer details.
3. NONE: No additional information required.
Result:
This is the prompt displayed by the system when the TAG option is selected.

This is how the held order is displayed when a tag is added.
This is the prompt displayed by the system when the CUSTOMER option is selected.
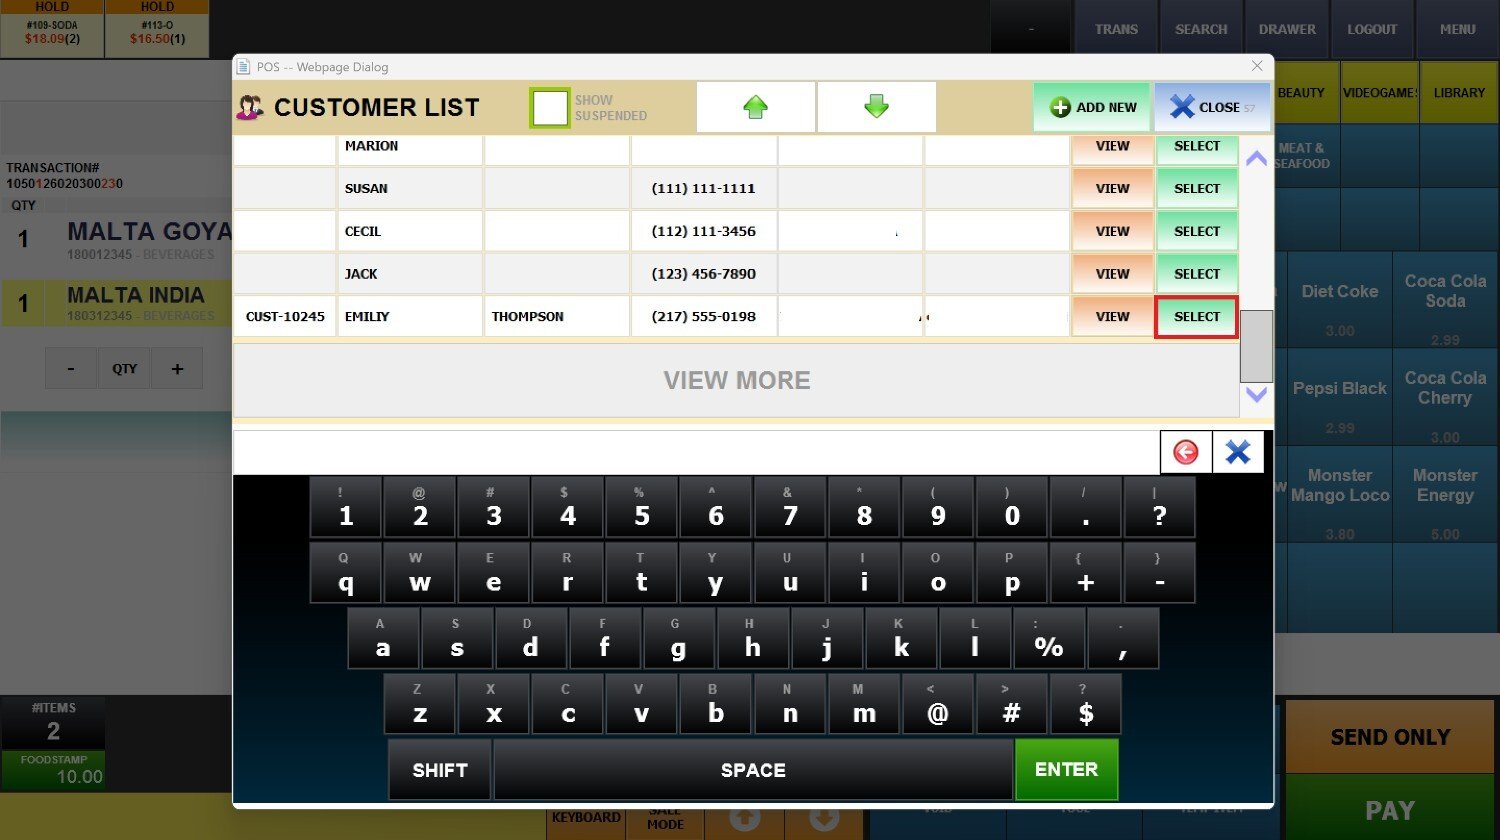
This is how the held order is displayed whenthe customer information is added.

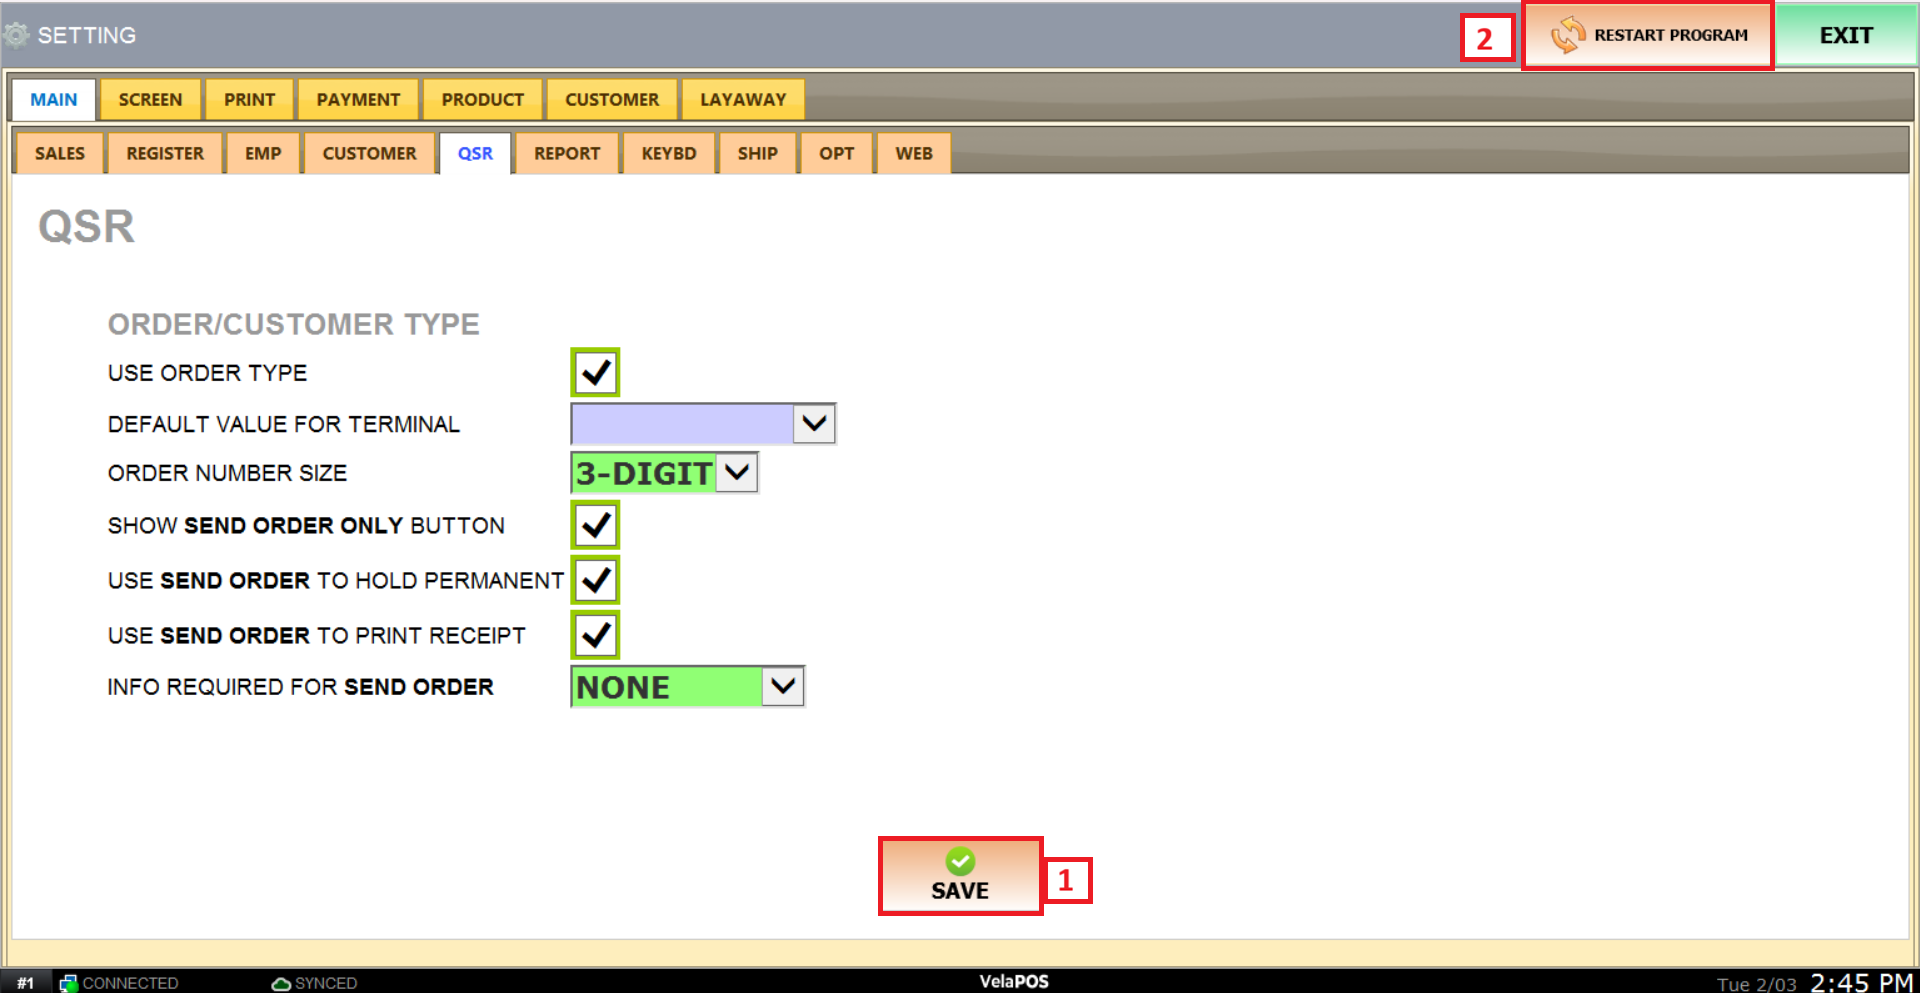
After making any modifications, press SAVE to store them, and RESTART THE PROGRAM to ensure the updates are applied correctly.